
Connect a Stripe account so customers can pay their invoices online by card, Apple Pay or Google Pay, and by bank transfer if you turn that on. The money goes straight from Stripe to your bank. Run a Call doesn't hold your funds and doesn't take a cut.
Before you start
- Only the account owner can connect, manage or disconnect Stripe. Settings → Integrations is owner-only.
- You can use a Stripe account you already have or create a new one during setup.
- Stripe will ask for your business details, so have these ready:
- your EIN (or SSN if you're a sole proprietor)
- your business address
- the bank account you want payouts sent to
- details for the business owner
Click Connect Stripe
Go to Settings → Integrations. On the Stripe card, click Connect Stripe.
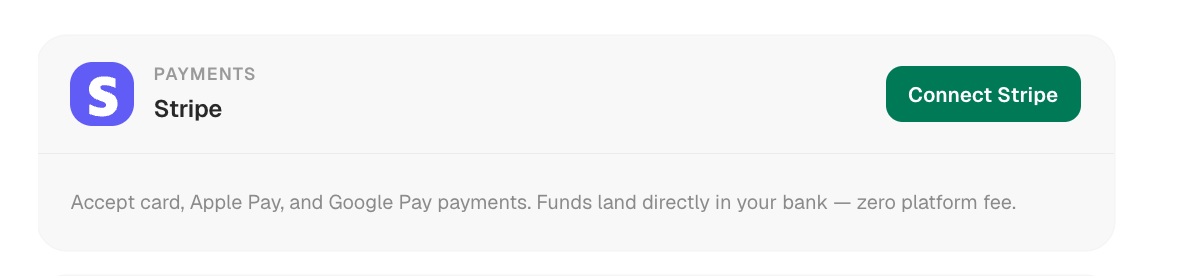
Run a Call sends you to Stripe. There you sign in to your existing Stripe account, or create a new one, and allow Run a Call to take payments on it.
Finish Stripe's verification
Stripe collects your business, ownership and bank details. That information stays with Stripe; Run a Call doesn't store it.
When Stripe is done, it sends you back to Settings → Integrations. The badge on the Stripe card shows where you are:
| Badge | What it means | What to do |
|---|---|---|
| Setup incomplete | The account is linked but Stripe still needs details. | Click Complete setup to continue where you left off. |
| Pending review | You've submitted everything and Stripe is reviewing it. The card says "Stripe is reviewing your account." | Wait. Most reviews are quick, and some take a day or two. |
| Connected | Stripe approved the account. | You're ready to take payments. |
Confirm you're ready
When everything is working, the Stripe card shows the Connected badge and the message "Connected and ready to collect payments."
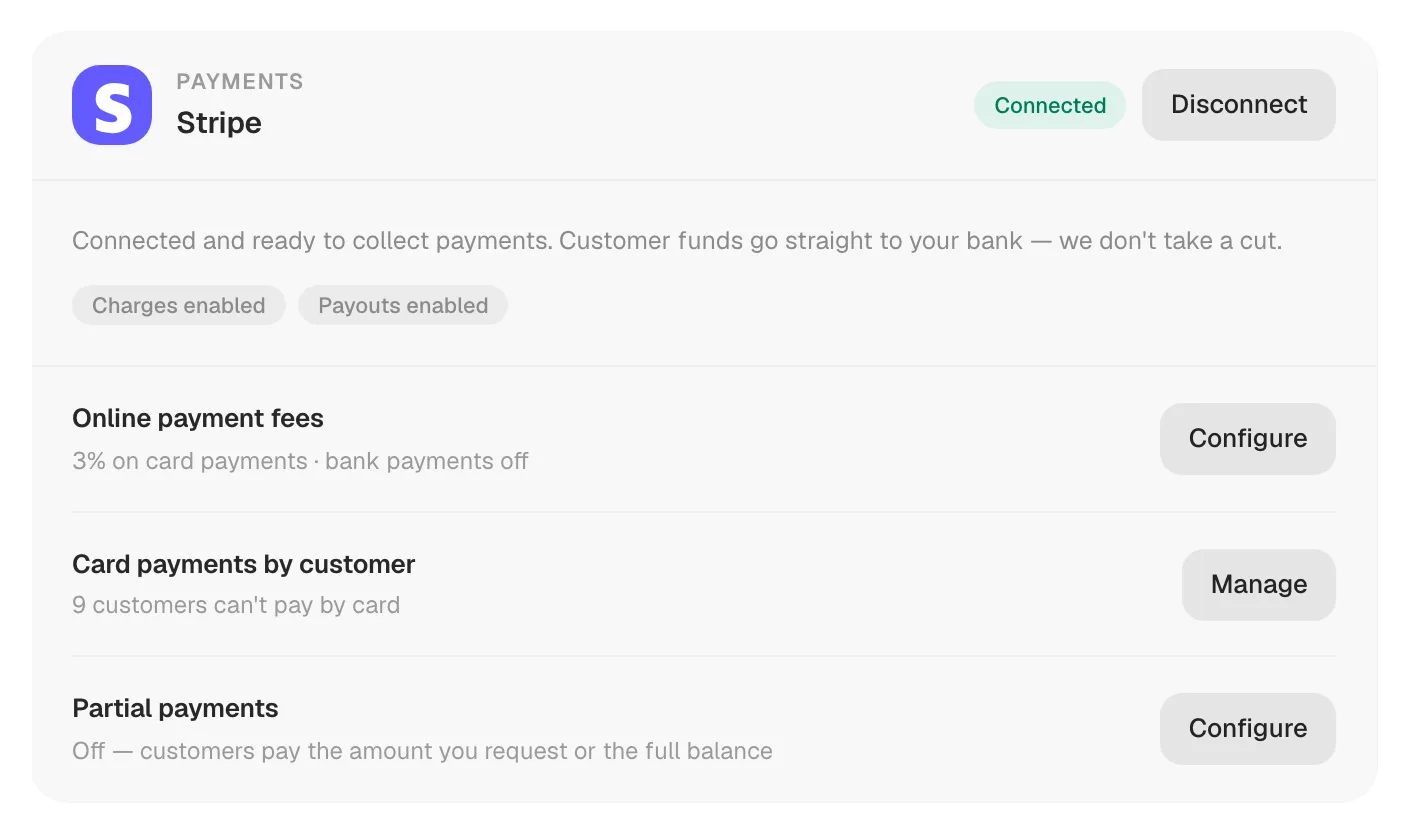
Check these three things:
- Charges enabled — customers can pay you.
- Payouts enabled — Stripe can send the money to your bank. If this badge is missing, sign in to your Stripe Dashboard and finish your bank details there.
- Online payment fees, Card payments by customer and Partial payments rows show under the card. They only appear once you can take charges.
To see the customer's side, open any invoice you've already sent and click Take payment online. This opens the same pay page your customer gets, which is handy for taking a card over the phone. A Pay button there means online payments are live.
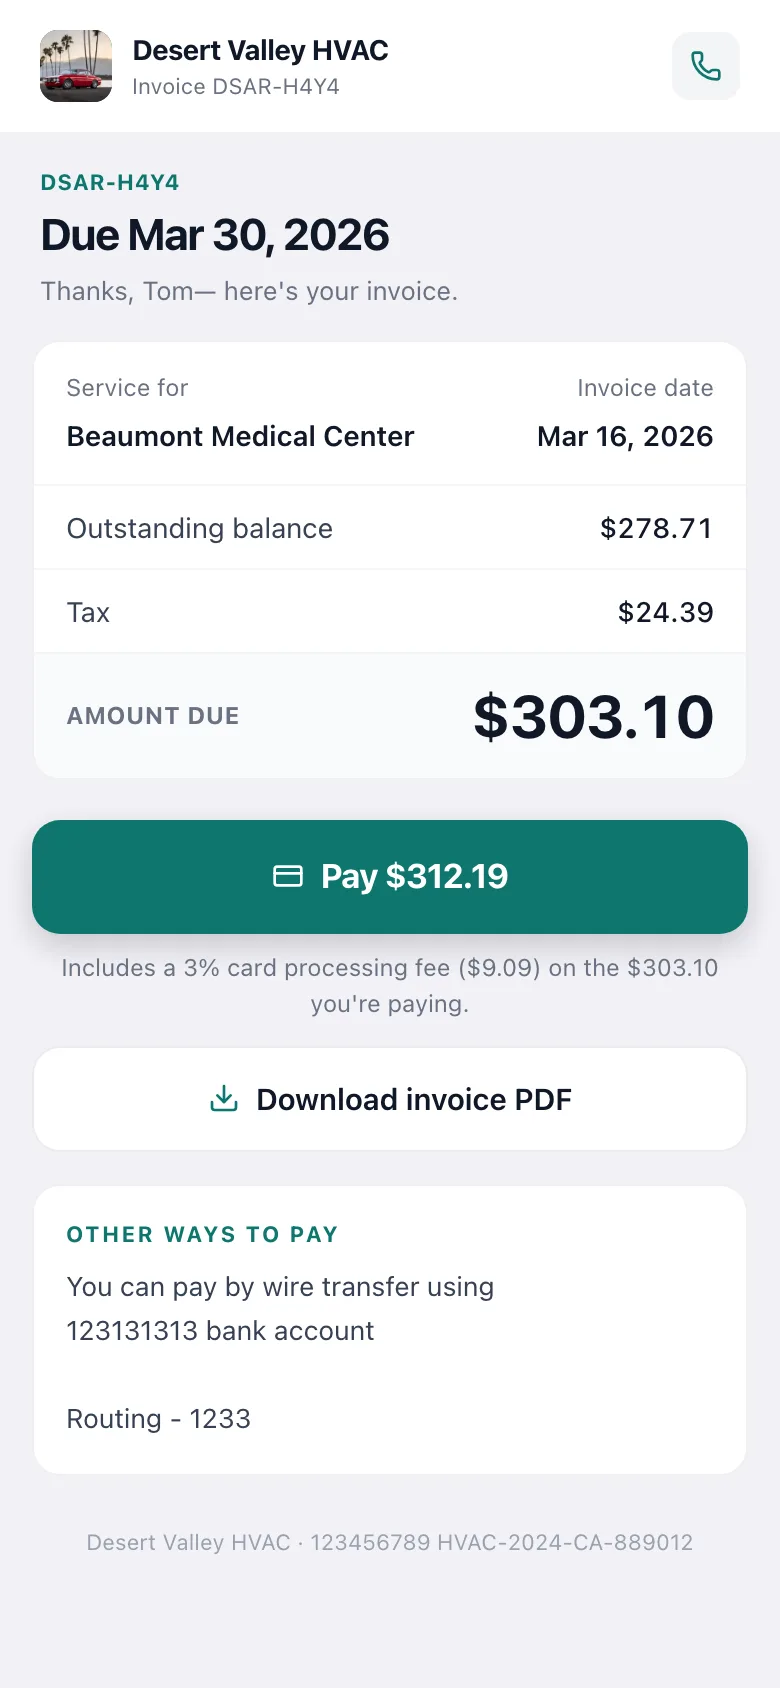
Opening the pay link yourself counts as a view: a Sent invoice changes to Viewed.
Choose your payment settings
These settings live under the Stripe card in Settings → Integrations. Each row has a Configure or Manage button.
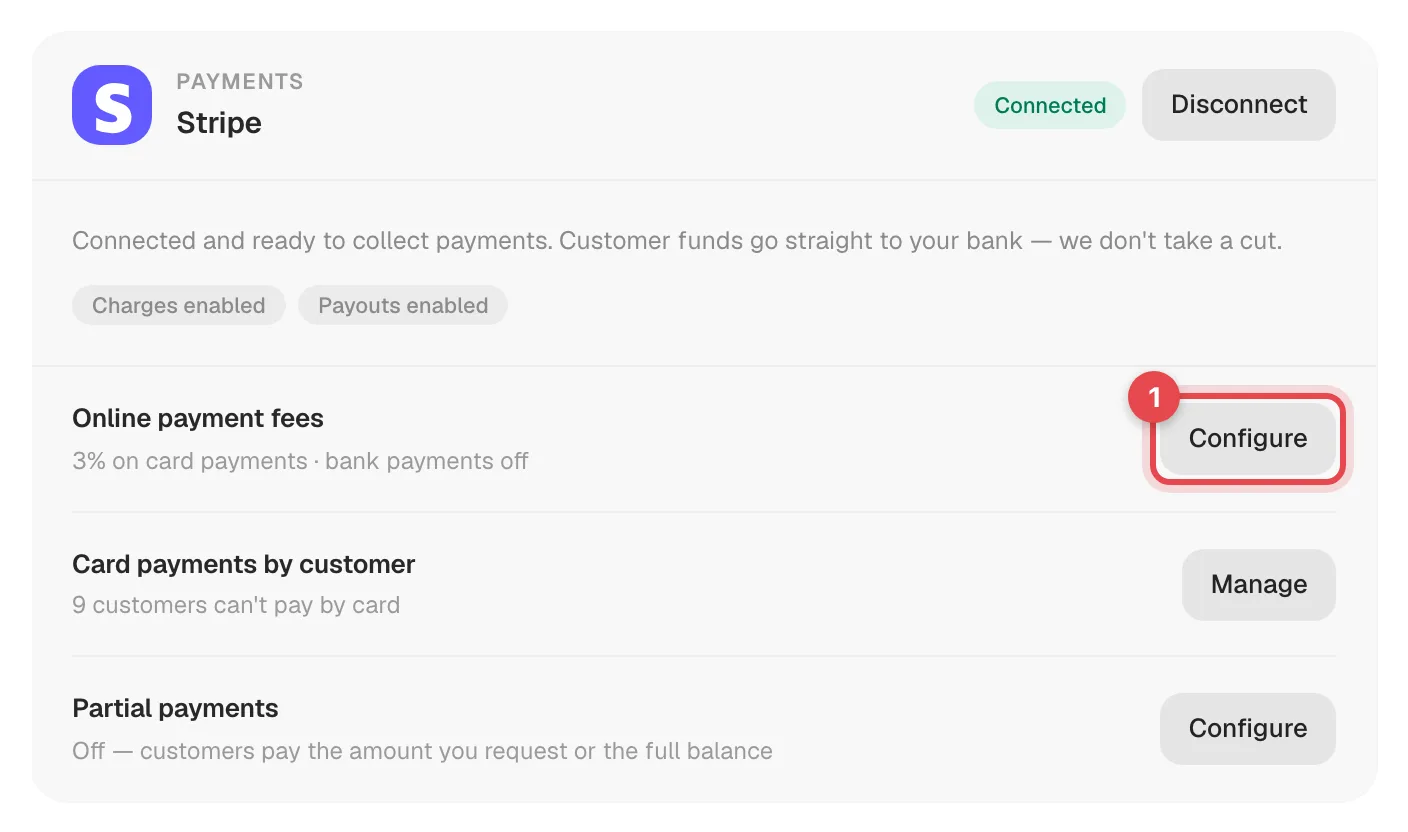
Online payment fees
| Setting | What it does |
|---|---|
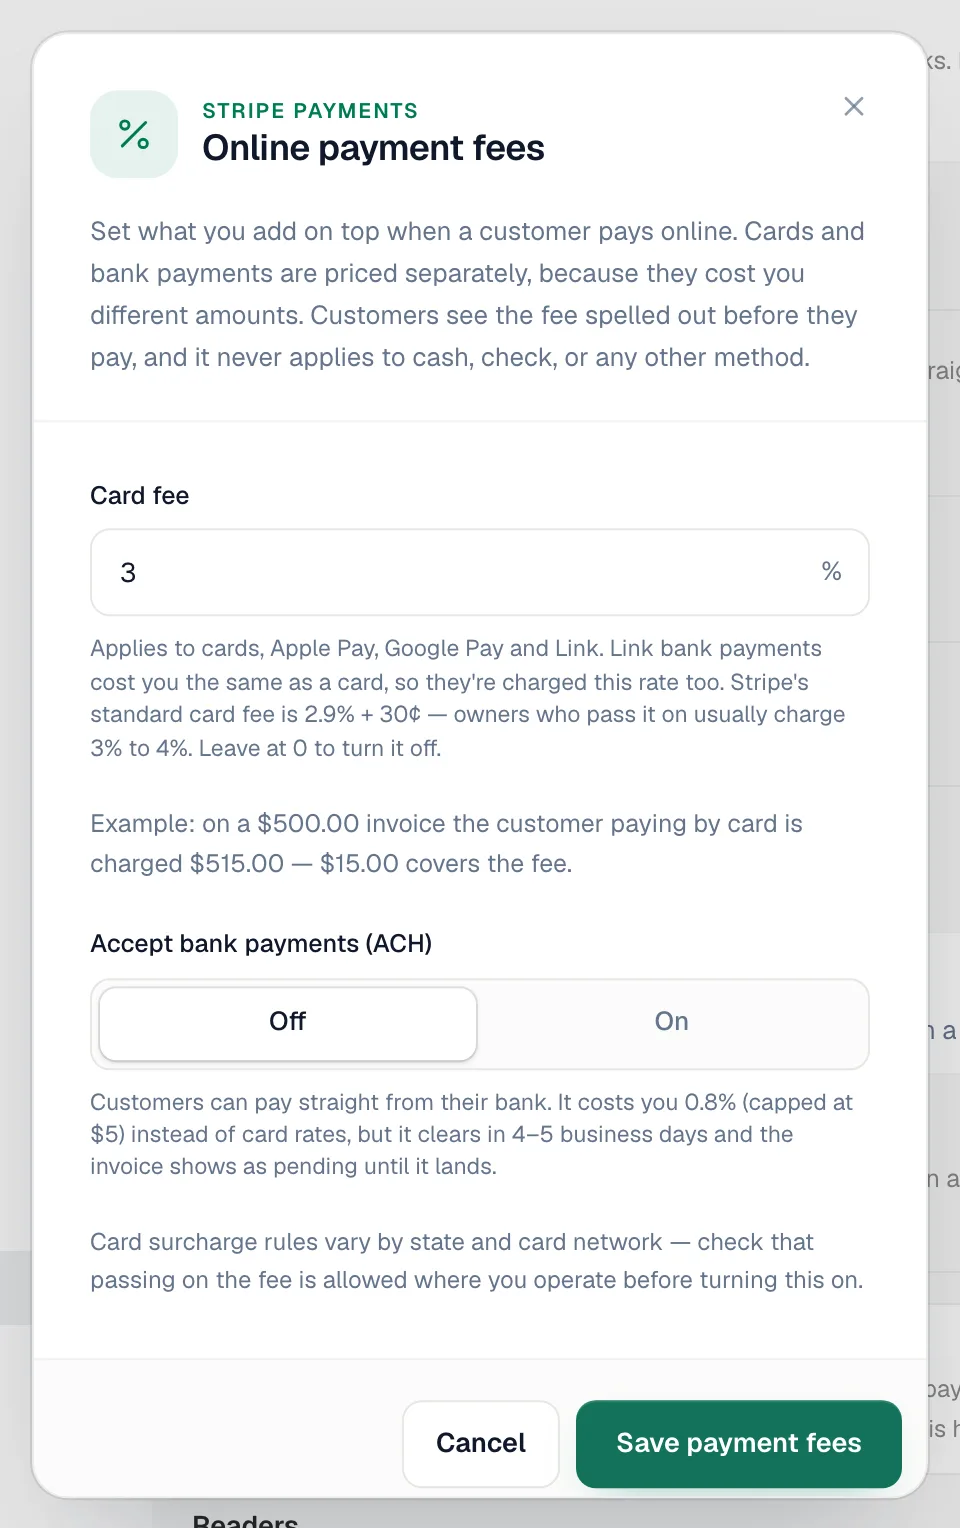
| Card fee | A percentage added on top when a customer pays by card, Apple Pay, Google Pay or Link. Leave it at 0 for no fee. You can set up to 10%. The window shows an example on a $500 invoice. Check that surcharging is allowed in your state before you turn it on. |
| Accept bank payments (ACH) | Lets customers pay straight from their bank account. It's off by default. If Stripe hasn't enabled bank payments on your account yet, the window says so. Stripe usually approves them within a day of finishing setup. |
| Bank fee | A separate, optional percentage for bank payments. Leave it empty so bank payments are free, which makes them the cheaper choice for large invoices. |
Customers always see the fee spelled out before they pay, and the total updates when they switch between card and bank. Fees never apply to cash, checks or other payments you record by hand. When you set a card fee, it also applies when you charge a card on file or take a card on a Tap to Pay reader.
Card payments by customer
Click Manage to pick customers who shouldn't be offered online card payment. Their invoices and pay links still work, but the pay page shows your other payment instructions instead of a Pay button. Remove a customer from the list to turn card payments back on for them.
Partial payments
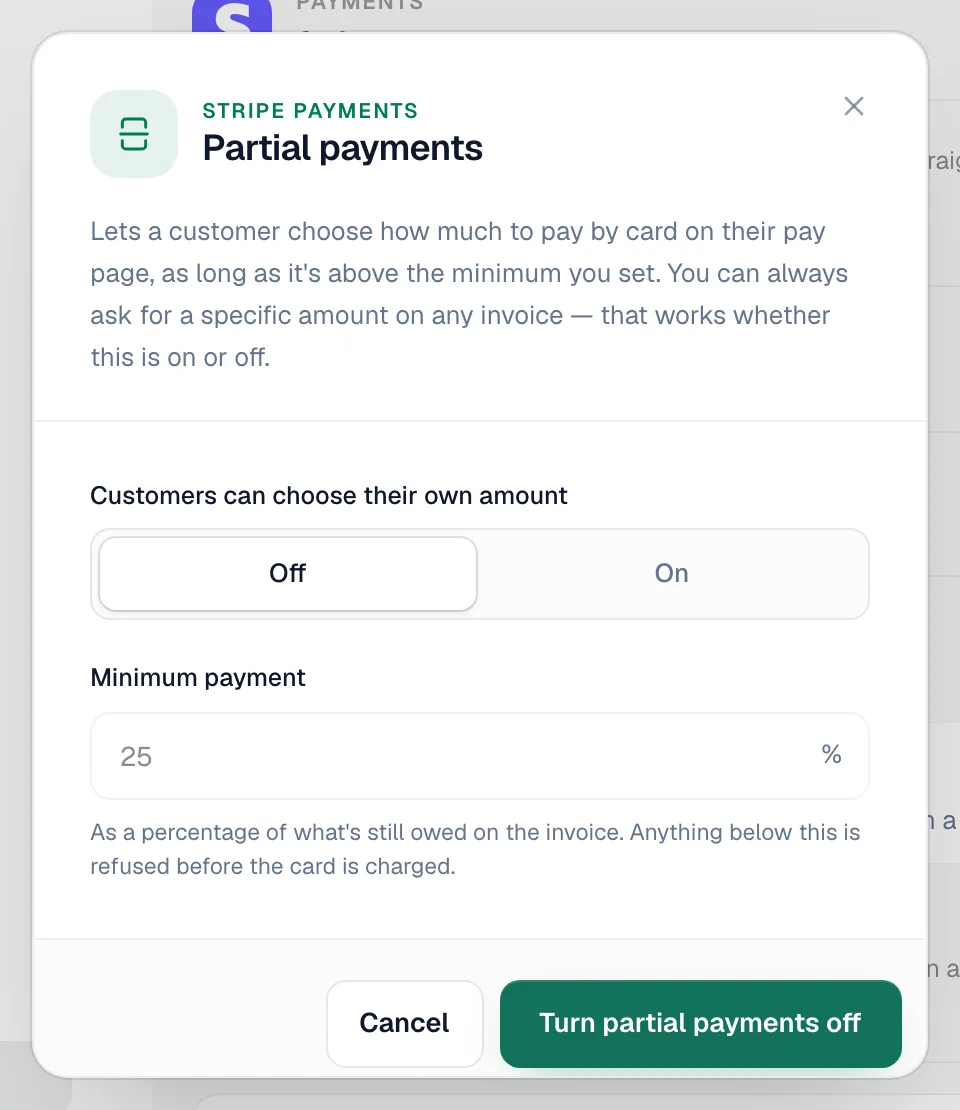
Turn on Customers can choose their own amount to let customers pay part of an invoice online, down to the Minimum payment you set (a percentage of what's still owed). With it off, customers pay the full balance, or the amount you ask for on that invoice. See Sending payment links.
What a bank payment looks like
Bank transfers take 4–5 business days to clear. When a customer pays by bank:
- The transfer starts. The invoice stays unpaid, and the payment shows as Pending — bank transfer, clears in 4–5 business days. You get a Bank payment of $X started notification.
- The customer is blocked from paying twice. Their pay page says Bank payment on its way, so they can't pay the same invoice again while the transfer is pending.
- The money lands. The payment changes to Succeeded, the invoice is marked paid, and the customer gets their receipt.
- If the bank returns the transfer, the payment shows as Failed and you get a Bank payment of $X failed notification with the reason. The customer is emailed their pay link again.
A pending bank payment doesn't count toward the balance, in Run a Call or in QuickBooks, until it clears. You can't remove a pending bank payment. It updates on its own.
Payouts
Stripe sends your money to your bank account on your Stripe payout schedule. To see or change the schedule, sign in to your Stripe Dashboard and open its payout settings. Card payments usually arrive sooner than bank transfers, which only pay out once they clear.
Refunds and disputes
Refunds aren't issued from Run a Call. Refund the payment in your Stripe Dashboard, then add a note on the customer's Notes tab so your team knows what happened. Disputes (chargebacks) are also handled in Stripe, so respond before Stripe's deadline.
Disconnecting Stripe
Click Disconnect on the Stripe card and confirm. Pay links keep loading, but customers can't pay online until you reconnect, so you'll need to collect by cash or check in the meantime. Your Stripe account and its payment history aren't affected.