Inviting a team member takes about 30 seconds. They get an email, set a password, and they're in.
Invite by email
- Settings → Team → + Invite.
- Enter their email and full name.
- Pick a role (see below).
- (Optional) Set default skills, service areas, default schedule.
- Click Send invite.
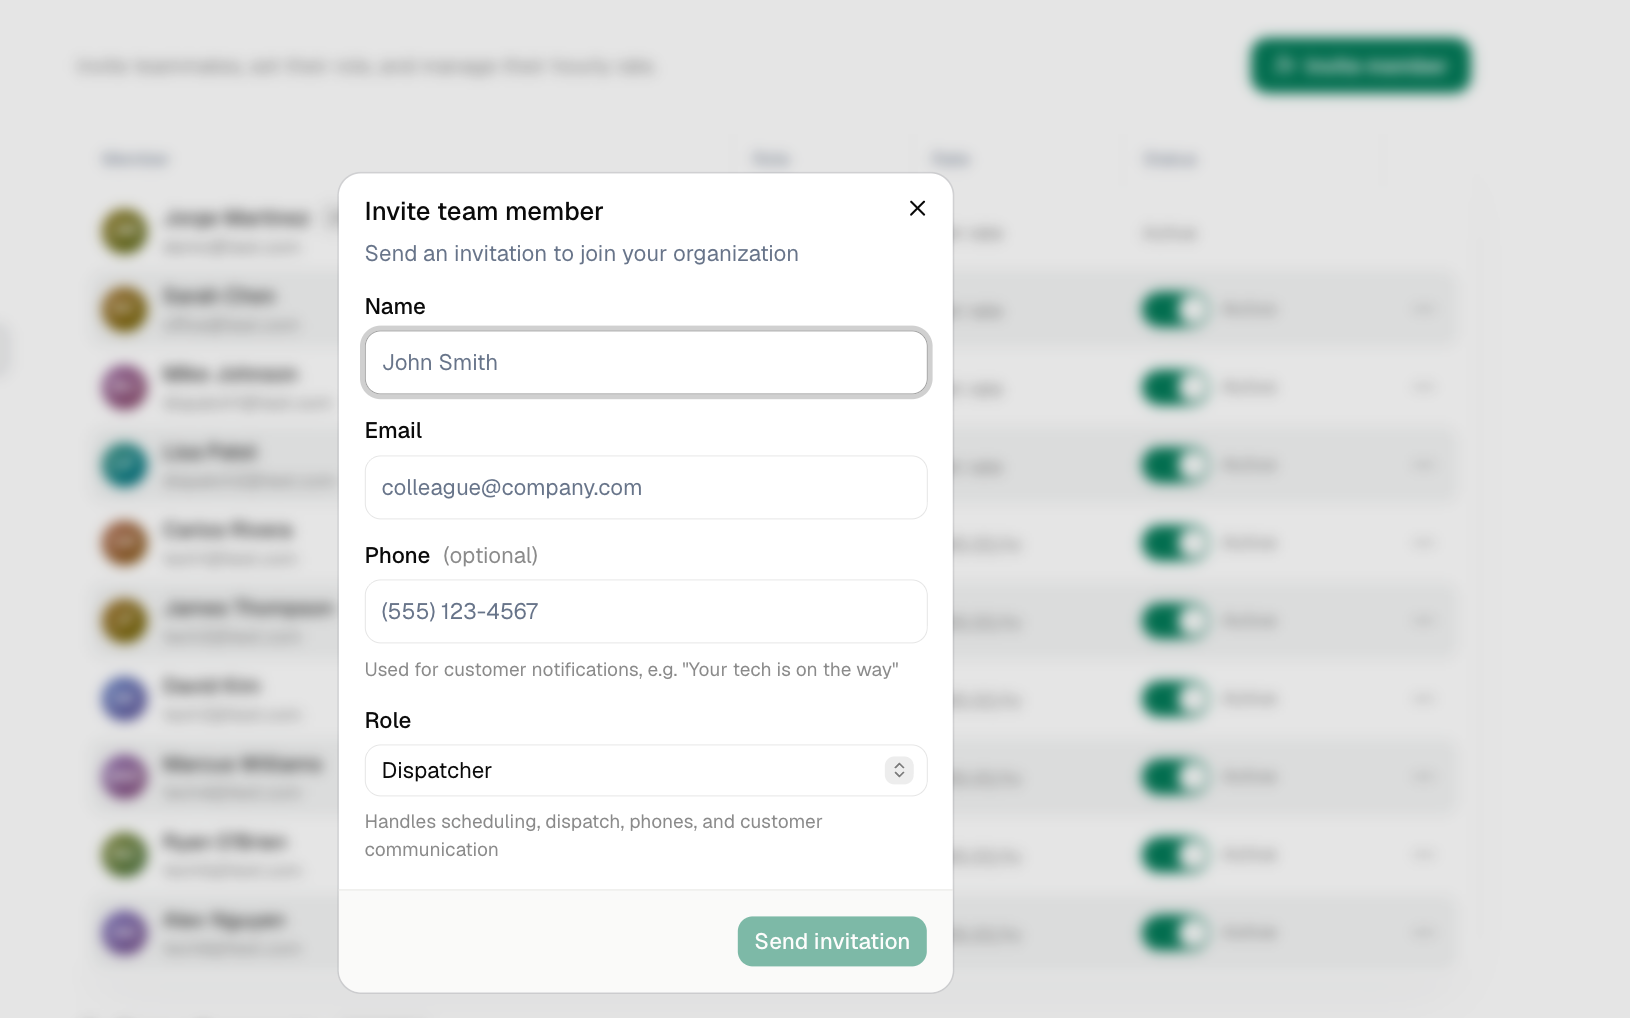
The new user gets an email with a 7-day invite link.
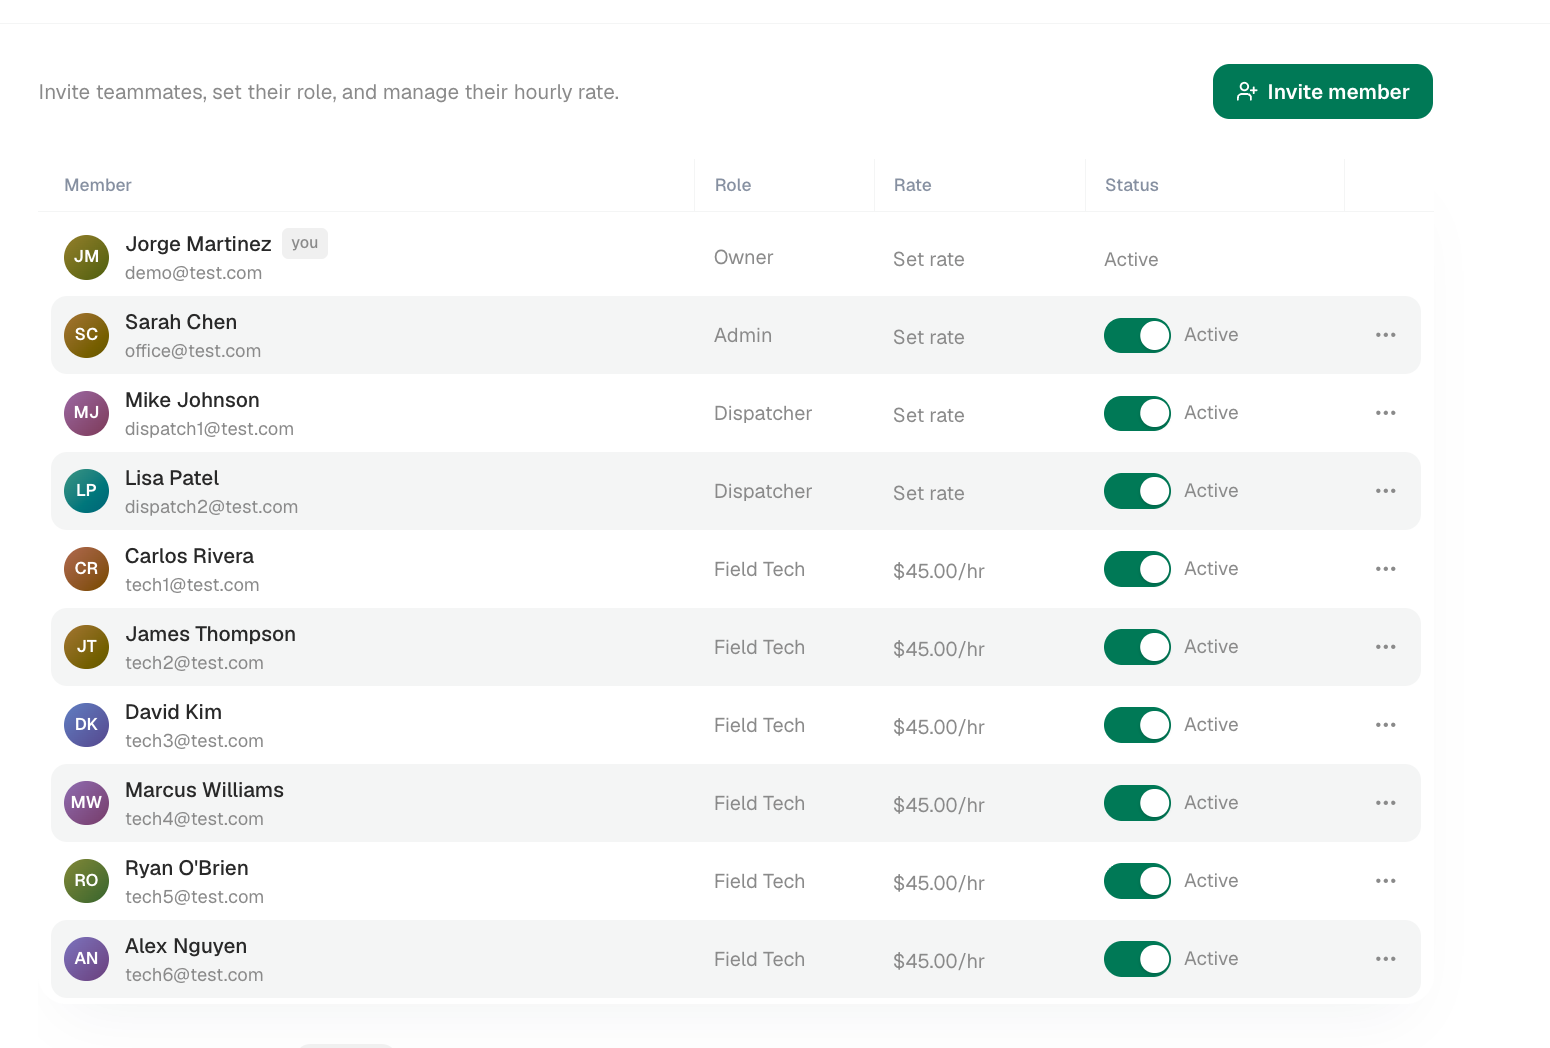
Roles
| Role | Access |
|---|---|
| Owner | Full access including billing. Usually one person. |
| Admin | Full access except billing. Common for ops managers. |
| Staff | Office/dispatch work. Can't change account settings. |
| Field tech | Only sees assigned jobs, the schedule, photos, signatures, payments. |
You can customize each role's permissions under Settings → Roles. See Customizing team roles and permissions.
Bulk invite
For onboarding a whole shop:
- Settings → Team → Bulk invite.
- Paste a CSV (email, name, role, skills).
- Send.
Each user gets their own invite email.
Resending an invite
If the user lost the email or the link expired:
- Settings → Team → find the pending invite.
- ⋯ → Resend.
Tracking active vs invited
The team page shows:
| Status | Meaning |
|---|---|
| Active | They signed in. |
| Invited | Invite sent, not signed in. |
| Disabled | Access revoked. |