
An estimate is where a sale starts. You build one or more priced options (Good, Better, Best), send a link, and the customer picks an option and signs on their phone. When they approve, Run a Call creates the job for you.
Who can do this
Owners, admins and dispatchers can create and send estimates in the office. Field techs can create and present estimates on their jobs from the mobile app (see Building and presenting estimates on mobile).
Start a new estimate
Go to Estimates and click New estimate.
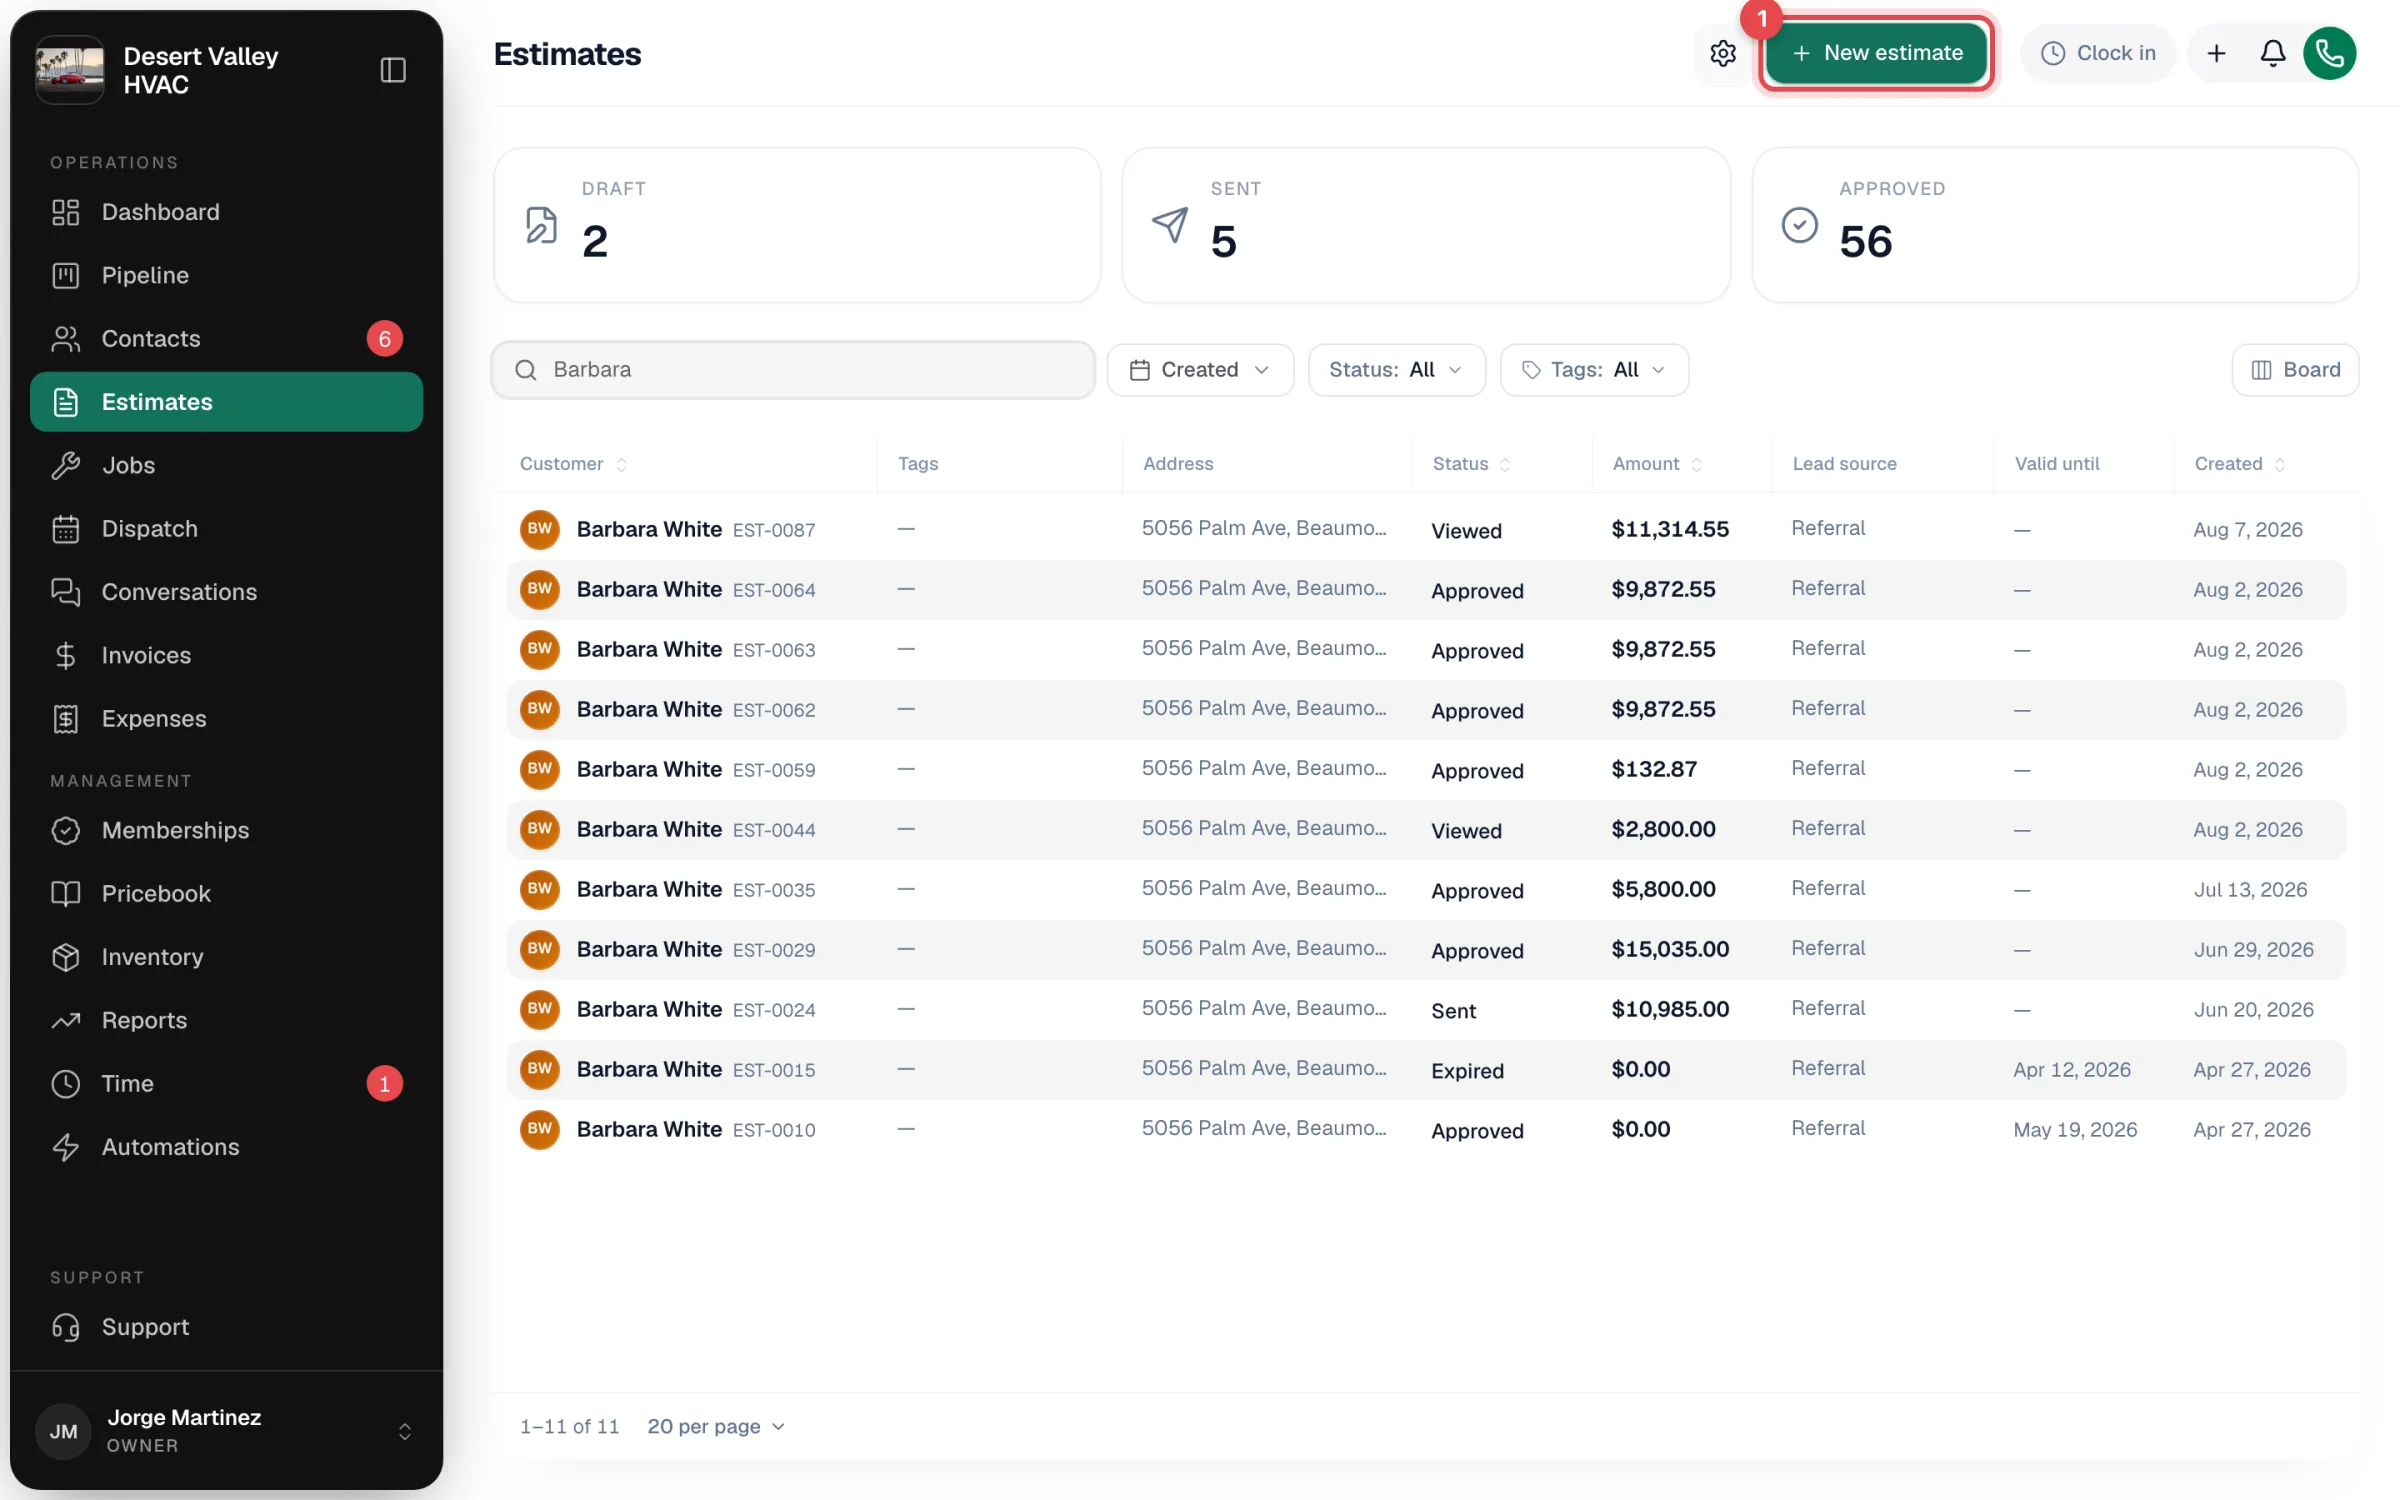
You can also start from a job, so the estimate is tied to that visit. See Creating estimates and invoices from jobs.
Pick the customer and name it
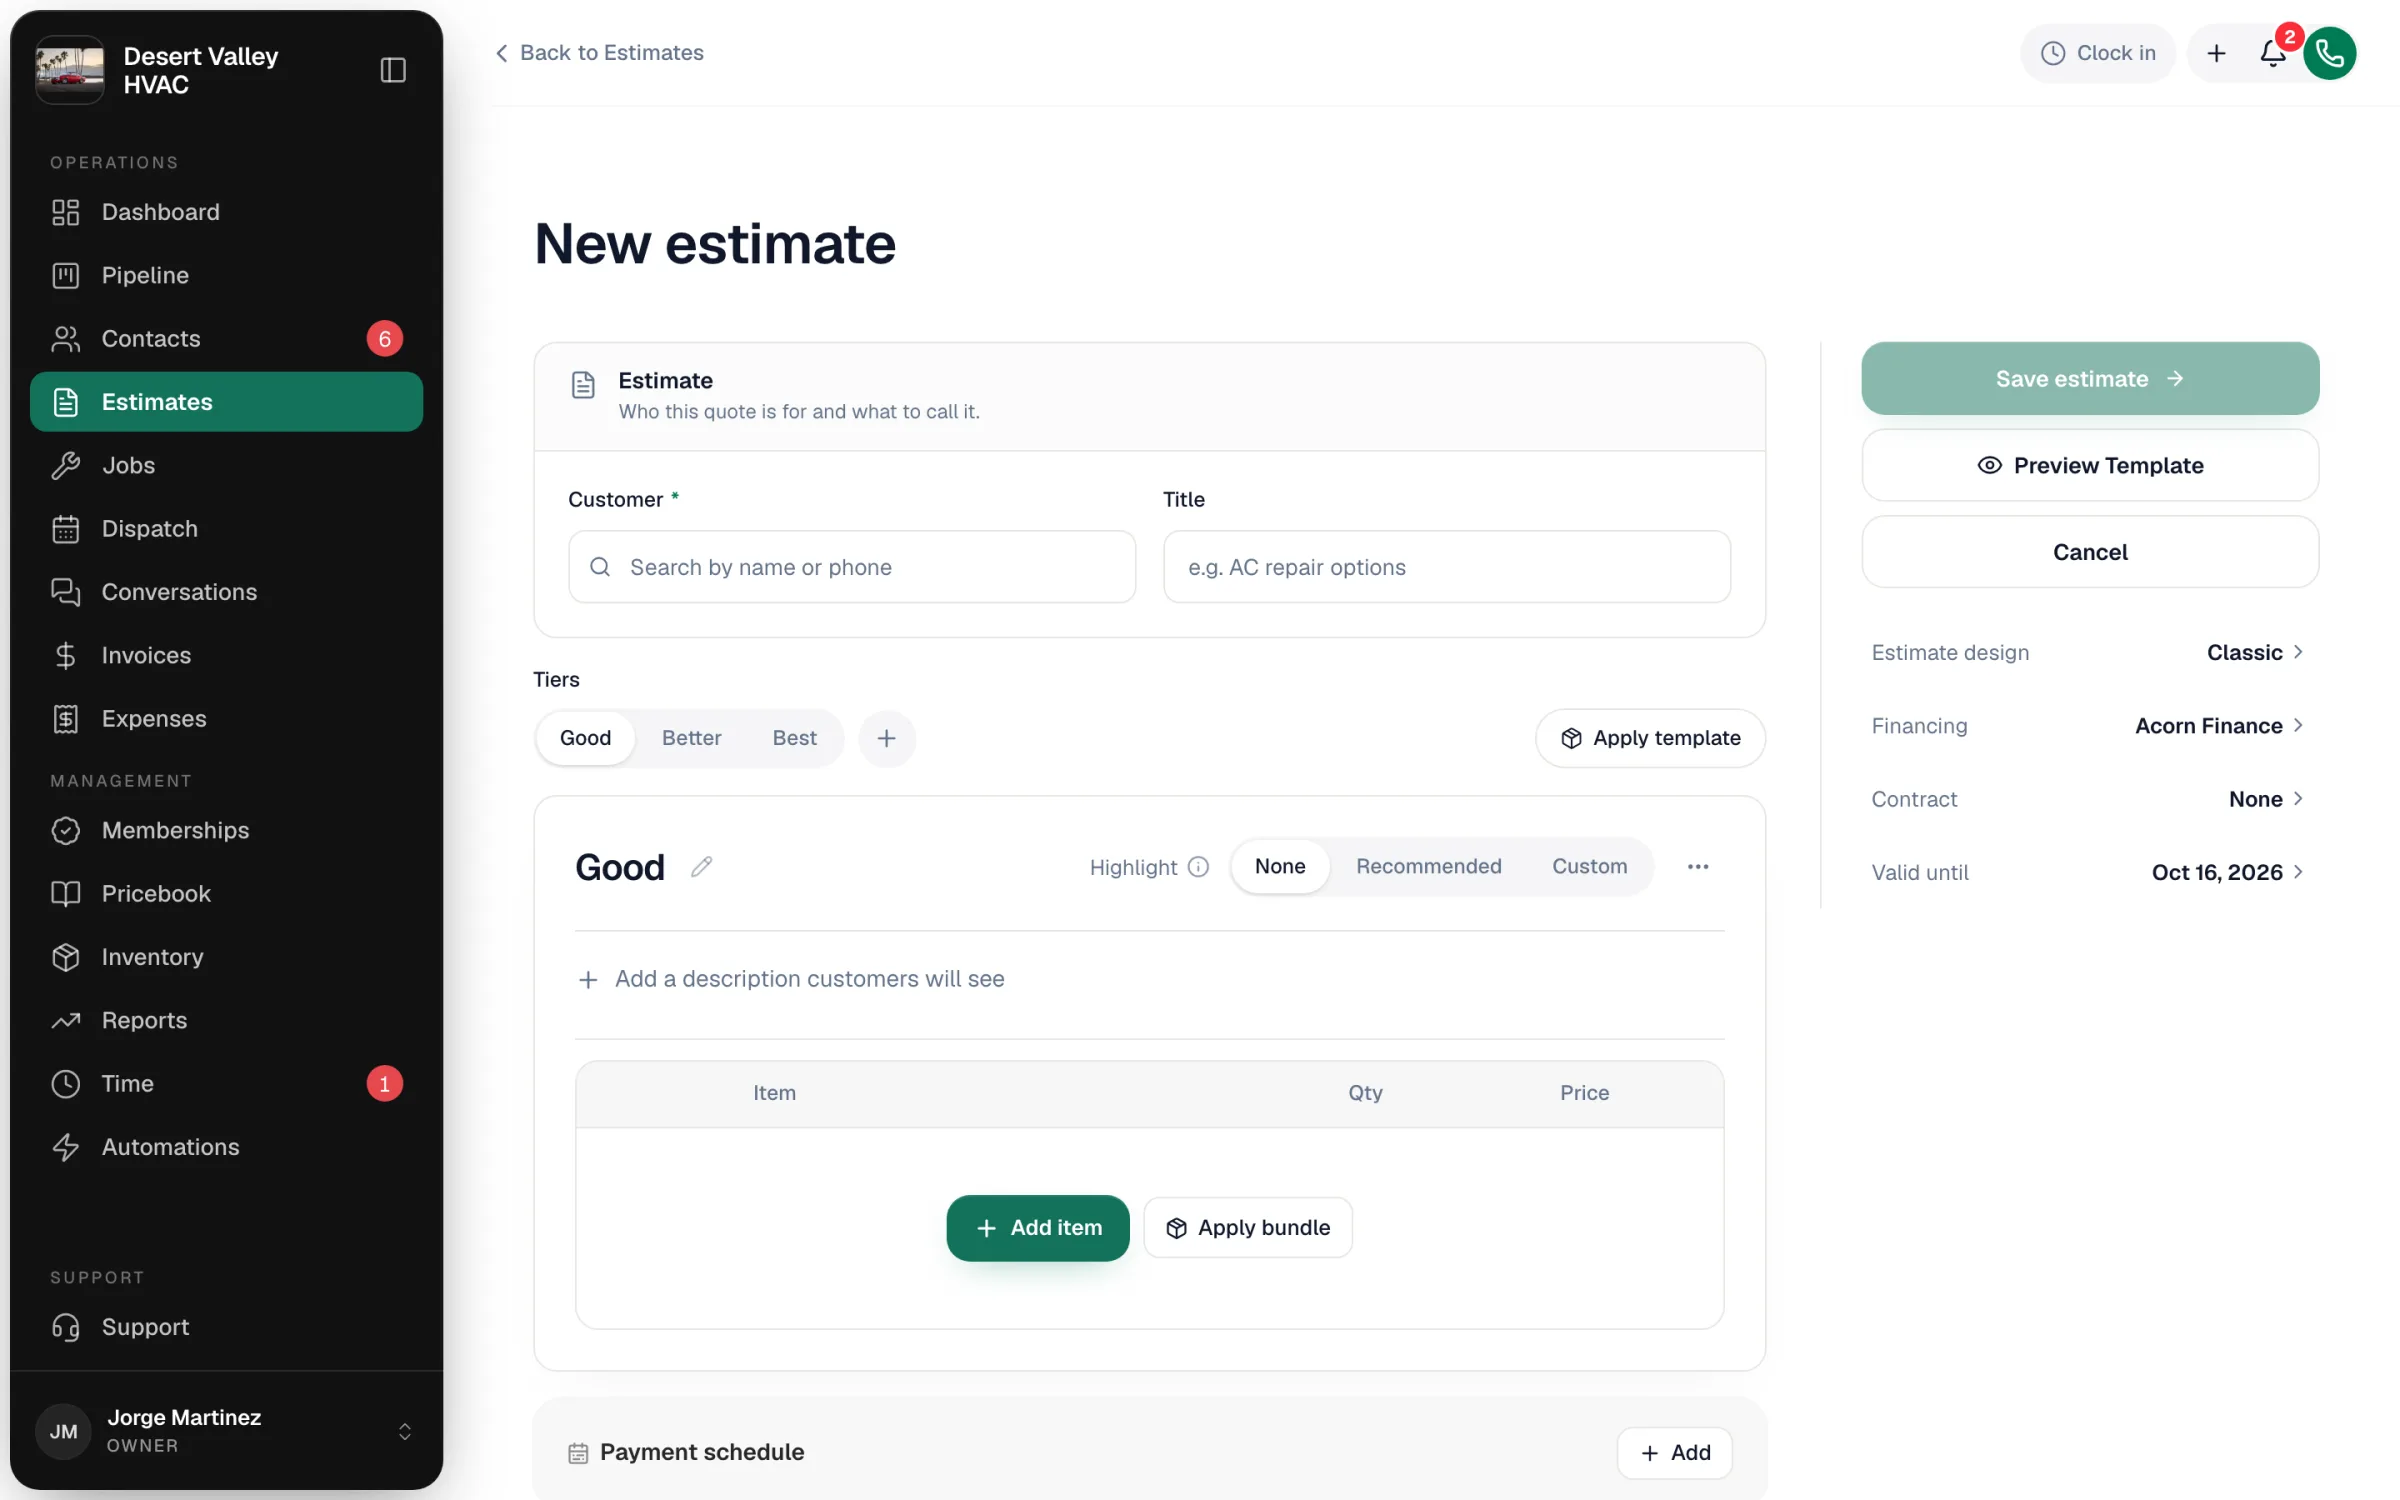
In the Estimate card, search for the Customer by name or phone. You can also add a new customer from here. If the customer has several properties, choose the Property. The Title is optional, for example AC repair options.
Build your options
Estimates start with three tiers: Good, Better and Best. Rename a tier with the pencil icon, add one with + (up to 6), or remove the ones you don't need. For each tier:
- Add item picks services, parts and equipment from your pricebook. Apply bundle adds a saved group of items in one click, and Apply template fills the tier from a saved template.
- Quantity and price can be changed on each line. Changing a price here doesn't change your pricebook.
- Add a description customers will see — for example what's included, the warranty, or why someone would pick this option.
- Highlight marks a tier as Recommended or with a Custom badge, so it stands out to the customer.
- Add-ons customers can tick on approval — optional extras, like a surge protector, that the customer can add when they sign.
Add the finishing touches
| Section | What it does |
|---|---|
| Payment schedule | Splits the price into a deposit and progress payments. See Adding a payment schedule to an estimate. |
| Note to customer | A short message at the top of the estimate. |
| Estimate design | The look of the approval page, PDF and emails. |
| Financing | Shows a monthly payment next to the price. See Offering financing on estimates. |
| Contract | Attaches your standard contract, which the customer must accept to approve. |
| Valid until | The expiry date. It defaults to your Expire after setting (30 days unless you change it). |
Click Preview Template to see exactly what the customer will see. When you're happy, click Save estimate. It's saved as a Draft.
Send it
On the estimate page, click Send estimate. The Email this estimate window opens.
- Check To. The customer's email is filled in, and you can add more addresses.
- Check Reply-to, which defaults to your company email.
- Edit the Subject and message if you like. The preview shows the email as the customer will see it.
- Tick Attach a PDF copy if they need a file to forward. They still approve with the link.
- Click Send estimate.
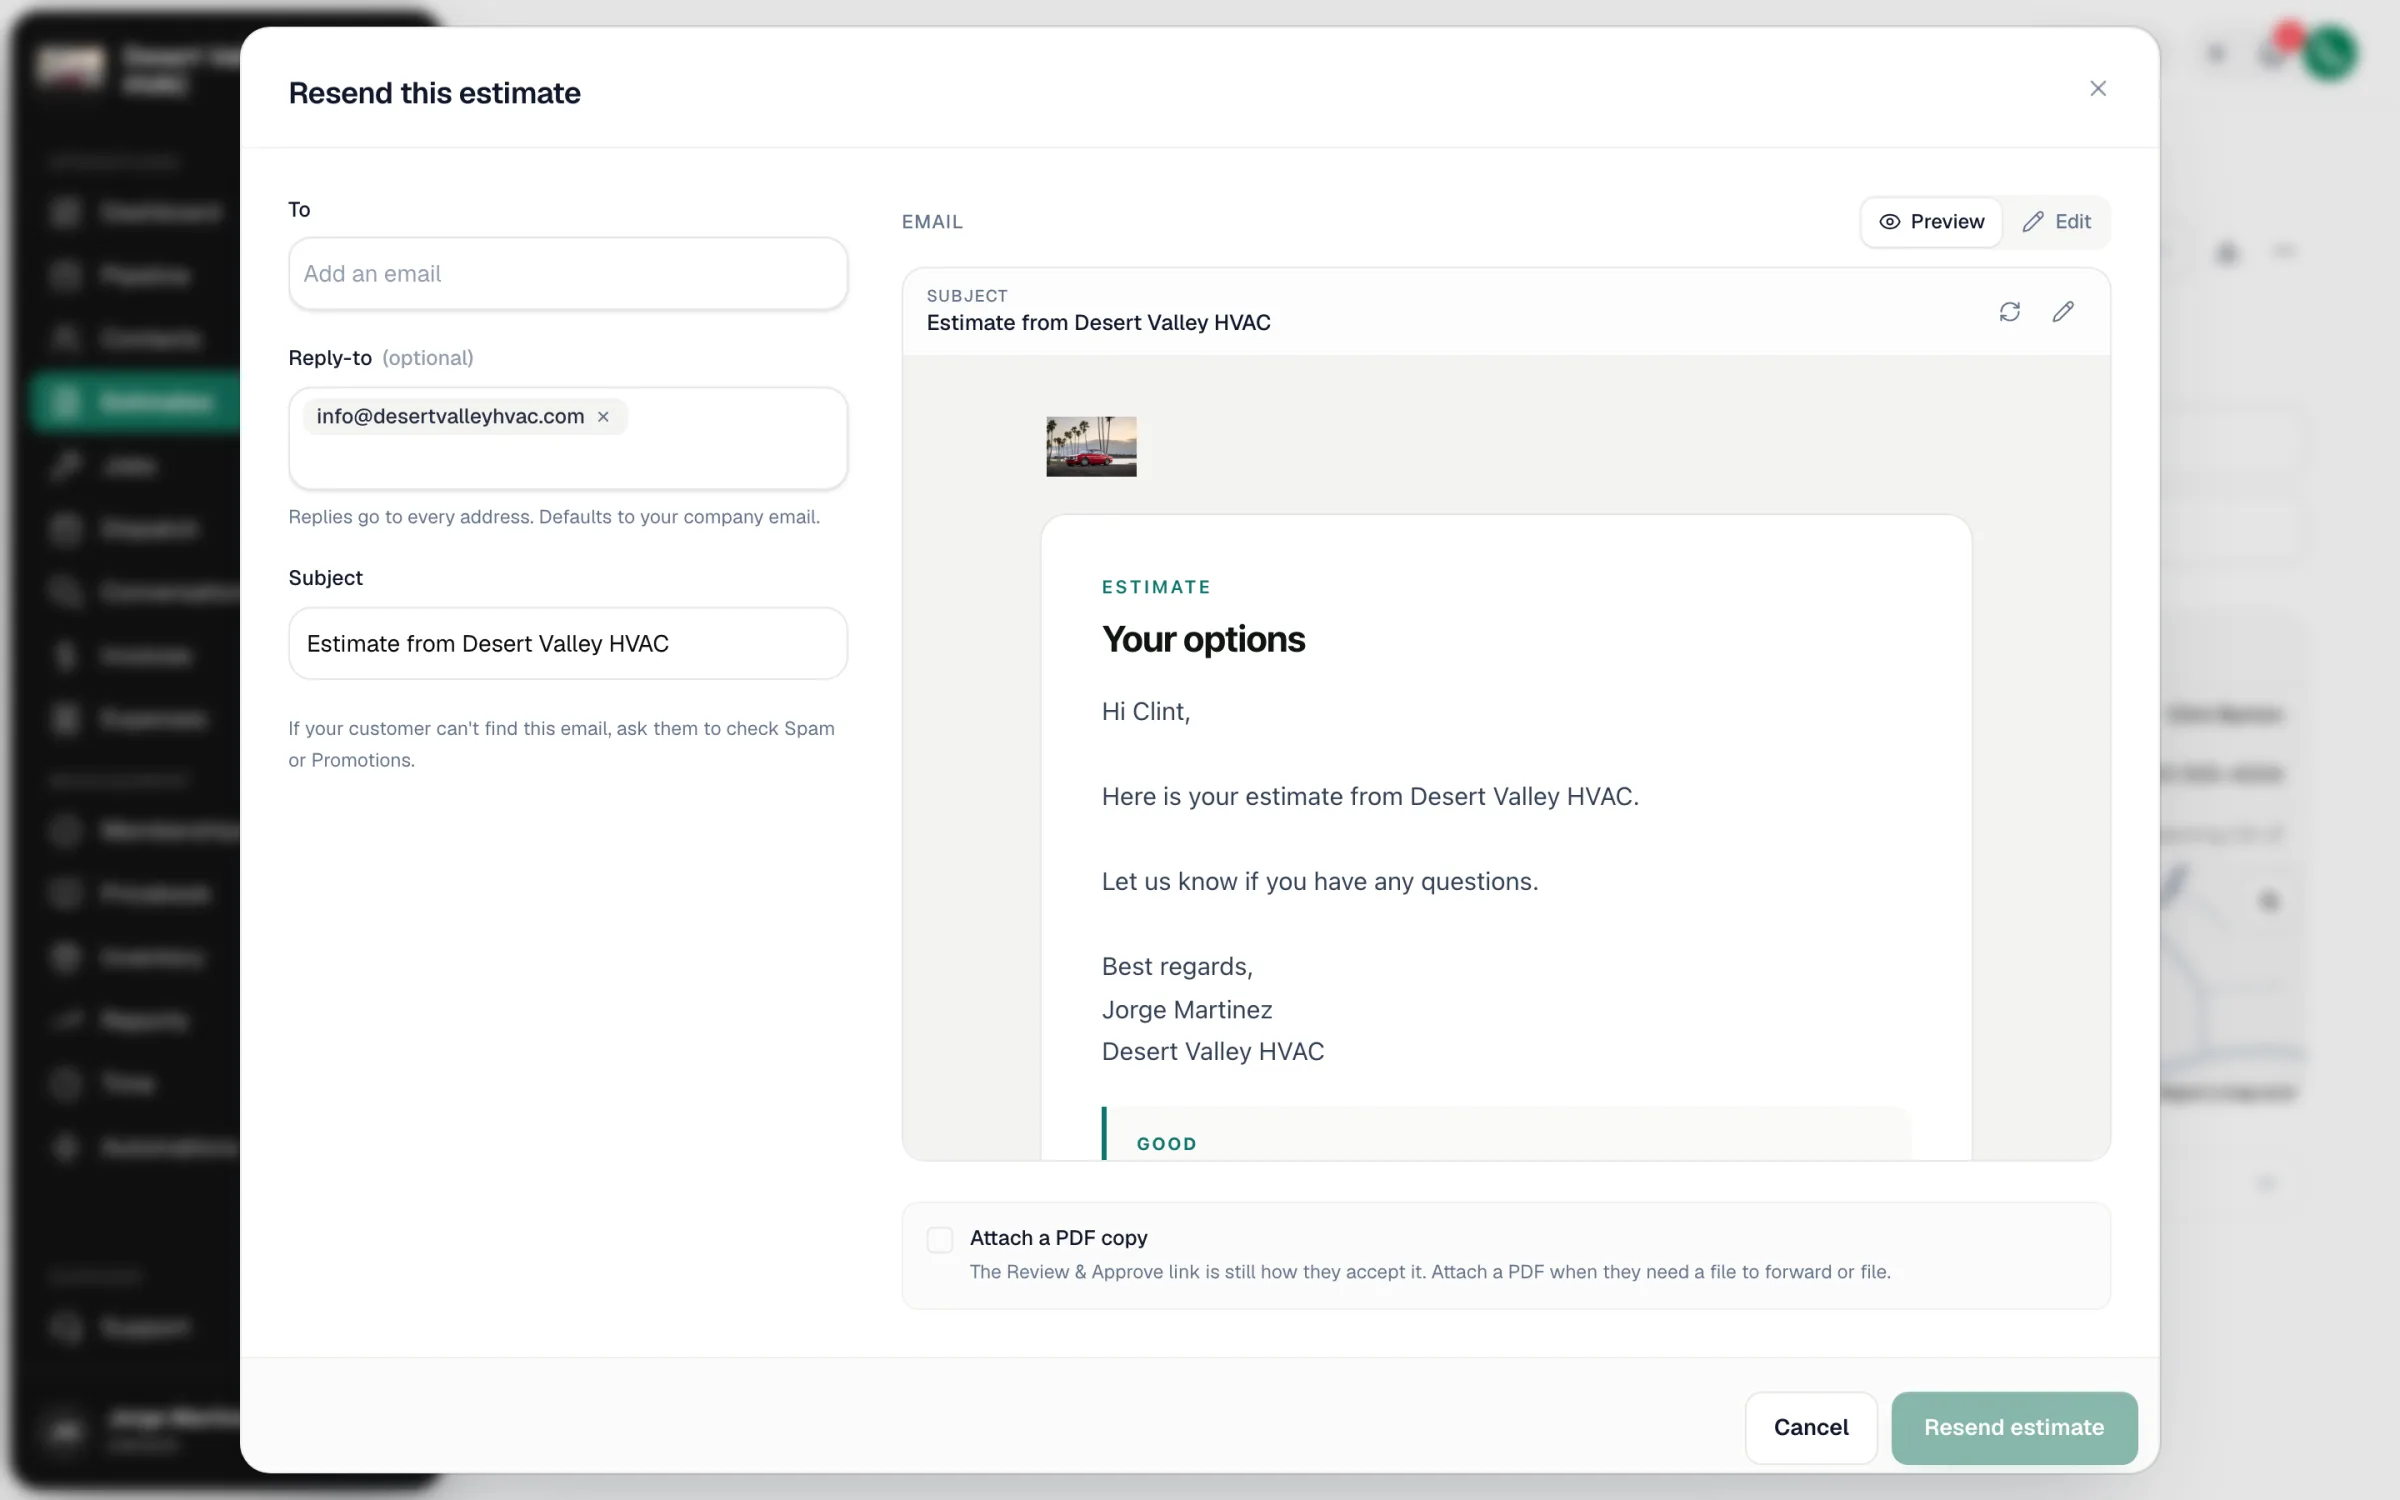
The estimate changes to Sent. The email has a button that opens the customer's approval page.
Estimates are sent by email. To text the link instead, copy it from the Customer approval link card on the estimate (Copy link) and paste it into a text message.
After you send
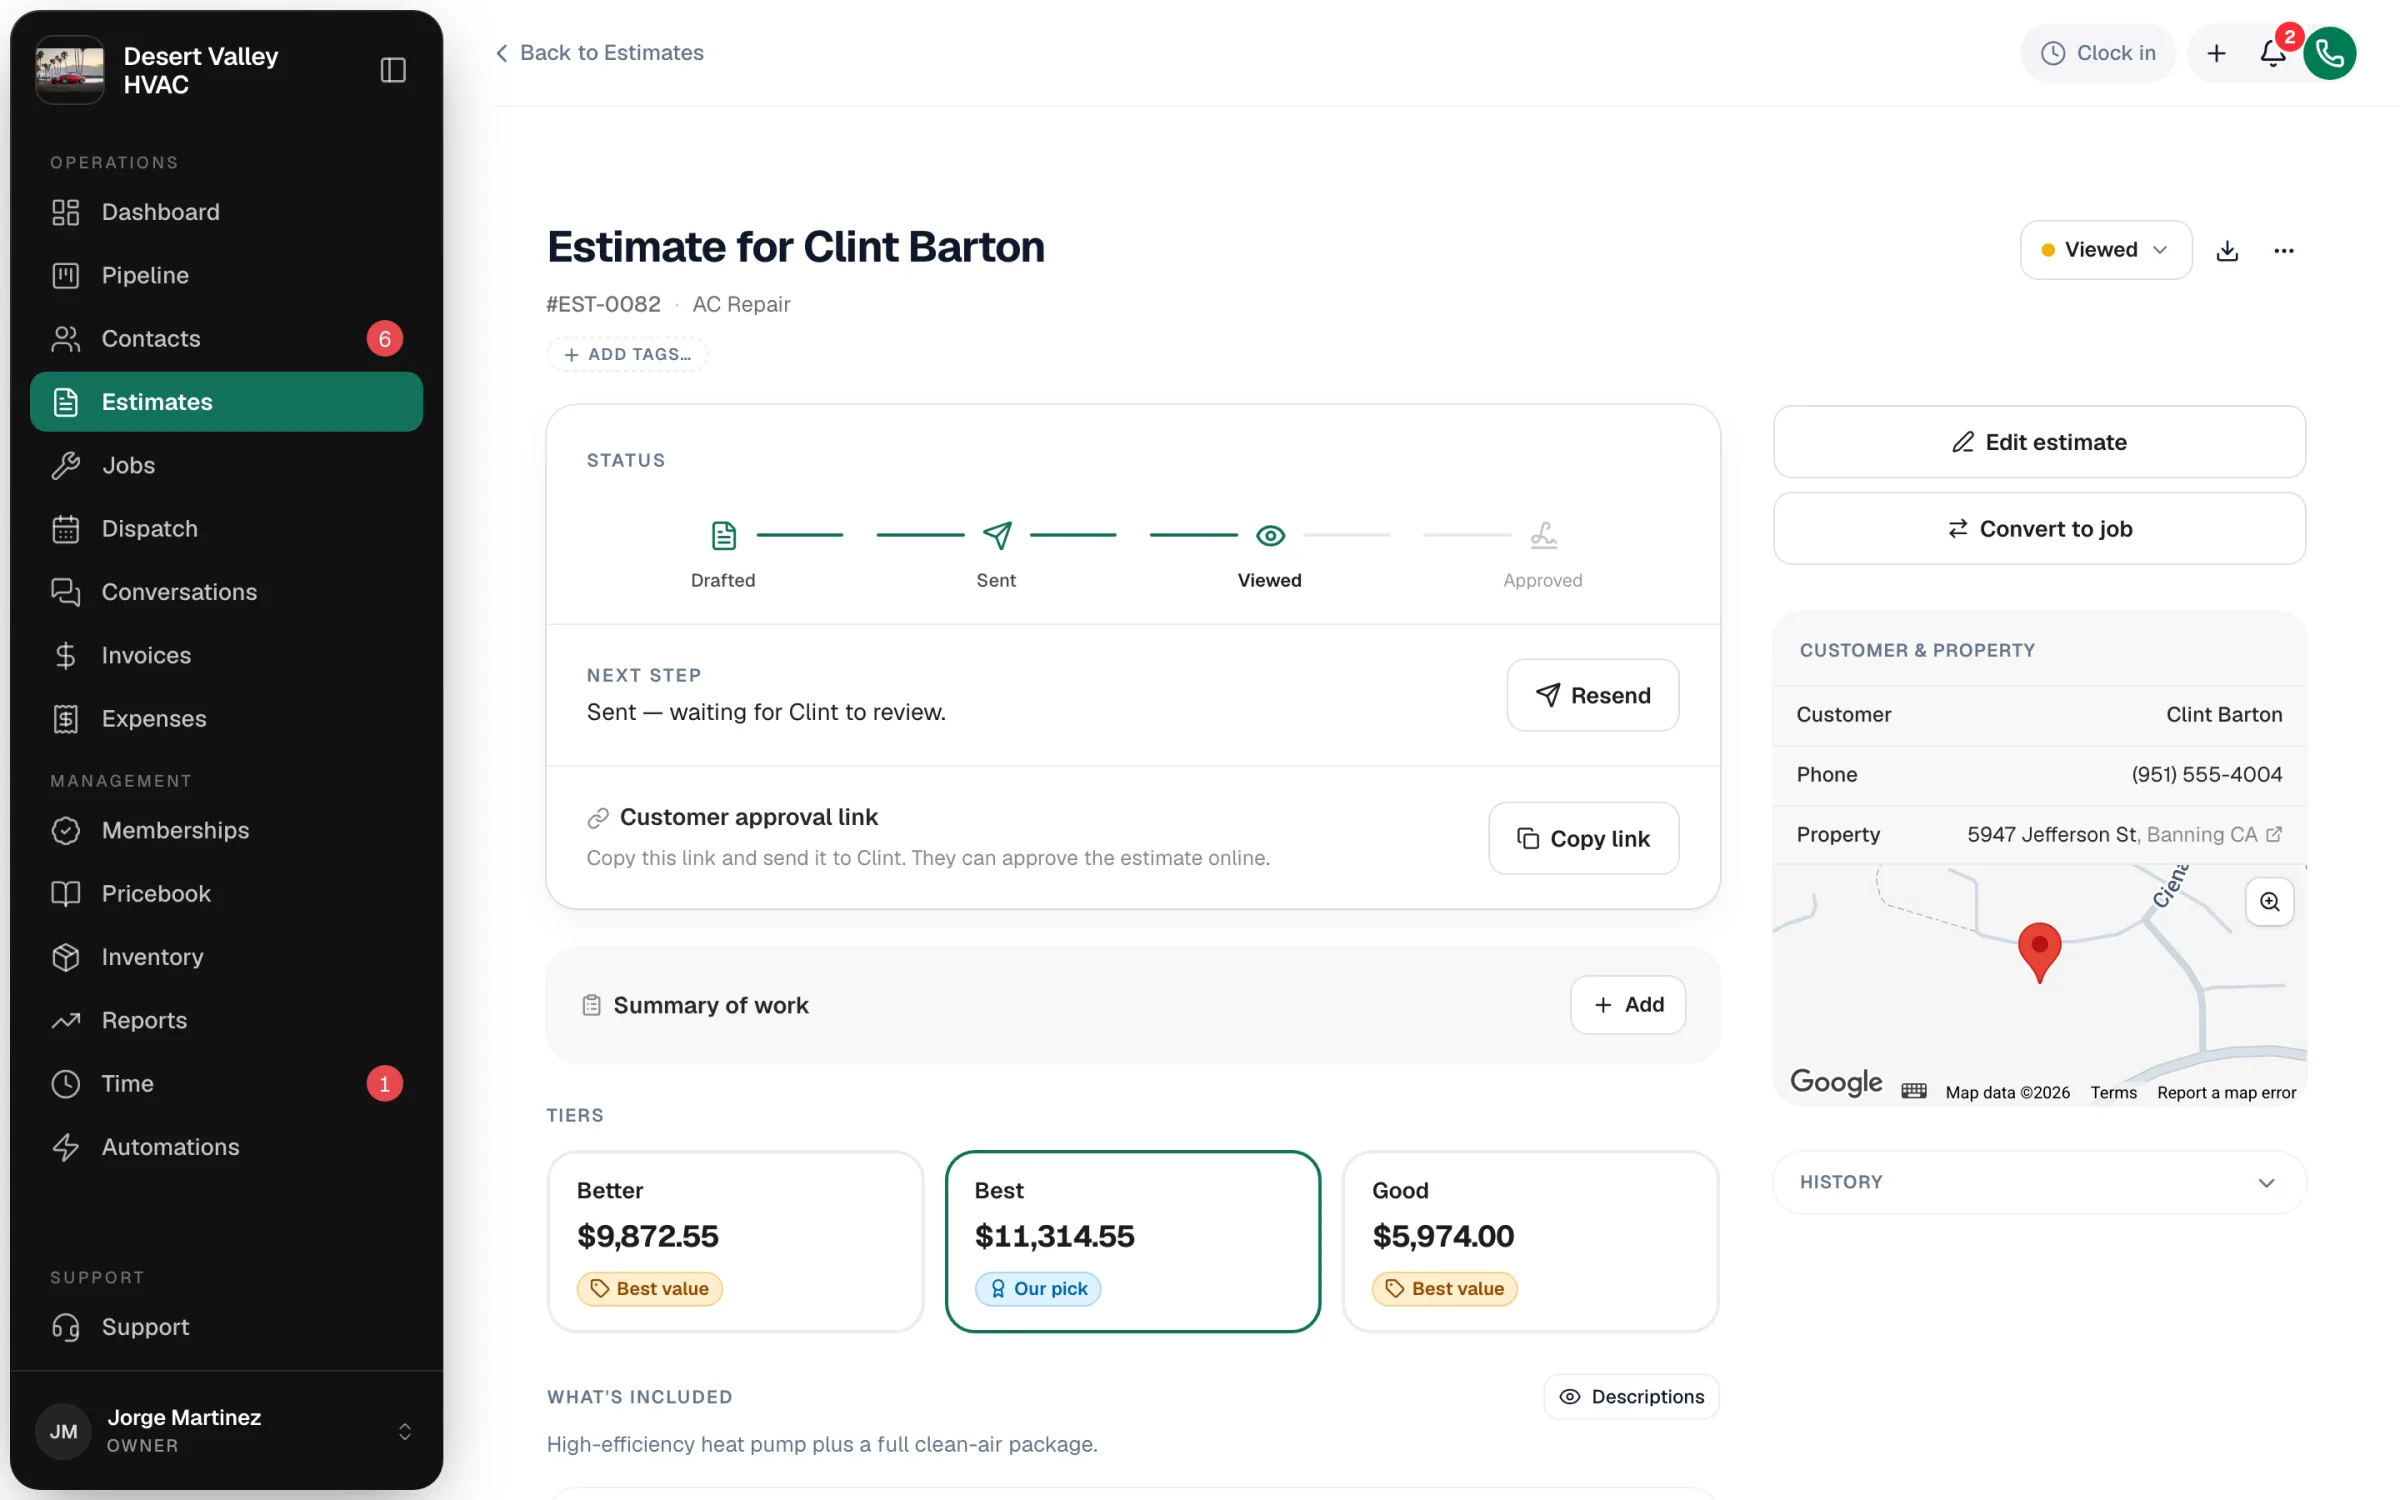
- The customer opens it. The estimate changes to Viewed, and the next-step bar tells you how many times they opened it and which option they looked at most. That's your cue to call.
- The customer approves. The estimate changes to Approved, a job is created, and everyone on your team gets a notification. See How customers approve or decline estimates.
- The customer declines. The estimate changes to Declined, with the reason they gave.
- The customer approves in person or by phone. Change the status to Approved yourself, or click Convert to job. See Creating a job from an estimate.
Changing an estimate after sending
Click Edit estimate. You can edit drafts, and sent or viewed estimates until they're approved. Changes show on the customer's link right away. Click Resend to email the updated version.
Internal notes and history
- Internal notes — only your team sees these. Type
@to mention a teammate. You can also dictate a note. - History — shows when the estimate was created, sent, viewed and approved, and who edited it.