
Add a unit to a customer's address when you're entering it from records, or when a tech finds equipment on site. Every field except Type is optional, and a photo of the data plate can fill most of the form for you.
Who can do this
Anyone on your team can add equipment, including field techs. Editing units from the office pages, and deleting them, needs a role that can edit customers (owners, admins and dispatchers by default).
Open the address
Go to Contacts, open the customer, and click the Properties tab. Find the address the unit is at and click Add equipment at the bottom of its equipment list.
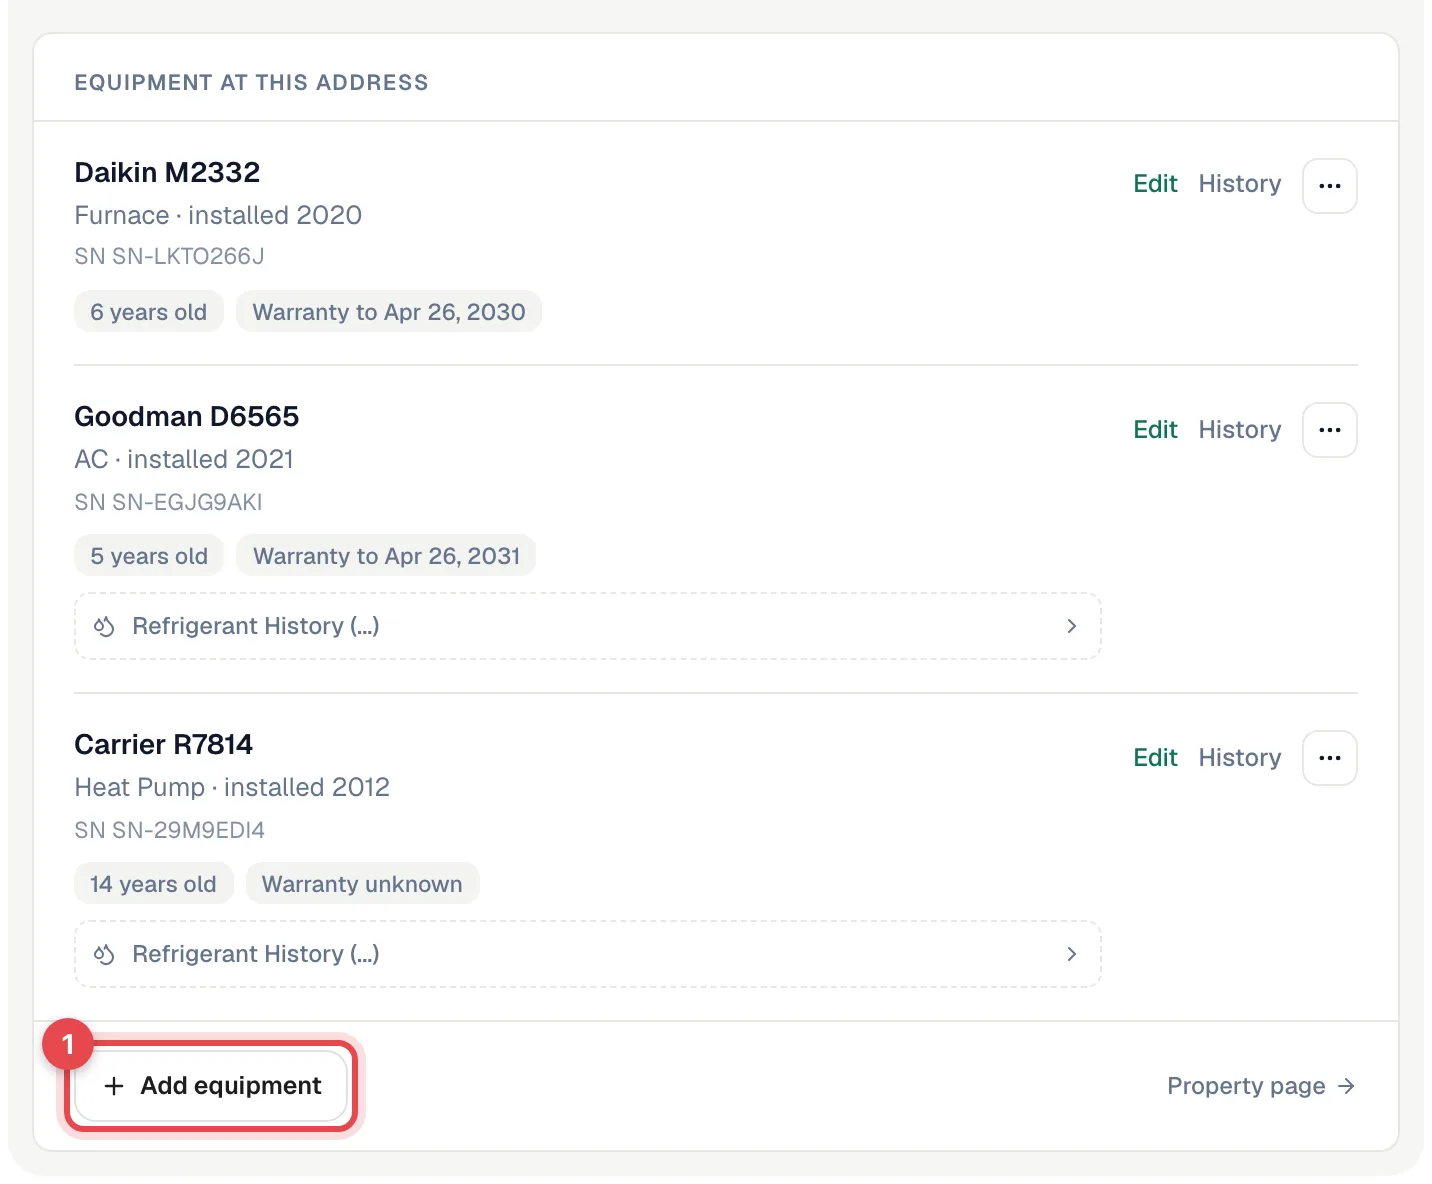
You can also start from:
- The property page: Add equipment next to Not in a system, or Add a unit on a system.
- A job: Attach equipment → Add equipment (or Add another unit).
- The field app: open the job, tap Equipment under This visit, then tap +.
Snap or upload the data plate (optional)
The Add equipment form opens. On a computer, the left side of the form invites you to Upload a photo of the data plate. On a phone or tablet you can tap Take a photo instead, or use Scan at the top of the form.
Run a Call reads the plate and fills in the type, manufacturer, model and serial number. It fills the install date (worked out from the manufacture date) and filter size only if those fields are still empty, and adds any extra specs to Notes. Check the fields before you save. The photo is saved on the unit as its data plate photo.
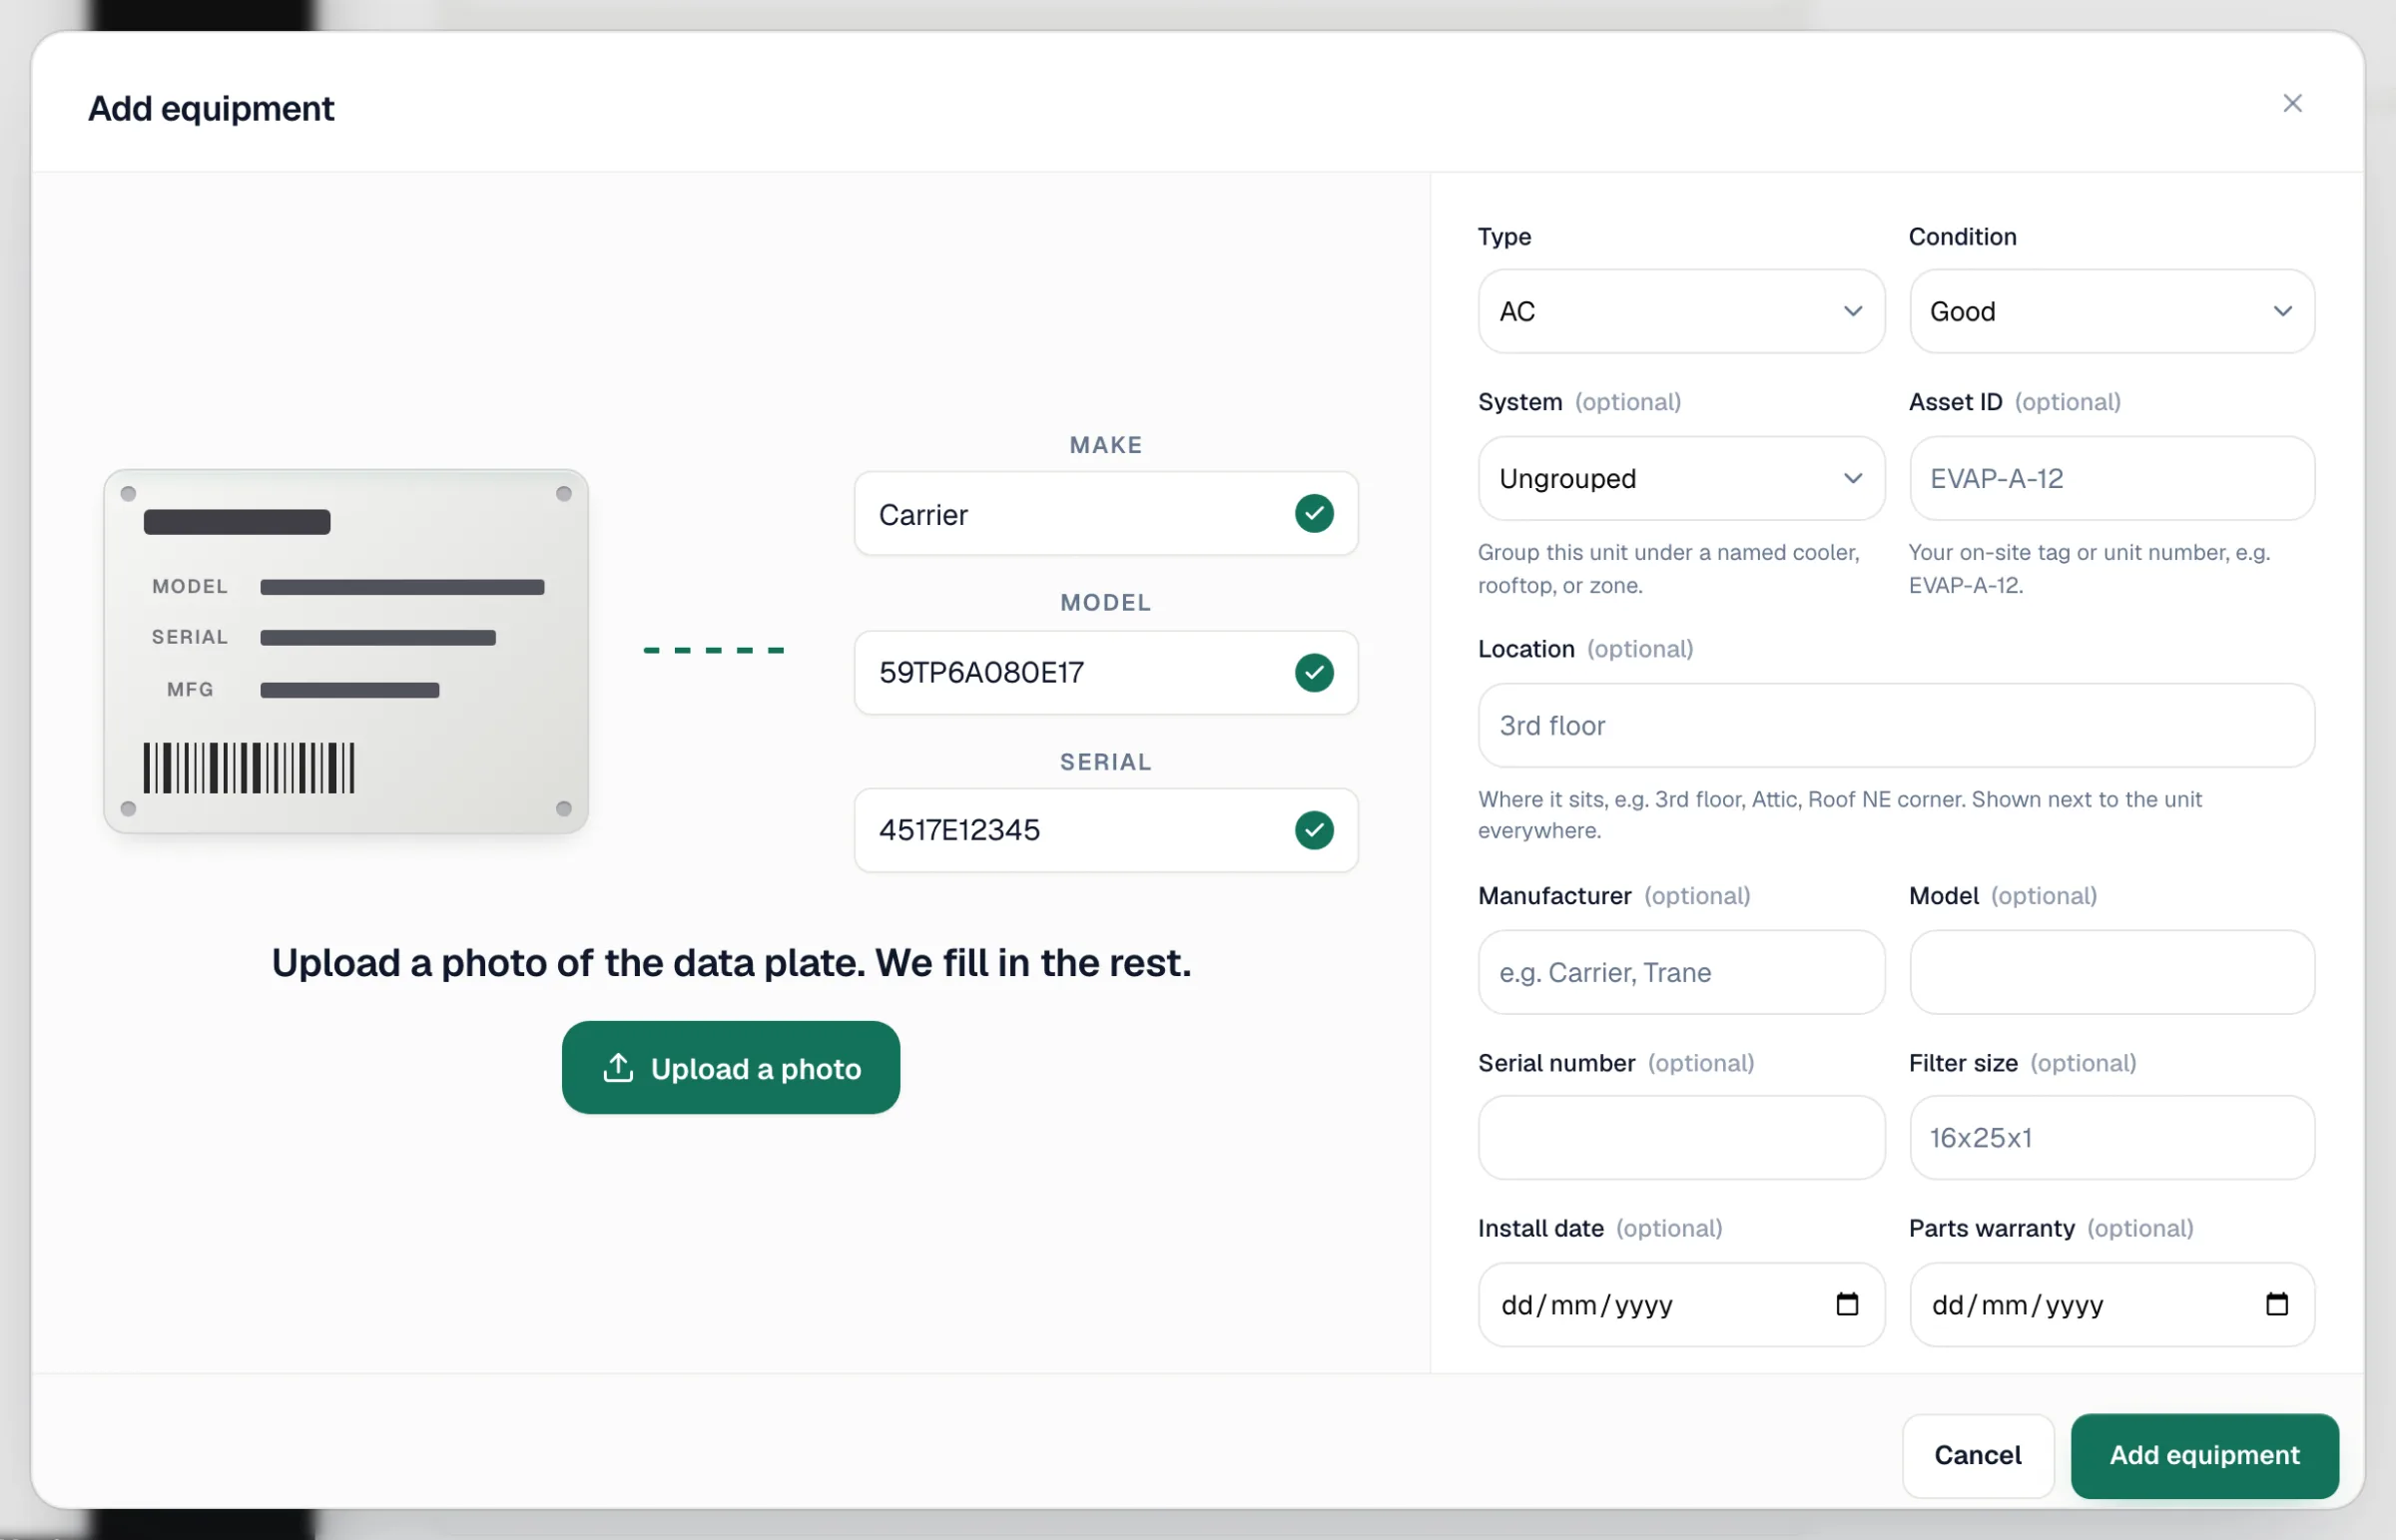
Fill in the fields
| Field | Notes |
|---|---|
| Type | Required. Defaults to AC. Includes the standard HVAC types, refrigeration types, any custom types your company added, and + Add custom type. See Asset IDs and custom equipment types. |
| Condition | New, Good, Fair, Poor or Critical. Defaults to Good. |
| System | Optional. Groups the unit under a named system at this address, such as Cooler A. See Grouping equipment into systems. |
| Asset ID | Optional. Your own tag or unit number, such as RTU-3. |
| Location | Optional. Where the unit sits, e.g. Attic or Roof NE corner. It shows next to the unit everywhere. |
| Manufacturer | e.g. Carrier, Trane. |
| Model / Serial number | Typed in capital letters automatically. |
| Filter size | e.g. 16x25x1. It shows as a chip on the equipment list. |
| Install date | Used for the unit's age. |
| Parts warranty / Labor warranty | Two separate end dates: the manufacturer's parts coverage and your own labor coverage. |
| Track refrigerant on this unit | Shown for types that can hold refrigerant. When it's on, the unit gets a Refrigerant tab and EPA Section 608 log. The default comes from the type. |
| Notes | Anything the next tech should know. On the customer's equipment list, notes show in a yellow box under the unit. |
Save
Click Add equipment. The unit appears under the address straight away.
Photos can only be added once the unit is saved. Open the unit again with Edit and add them in the Photos strip, or use the unit's Photos tab.
Editing a unit later
- Customer page: Properties tab → Edit next to the unit.
- Unit page: Edit in the header.
- Field app: open the unit from the job's equipment sheet → ⋯ → Edit unit.
You can move a unit into a system at any time. Its history stays with it.
Removing a unit
| If… | Do this |
|---|---|
| The unit was replaced, removed or taken out of service | Mark it inactive from a job: open the equipment sheet, then the unit, then ⋯ → Inactivate unit. It moves to the retired list, keeps all its history, and can be reactivated. See Equipment on a job. |
| The unit was entered by mistake | Customer page → Properties → ⋯ next to the unit → Delete unit, or Delete on the unit's page. It disappears from lists. Past jobs and invoices aren't changed. |