
One customer can have many addresses: a homeowner with a lake cabin, a landlord with rentals, a restaurant owner with three locations. In Run a Call each address is a property, and every job, estimate and piece of equipment belongs to one property — so history, equipment and "what's open here" stay with the right address.
Who can do this
Anyone whose role can edit customers — by default owners, admins and dispatchers.
Open the customer's Properties tab
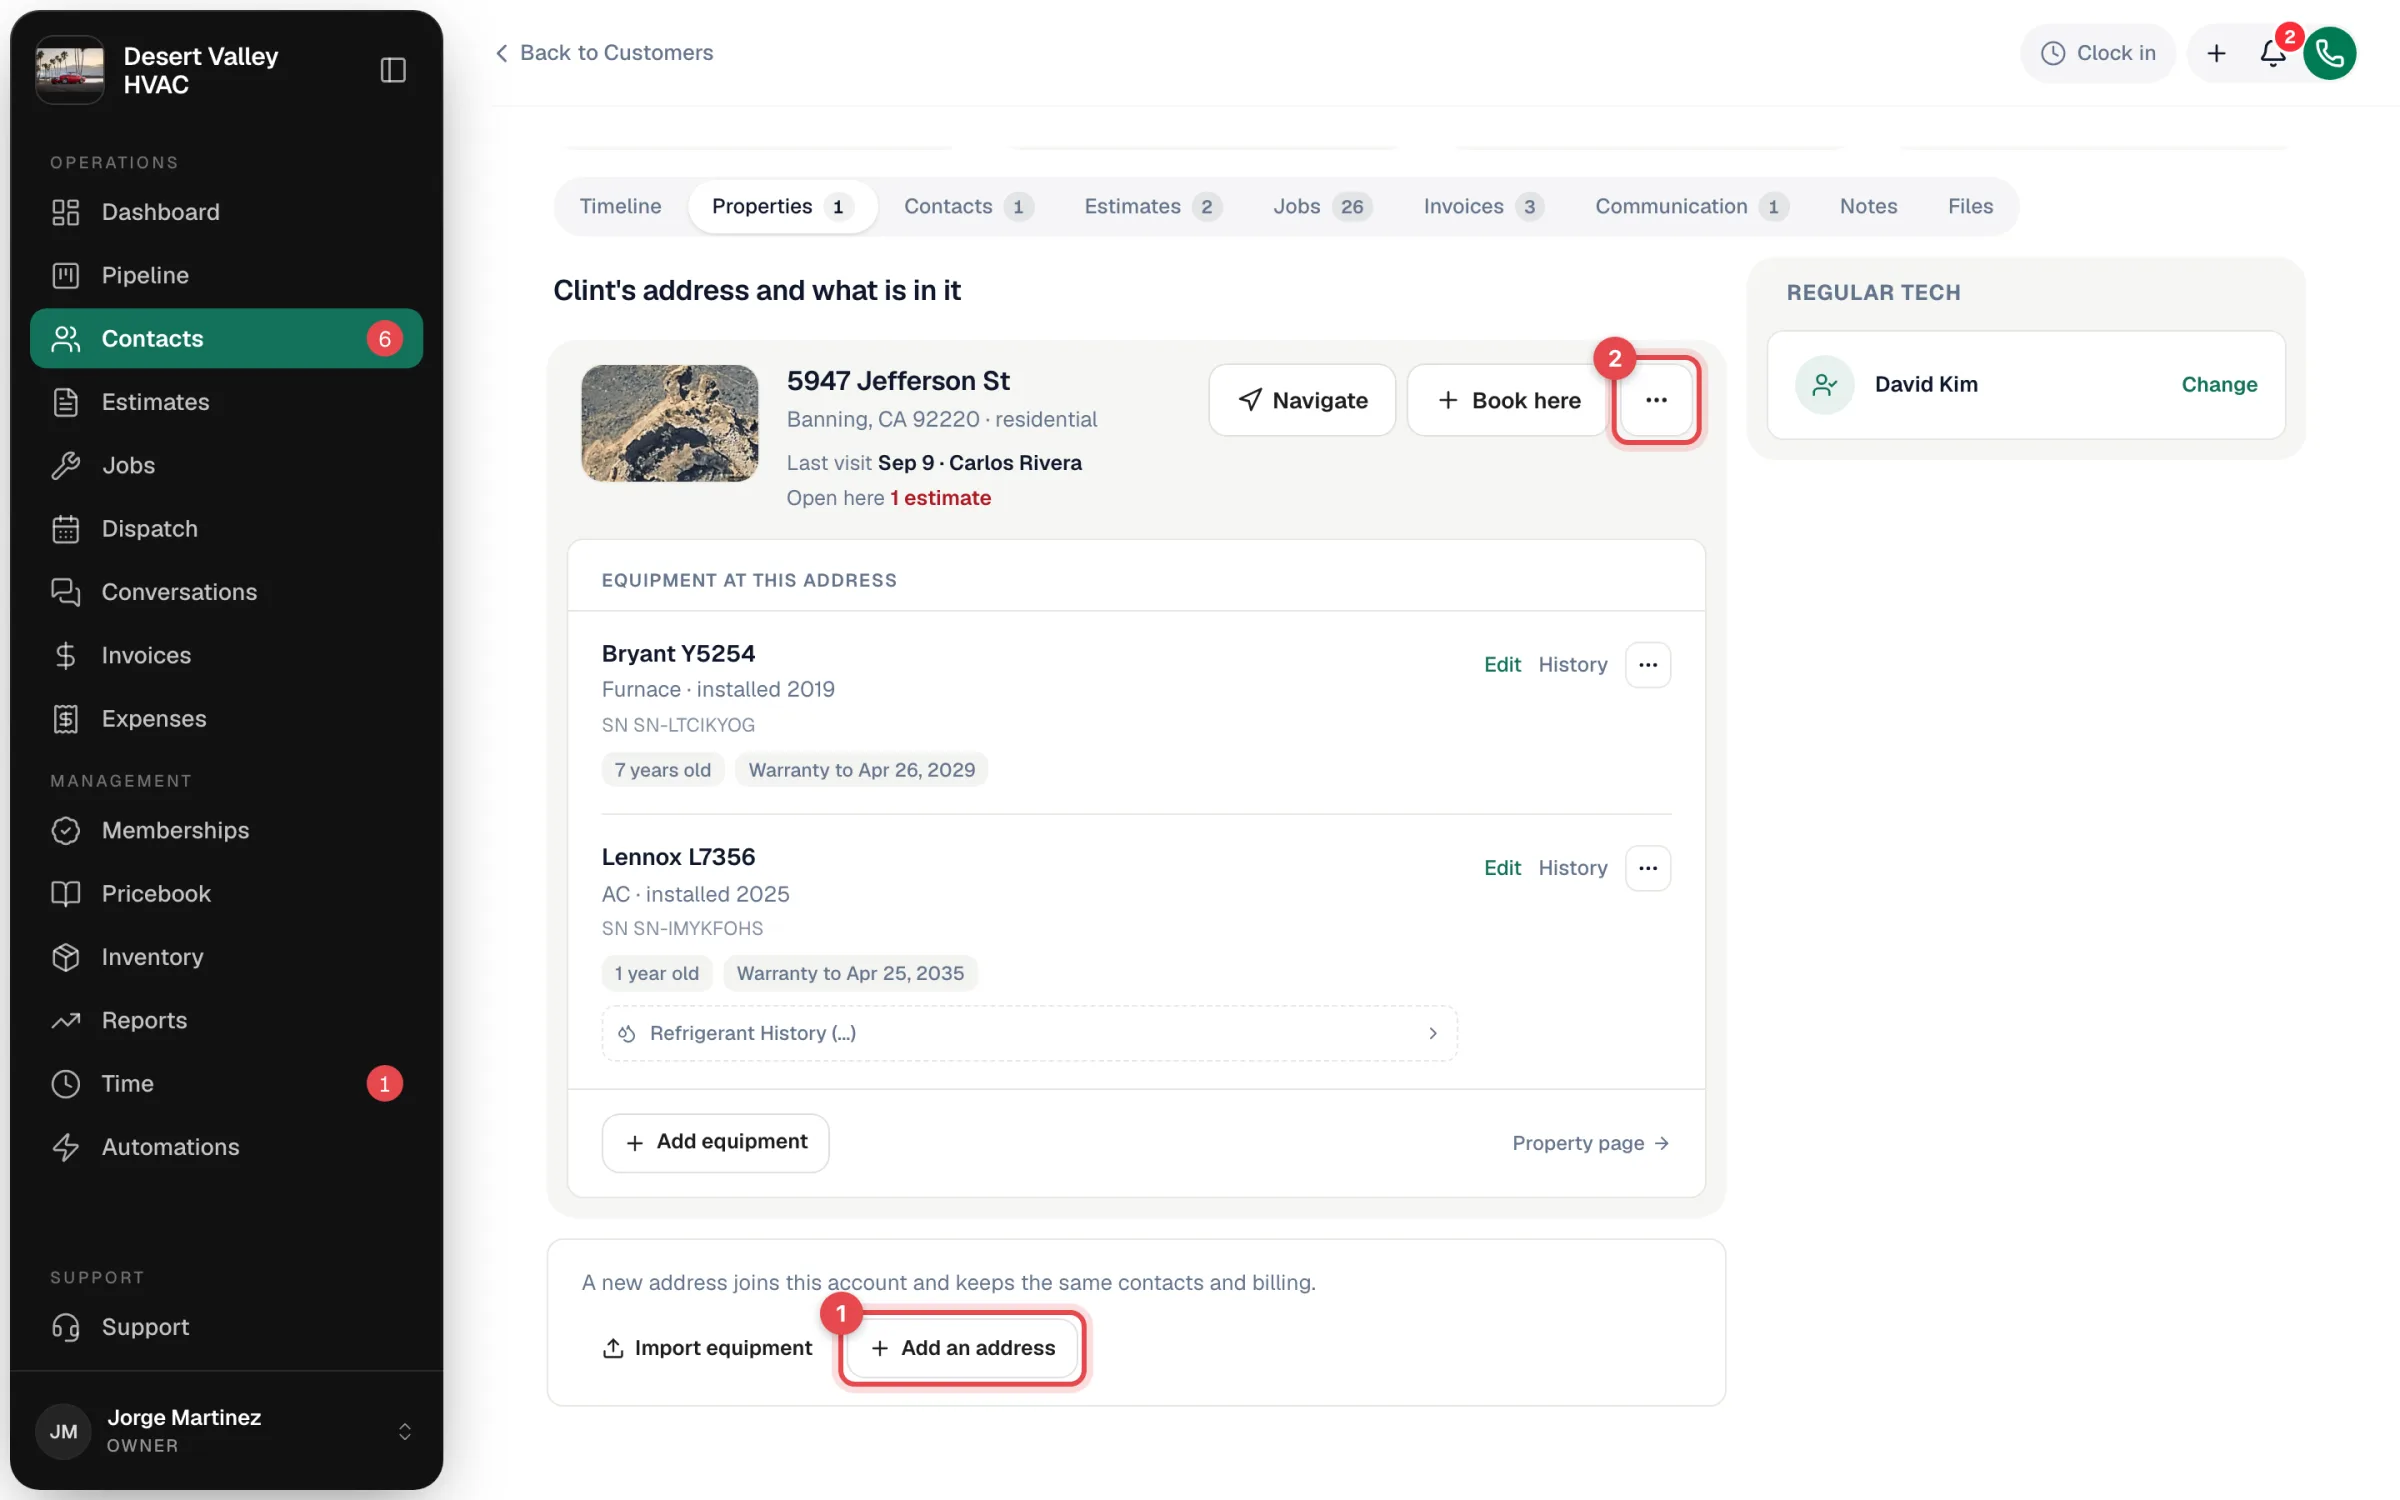
Open the customer from Contacts and click the Properties tab. Each address has its own card showing:
- The street, city, and property type (for example residential or single-family house).
- Access: notes, if any.
- Last visit — the date and tech — and what's Open here (estimates waiting, unpaid invoices).
- Equipment at this address, with each unit's age and warranty.
Click Add an address
At the bottom of the tab, click Add an address (1).
Fill in the property
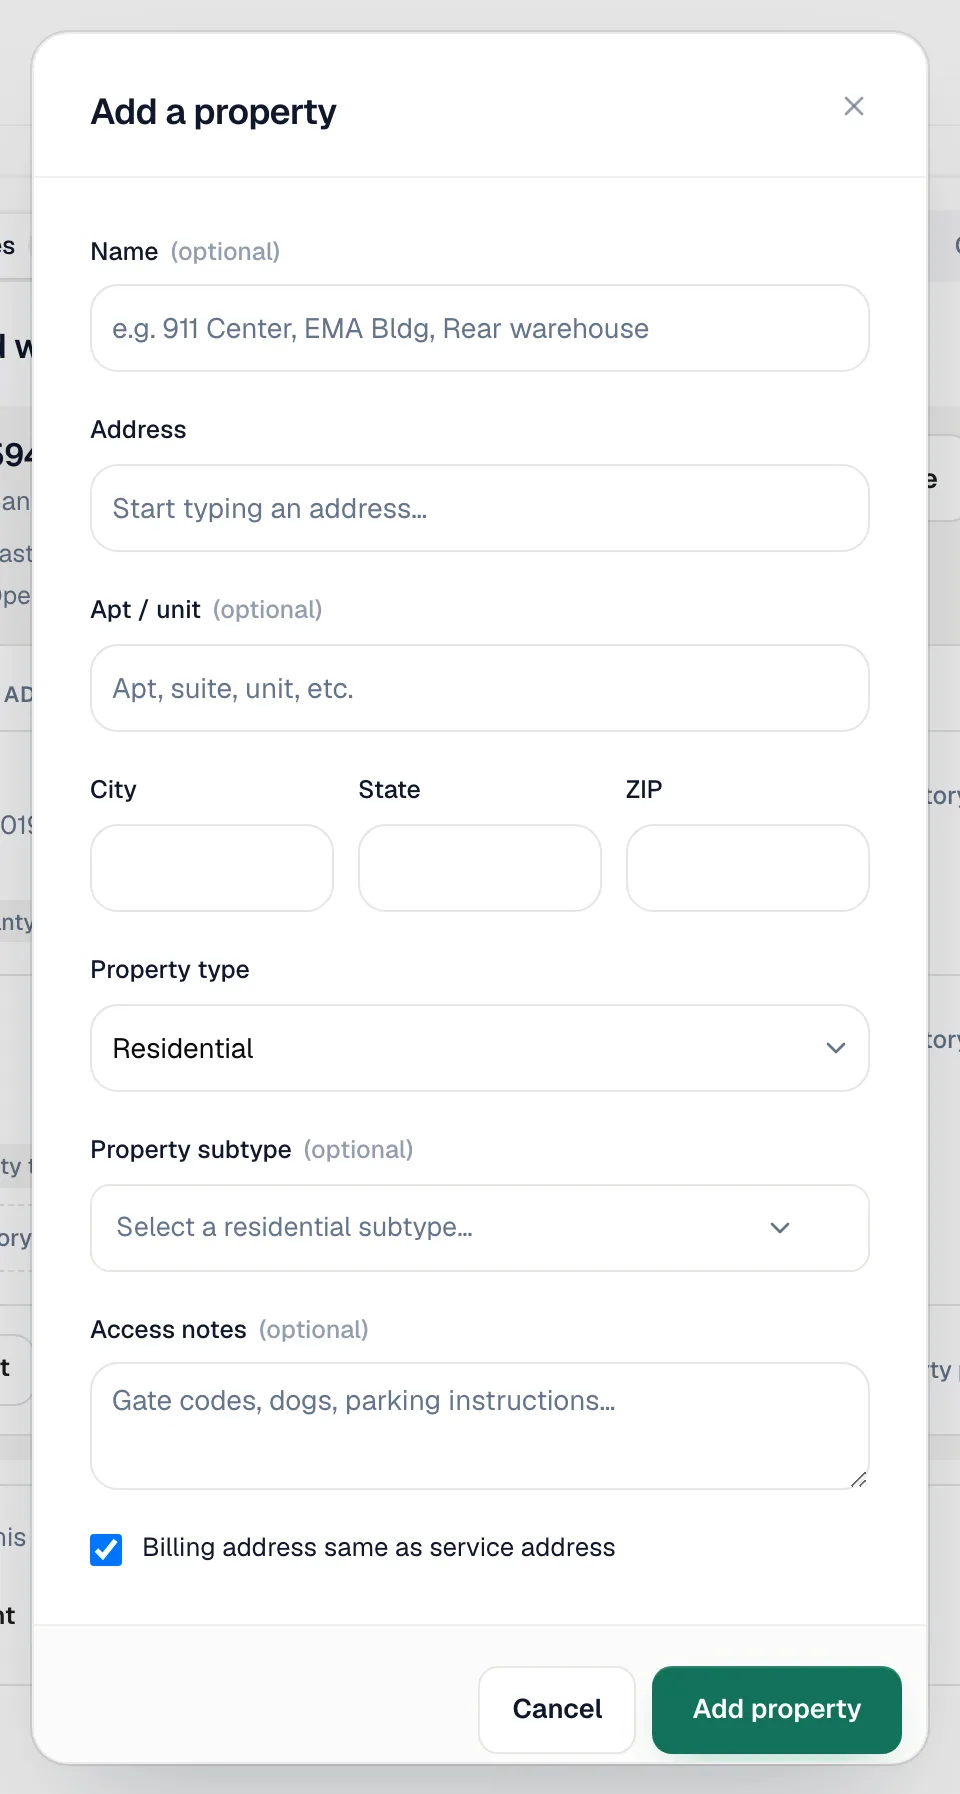
| Field | What to enter |
|---|---|
| Name (optional) | A nickname that tells buildings apart, such as Rear warehouse or Lake house. Shown instead of the street when set. |
| Address | Start typing and pick the address from the suggestions — the city, state and ZIP fill in and the map location is saved for dispatch and navigation. |
| Apt / unit (optional) | Suite, unit or apartment number. |
| City, State, ZIP | Filled in by the suggestion; you can edit them. |
| Property type | Residential or Commercial. |
| Property subtype (optional) | Single-family house, condo, office, restaurant and more — or add your own. |
| Access notes (optional) | Gate codes, dogs, where to park. Techs see these on the job in the mobile app. |
If the customer has no billing address yet, you'll see Billing address same as service address (checked). Uncheck it and click Next to enter a separate billing address on a Where do bills go? step.
Save
Click Add property. The new address appears as its own card, ready for equipment and jobs.
Booking a job at a specific address
- From the property card, click Book here — the new job opens with that customer and address filled in.
- From Book a job in the customer header, or any time you create a job, pick the customer and then choose the address in the Property field.
The tech sees that property's address and access notes on the job in the mobile app.
Managing an address
Click the ⋯ button on a property card (2):
| Action | What it does |
|---|---|
| Edit address | Change any of the fields above. |
| Property page | Opens the full page for that address, with all of its equipment and systems. |
| Delete address | Removes the property and its equipment from the customer's profile, after you confirm. |
Navigate opens driving directions in Google Maps.
Deleting an address also removes its equipment from view. If the customer sold the house but you did work there, think twice — keeping the address keeps its history easy to find.
Examples
| Customer | How to set it up |
|---|---|
| Homeowner with a second home | One customer, two properties, one billing address. |
| Landlord with rentals | One customer, a property per rental. Bills go to the landlord. |
| Business with separate locations that each need their own contacts or billing | A parent account with a site per location — see Commercial accounts with several sites. |