
Big jobs rarely get paid in one shot. A payment schedule splits an estimate into a deposit and progress payments — each milestone becomes its own invoice with its own pay link, so you collect as the work moves instead of chasing one big bill at the end.
Think 30% deposit / 50% at rough-in / 20% at completion on an install.
Adding a schedule to an estimate
It works the same in the office and in the field app:
- Build the estimate as usual (options and line items).
- In the Payment schedule card below the line items, click Add. The How do they pay? window opens.
- Start from a preset, or build your own:
- Half up front, half at the end — The usual split on a replacement. (Deposit 50%, Completion 50%)
- Deposit, then mid-job, then the rest — For longer installs where you pay for equipment up front. (Deposit 30%, Rough-in 50%, Completion 20%)
- Set my own stages — start from scratch.
- Adjust the names and amounts. Use the arrows to reorder, Add milestone to add a row, and × to remove one.
- Leave Send the deposit invoice when the customer approves. ticked, or untick it (see below).
- Click Save schedule, then save the estimate.
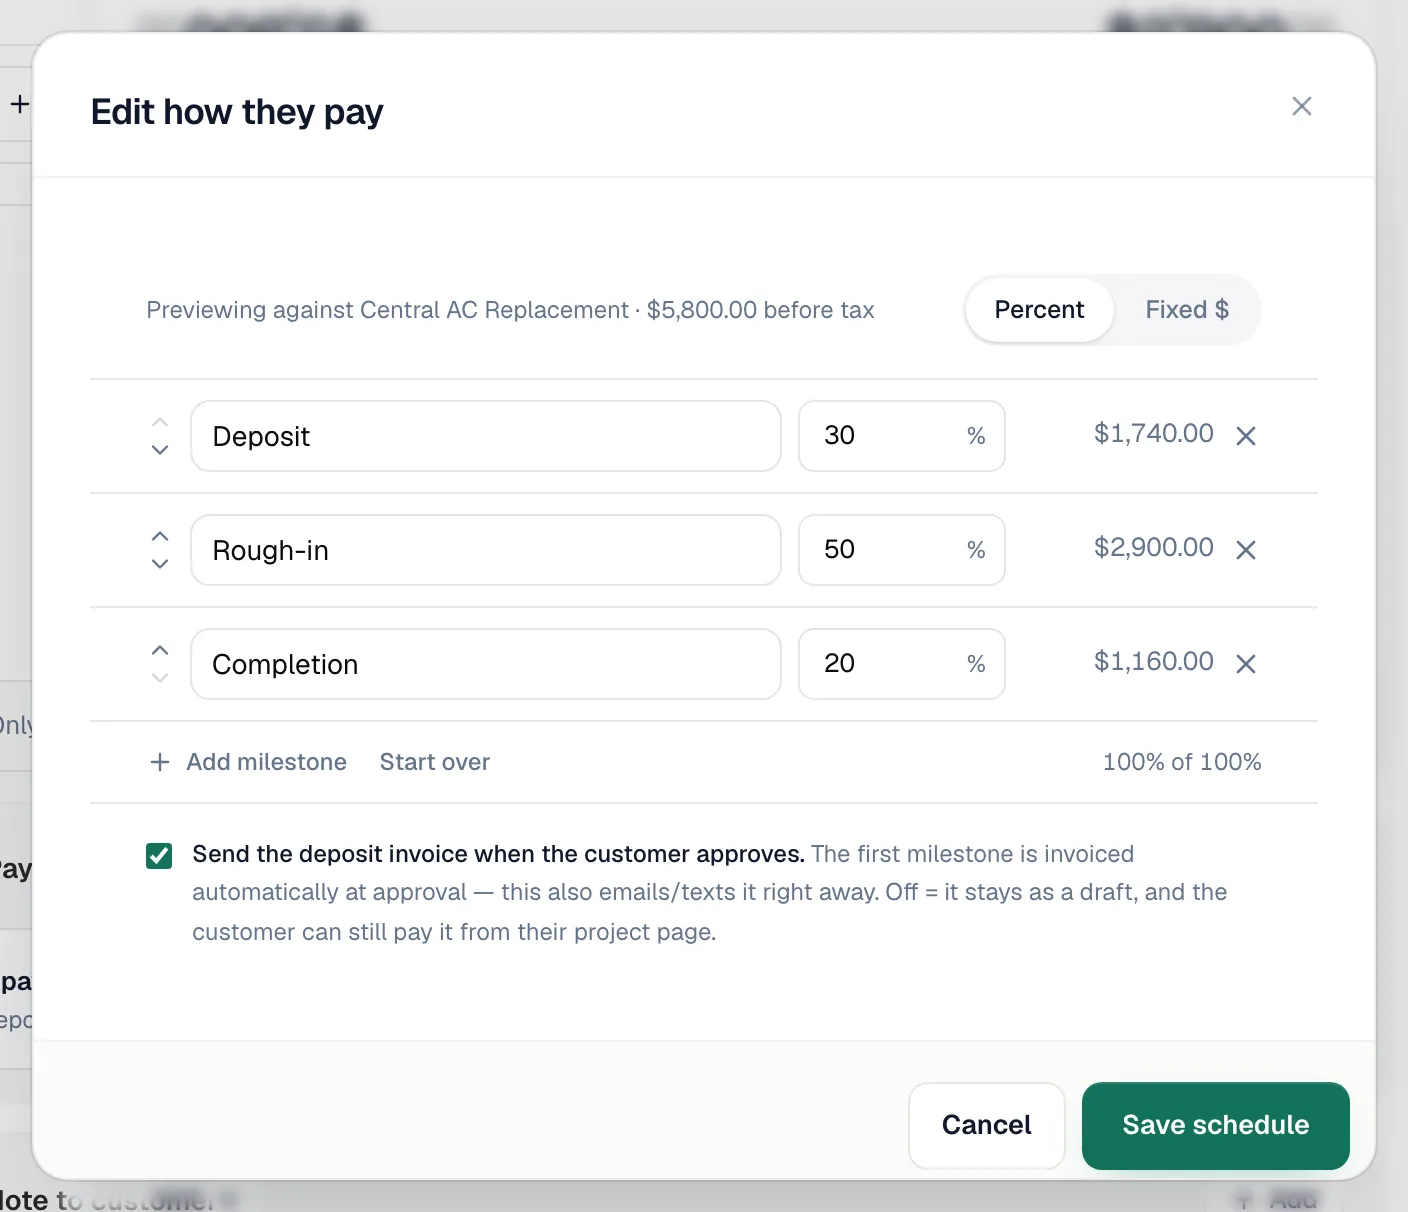
Changed your mind mid-edit? Start over clears the rows and brings the presets back. To remove a schedule, open it with Edit, delete every row and click Remove schedule.
Percent or fixed amounts
| Type | How it works |
|---|---|
| Percent | Each milestone is a share of the signed total. Percentages must add up to 100. Scales automatically if the customer picks a different option or adds an add-on. |
| Fixed $ | Each milestone is a dollar amount, before tax — each milestone's invoice adds its share of tax on top. The amounts must add up to the option total. |
Use percent unless you have a reason not to. Fixed schedules must match the option total exactly — if the customer's add-on picks change the total at approval, they'll be asked to call you to finalize the plan.
The builder previews the split against the option you're viewing. Exact dollar amounts lock in when the customer approves — the final payment always absorbs any rounding, so the milestones add up to the signed total to the cent.
The deposit
The first milestone is the deposit. When the customer approves the estimate:
- The deposit invoice is generated automatically, due on receipt.
- By default it's also sent to the customer right away, with the pay link. Untick Send the deposit invoice when the customer approves. in the builder if you'd rather review it first. It stays a draft, and the customer can still pay it from their customer project page.
This also happens when a tech gets an on-site approval and converts the estimate to a job — the deposit generates at conversion.
What the customer sees
Before signing, the approval page shows the payment plan under the total — the customer knows the split before they commit. After approval, the same link becomes their project page, with the plan at the top and a Pay button on whatever's due. See The customer project page.
Editing after approval
- Milestones that haven't been invoiced yet can be renamed or re-split — as long as the schedule still adds up.
- Invoiced milestones are locked. Void the milestone's invoice first if you need to change it.