
Steps are what an automation does after its trigger fires. In the builder, click a + to open Add a step, pick one, then fill in its settings in the panel that opens. You can chain steps in any order.
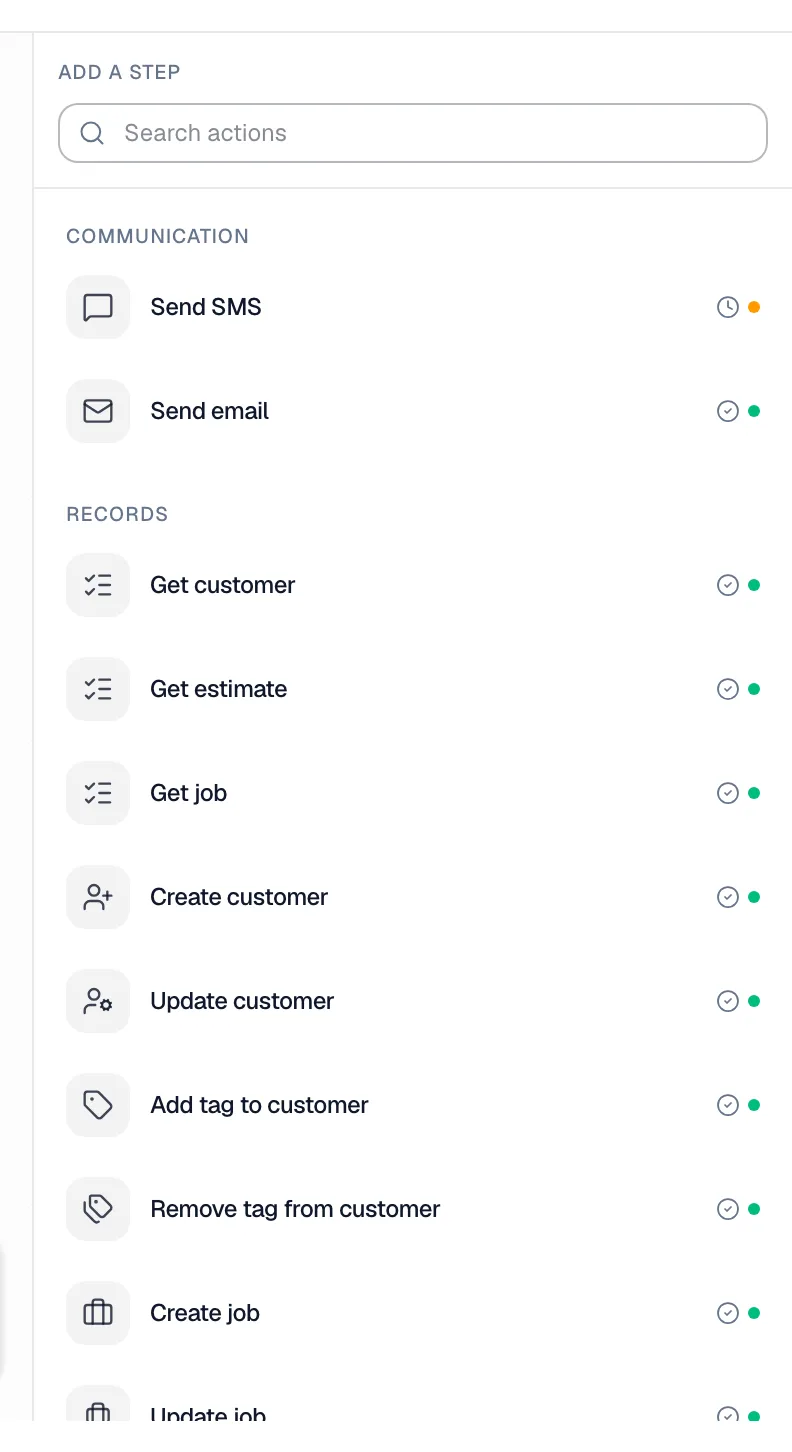
Most steps work on the record that started the automation (the customer, job or invoice from the trigger). Steps that ask for an ID let you pick it from the variable list, from the trigger or from an earlier step, instead of typing it.
Communication
Send SMS
Texts someone. Needs business texting (Enabling SMS-based automations).
| Setting | What it does |
|---|---|
| Send to | Customer (the customer from the trigger), Assigned tech (the tech on the job), Custom phone (a number you type, starting with +1), or The caller (missed-call trigger) |
| Message | Up to 1,600 characters. Longer texts are split by the carrier into several parts. Insert variables for names, dates and links. |
| Only send during business hours | Holds a text that would go out while you're closed and sends it when you next open. |
Send email
Emails someone. No add-on needed.
| Setting | What it does |
|---|---|
| Send to | Customer, Org owner, My team (then tick who under Team members to notify), or Custom email (one or more addresses) |
| CC (optional) | Extra addresses to copy |
| Subject | The subject line, with variables if you like |
| Body | Write it in Visual, switch to HTML for raw markup, and check Preview to see the finished email |
| Only send during business hours | Same as for texts |
Records
Get customer, Get estimate, Get job
Look up the latest version of a record while the automation runs. Details from the trigger are captured when the automation starts, so use these after a Delay to see whether an estimate has been approved or a job has moved on in the meantime. Give it the Customer id, Estimate id or Job id (usually customer.id, estimate.id or job.id from the trigger).
What each gives later steps:
| Step | Details you can use afterwards |
|---|---|
| Get customer | First and last name, email, phone, tags, source |
| Get estimate | Status (draft, sent, viewed, approved, declined, expired), total, approved total, approval date, expiry date |
| Get job | Status, customer, assigned tech, next appointment start, when the job wrapped |
Create customer
Adds a new customer. Fields: First name, Last name, Company (optional), Email, Phone, Street, City, State, ZIP, Tags (comma-separated). Handy with an inbound webhook from a web form.
Update customer
Changes an existing customer's First name, Last name, Email or Phone. Needs the Customer ID.
Add tag to customer / Remove tag from customer
Adds or removes one or more tags on the customer from the trigger. A tag that doesn't exist yet is created. Removing a tag the customer doesn't have does nothing.
Create job
Creates a job. Fields: Customer ID and Title (required), Description, Status, Scheduled start (ISO) and Scheduled end (ISO) (for example 2026-07-09T08:00:00), Assigned tech id (optional).
Update job
Changes a job's Title, Status, Scheduled start or Scheduled end. Needs the Job ID.
Update job status
Sets the job from the trigger to the status you choose in Set status to.
Create invoice from job
Creates a draft invoice from the job's line items for the job in the trigger.
| Setting | What it does |
|---|---|
| Due in (days) | Leave blank to use your normal payment terms |
| Notes (optional) | Notes saved on the invoice |
It won't create one if the job isn't scheduled or completed, has no line items, or already has an invoice. A completed job moves to Invoiced.
Update membership
Needs the Membership ID. Under What to do, choose Pause, Reactivate, Change plan (with the New plan ID) or Change next visit (with the date).
Add note
Adds a note to A customer or A job (Attach to).
| Setting | What it does |
|---|---|
| Note body | The note text, with variables |
| Visibility | Internal (office / tech only) or Public (customer can see it) |
| Notify (optional) | Team members to mention; they get an in-app notification |
Operations
Assign technician to job
Books a new appointment on a job and assigns a tech. Needs Job ID, Tech ID, Start (ISO) and End (ISO).
Integrations
Send / fetch via webhook
Sends data to, or pulls data from, another app's web address. Use it to post into a team chat app, add a row to a spreadsheet through a connector service, or look something up.
| Setting | What it does |
|---|---|
| HTTP method | GET, POST, PUT, PATCH or DELETE |
| Target URL | Must start with https:// |
| Query params (JSON, optional) | Added to the end of the address |
| Body (JSON, optional) | For POST, PUT and PATCH. Leave blank to send the trigger's data as-is. |
| Headers (JSON, optional) | For example an access key the other app requires |
| Timeout (ms, optional) | How long to wait for an answer: 100 to 30,000 milliseconds; 10 seconds if blank |
Click Run test to send the request right away and see the response. Later steps can use the reply, for example {{steps.<step>.output.response.field}}; pick it from the variable list rather than typing it.
Logic
| Step | What it does |
|---|---|
| Filter | Continue only when your conditions are met; otherwise the run stops quietly |
| Paths | Split into branches, each with its own conditions and steps |
| Delay | Wait minutes, hours, days or weeks before the next step |
Full guide: Filters, paths, and delays.
Limits and safety
- Texting rules apply to every Send SMS: customers who replied STOP are skipped, and a customer gets at most one automated text every 25 minutes. Texts to your own techs are also spaced 25 minutes apart.
- Email spacing: a customer gets at most one automated email every 25 minutes.
- Per-job opt-out: texts and emails to the customer on a job with customer notifications turned off are skipped for scheduling triggers.
- Daily caps: up to 500 automated texts and 500 automated emails per day for your business.
- Run size: a run can take at most 100 steps.
Skipped steps show in the run's timeline with the reason. See Viewing automation runs and step timelines.
What isn't a step
- Editing an existing invoice.
- Sending a push notification to the mobile app (use Add note with Notify for team members, or Send SMS to the assigned tech).
- Waiting until something becomes true. Use Delay, then a Get step, then a Filter.