
When the built-in messages don't cover what your shop needs, build your own automation. For example: email your install crew when an estimate over $5,000 is approved, tag a customer and text them three days after a job, or text back anyone whose call you missed.
Every automation has one trigger (what starts it) and one or more steps (what it does).
Before you start
- Owners, admins and office staff can build automations.
- Use a tablet or computer. On a phone the builder opens read-only.
- Steps that send texts need business texting. See Enabling SMS-based automations.
Create the automation
Open Automations from the sidebar and click New automation in the right-hand panel. The builder opens with an empty trigger card marked Start here.
Pick the trigger
Click the trigger card. A Pick a trigger list opens on the right, grouped into Customers, Jobs, Appointments, Estimates, Invoices, Payments, Memberships, Calls and External. Use Search triggers to find one fast, then click it.
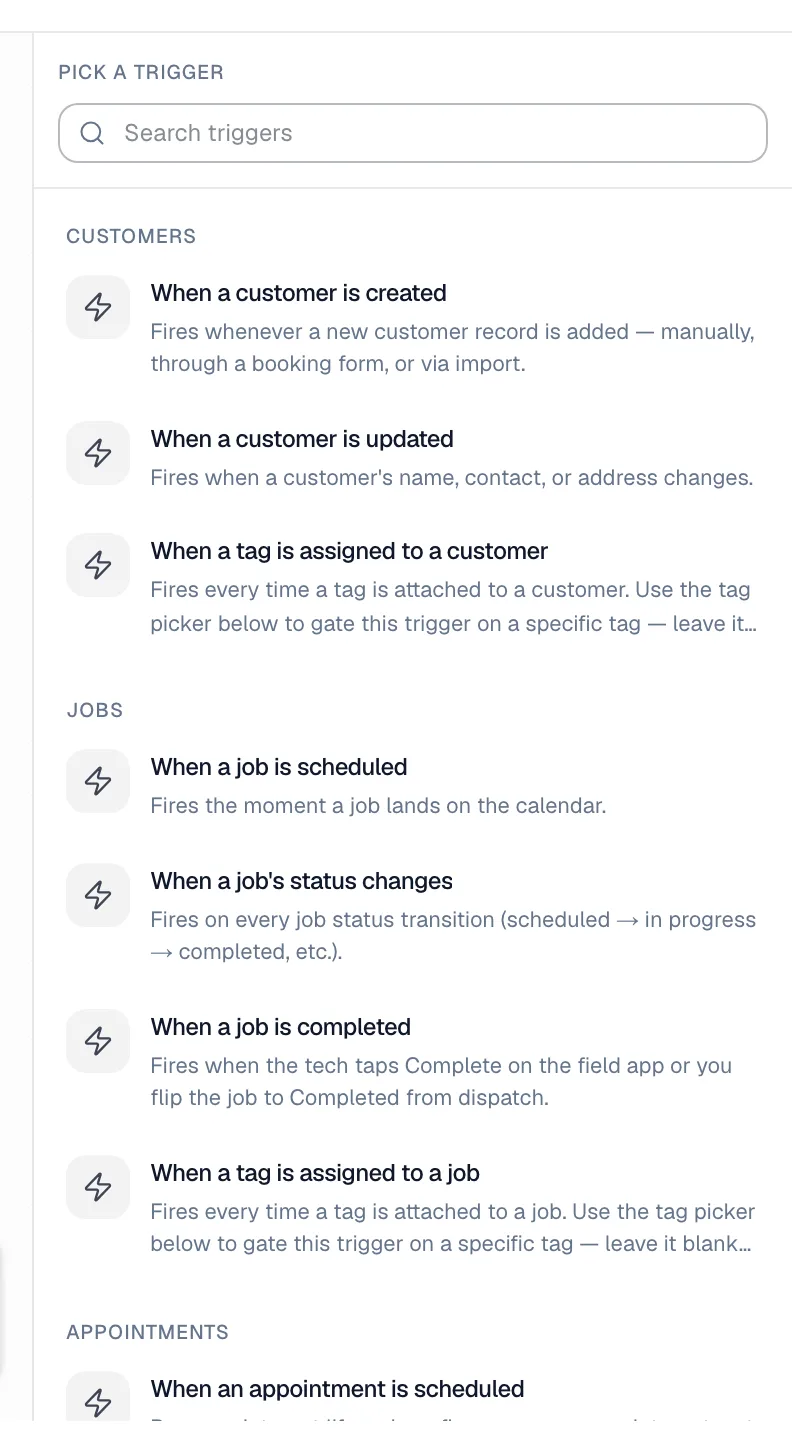
The two tag triggers need one more choice: under Trigger only when this tag is added, pick the tag. You can't activate them without one.
You can switch to a different trigger later with Change on the trigger card. Every trigger, and what it gives you to work with, is in the Automation triggers catalog.
Add steps
Click the + below the trigger. An Add a step list opens, grouped into:
| Group | Steps |
|---|---|
| Communication | Send SMS, Send email |
| Records | Get customer, Get estimate, Get job, Create customer, Update customer, Add tag to customer, Remove tag from customer, Create job, Update job, Update job status, Create invoice from job, Update membership, Add note |
| Operations | Assign technician to job |
| Integrations | Send / fetch via webhook |
| Logic | Filter, Paths, Delay |
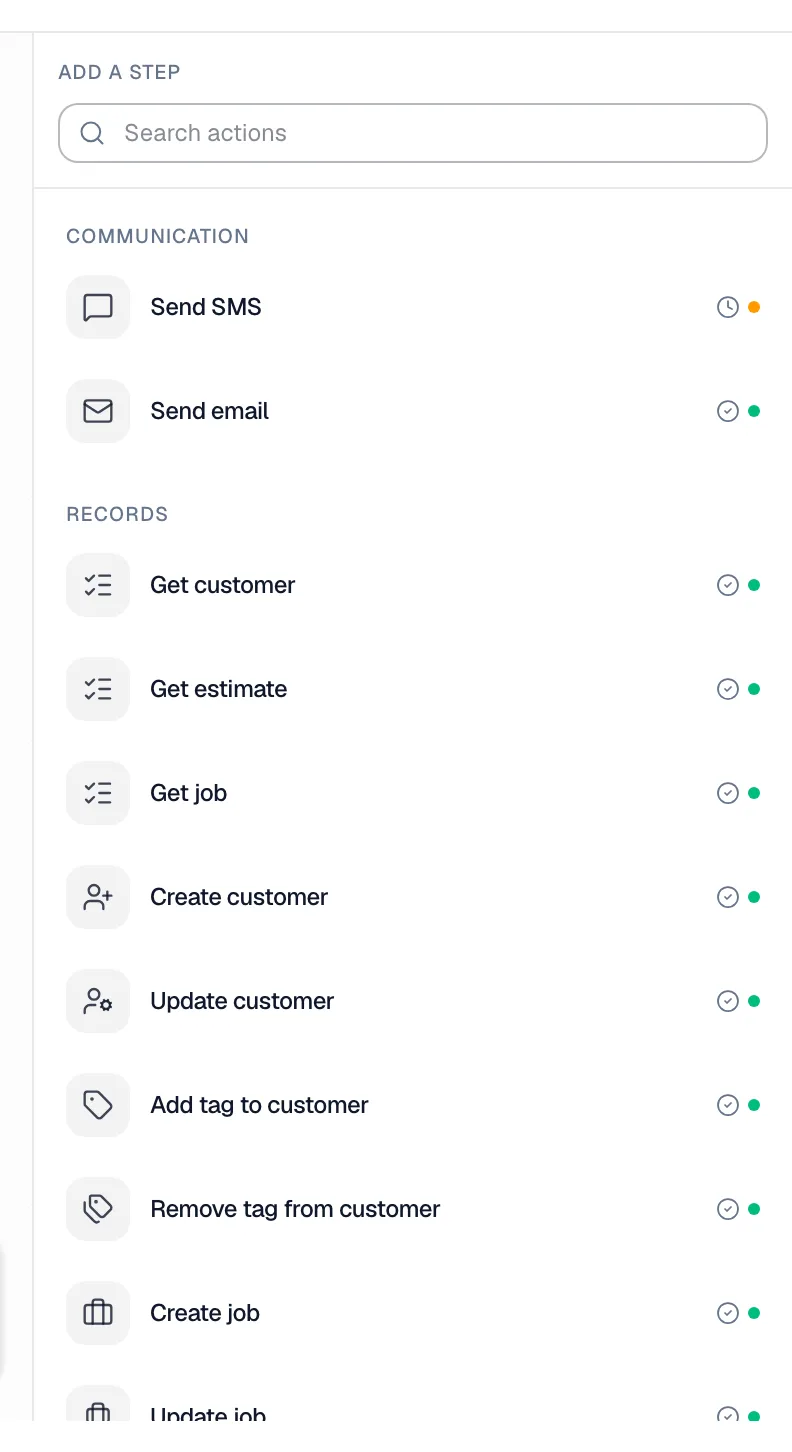
Click a step to add it, then fill in its settings in the panel that opens. A dot next to each step in the list shows whether it's ready to use; a step that needs something you don't have yet (like texting) shows a lock.
Add more steps with the + buttons between and below steps. Details for every step: Automation actions catalog. For conditions, branches and waiting: Filters, paths, and delays.
Personalize messages
In a text or email, insert details from the trigger or from earlier steps, such as the customer's first name or the job's appointment window. They go in as variables like {{customer.first_name}} and are filled in when the automation runs. See Variables and step outputs in messages.
Save
Click Save in the top bar (or press Ctrl+S / Cmd+S). The first time, you're asked to Name this automation, with an optional description. Each save creates a new version: you'll see Saved version 1, and the version number (v1, v2…) shows next to the status.
The builder doesn't save on its own. If you try to leave with unsaved changes, it asks whether to discard them.
Activate
Click Activate in the top bar. The status changes from Draft to Active and the automation runs on the next matching event.
Activate stays disabled, with the reason shown under the top bar, until:
- a trigger is picked (and a tag, for tag triggers),
- there's at least one step,
- your latest changes are saved,
- no step needs something your account doesn't have. For example, a Send SMS step needs texting.
If your texting registration is still in review, you can activate anyway; you'll see Will fire when Send SMS is approved.
Turn it off or change it
- Pause: flip the switch next to the name in the builder, or the switch on its row on the Automations page. The status shows Paused. Flip it back to resume.
- Edit: make your changes and Save. An active automation keeps running and uses the new version from then on.
- Rename or add a description: click the pencil next to the name.
- Delete: on the Automations page, click the trash icon on its row (or open the row and click Delete automation) and confirm. It stops running immediately; its past runs stay in All runs.
Try it out safely
There's no practice mode: an active automation sends real texts and emails and changes real records. To test:
- Point the first version at yourself. For example, set Send to to Custom phone or Custom email with your own number or address.
- Activate it and make the trigger happen once (schedule a job for a customer record you use for testing, send yourself an estimate, and so on).
- Click Runs in the top bar to see exactly what each step did. See Viewing automation runs and step timelines.
- When it looks right, switch Send to back to the customer, Save, and you're live.
For the Send / fetch via webhook step, Run test sends the request right away and shows the response, without running the rest of the automation.
Good to know
- Where it shows up: once saved, your automation appears on the Automations page in Uncategorized with its own switch. Move it into a folder with folders.
- Safety limits: one run can take at most 100 steps. Automations that set off other automations stop after 5 in a chain, shown as Loop killed in the runs list.
- Daily caps: automations can send up to 500 texts and 500 emails per day for your business, and a customer gets at most one automated text and one automated email every 25 minutes.