
Some commercial customers are really a family of accounts: a property management company with several buildings, a restaurant group with a few locations, a school district with many campuses. Run a Call handles this with a parent account and sites under it. Each site is its own customer — its own addresses, contacts, equipment, jobs and invoices — and the parent shows what's owed and what's open across all of them.
Only need several addresses for one customer who pays for everything the same way? Add properties instead — see Adding multiple properties for one customer. Use sites when each location needs its own contacts, its own invoices or its own balance.
Who can do this
Owners, admins and dispatchers (anyone who can edit customers).
Create the parent account
The parent is usually the company that manages or owns the locations.
- Click Contacts → New customer.
- Choose Commercial and enter the Company / business name.
- Enter the primary contact — for example the property manager or accounts payable — and Save customer.
You can leave the parent without any addresses of its own; the addresses live on the sites.
Add the first site
- Click Contacts → New customer again.
- Choose Commercial and enter the location's name — for example Riverside Apartments – Building A.
- In Parent account, search for and pick the parent.
- Add the location's own contact and address, then Save customer.
Only a top-level customer can be a parent — a site can't have sites of its own.
Add more sites from the parent
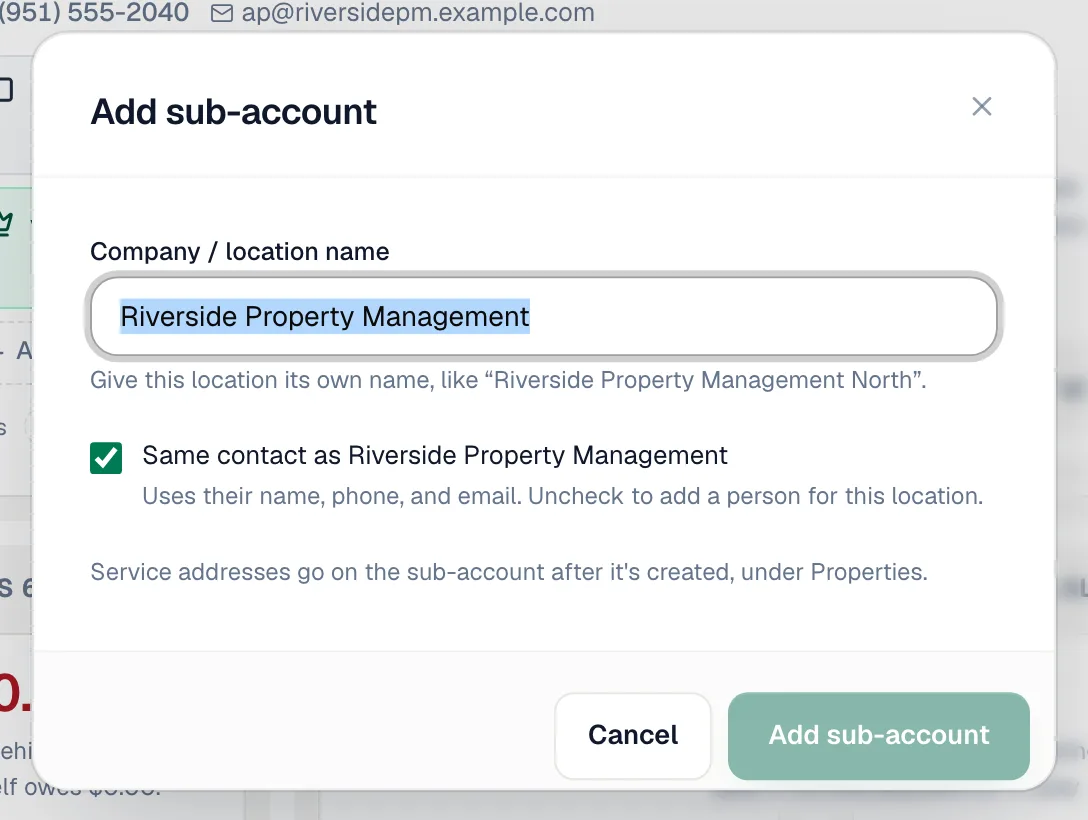
Once a parent has at least one site, its profile gets a Sites tab (it opens first when the parent has no addresses of its own). Click Add a site.
In Add sub-account:
| Field | What to enter |
|---|---|
| Company / location name | Starts as the parent's name — give the location its own name, like Riverside North. |
| Same contact as [parent] | Checked by default: the site uses the parent's name, phone and email. Uncheck to enter Contact first name, Contact last name, Phone and Email for this location. |
Click Add sub-account, then open the new site and add its service address on the Properties tab.
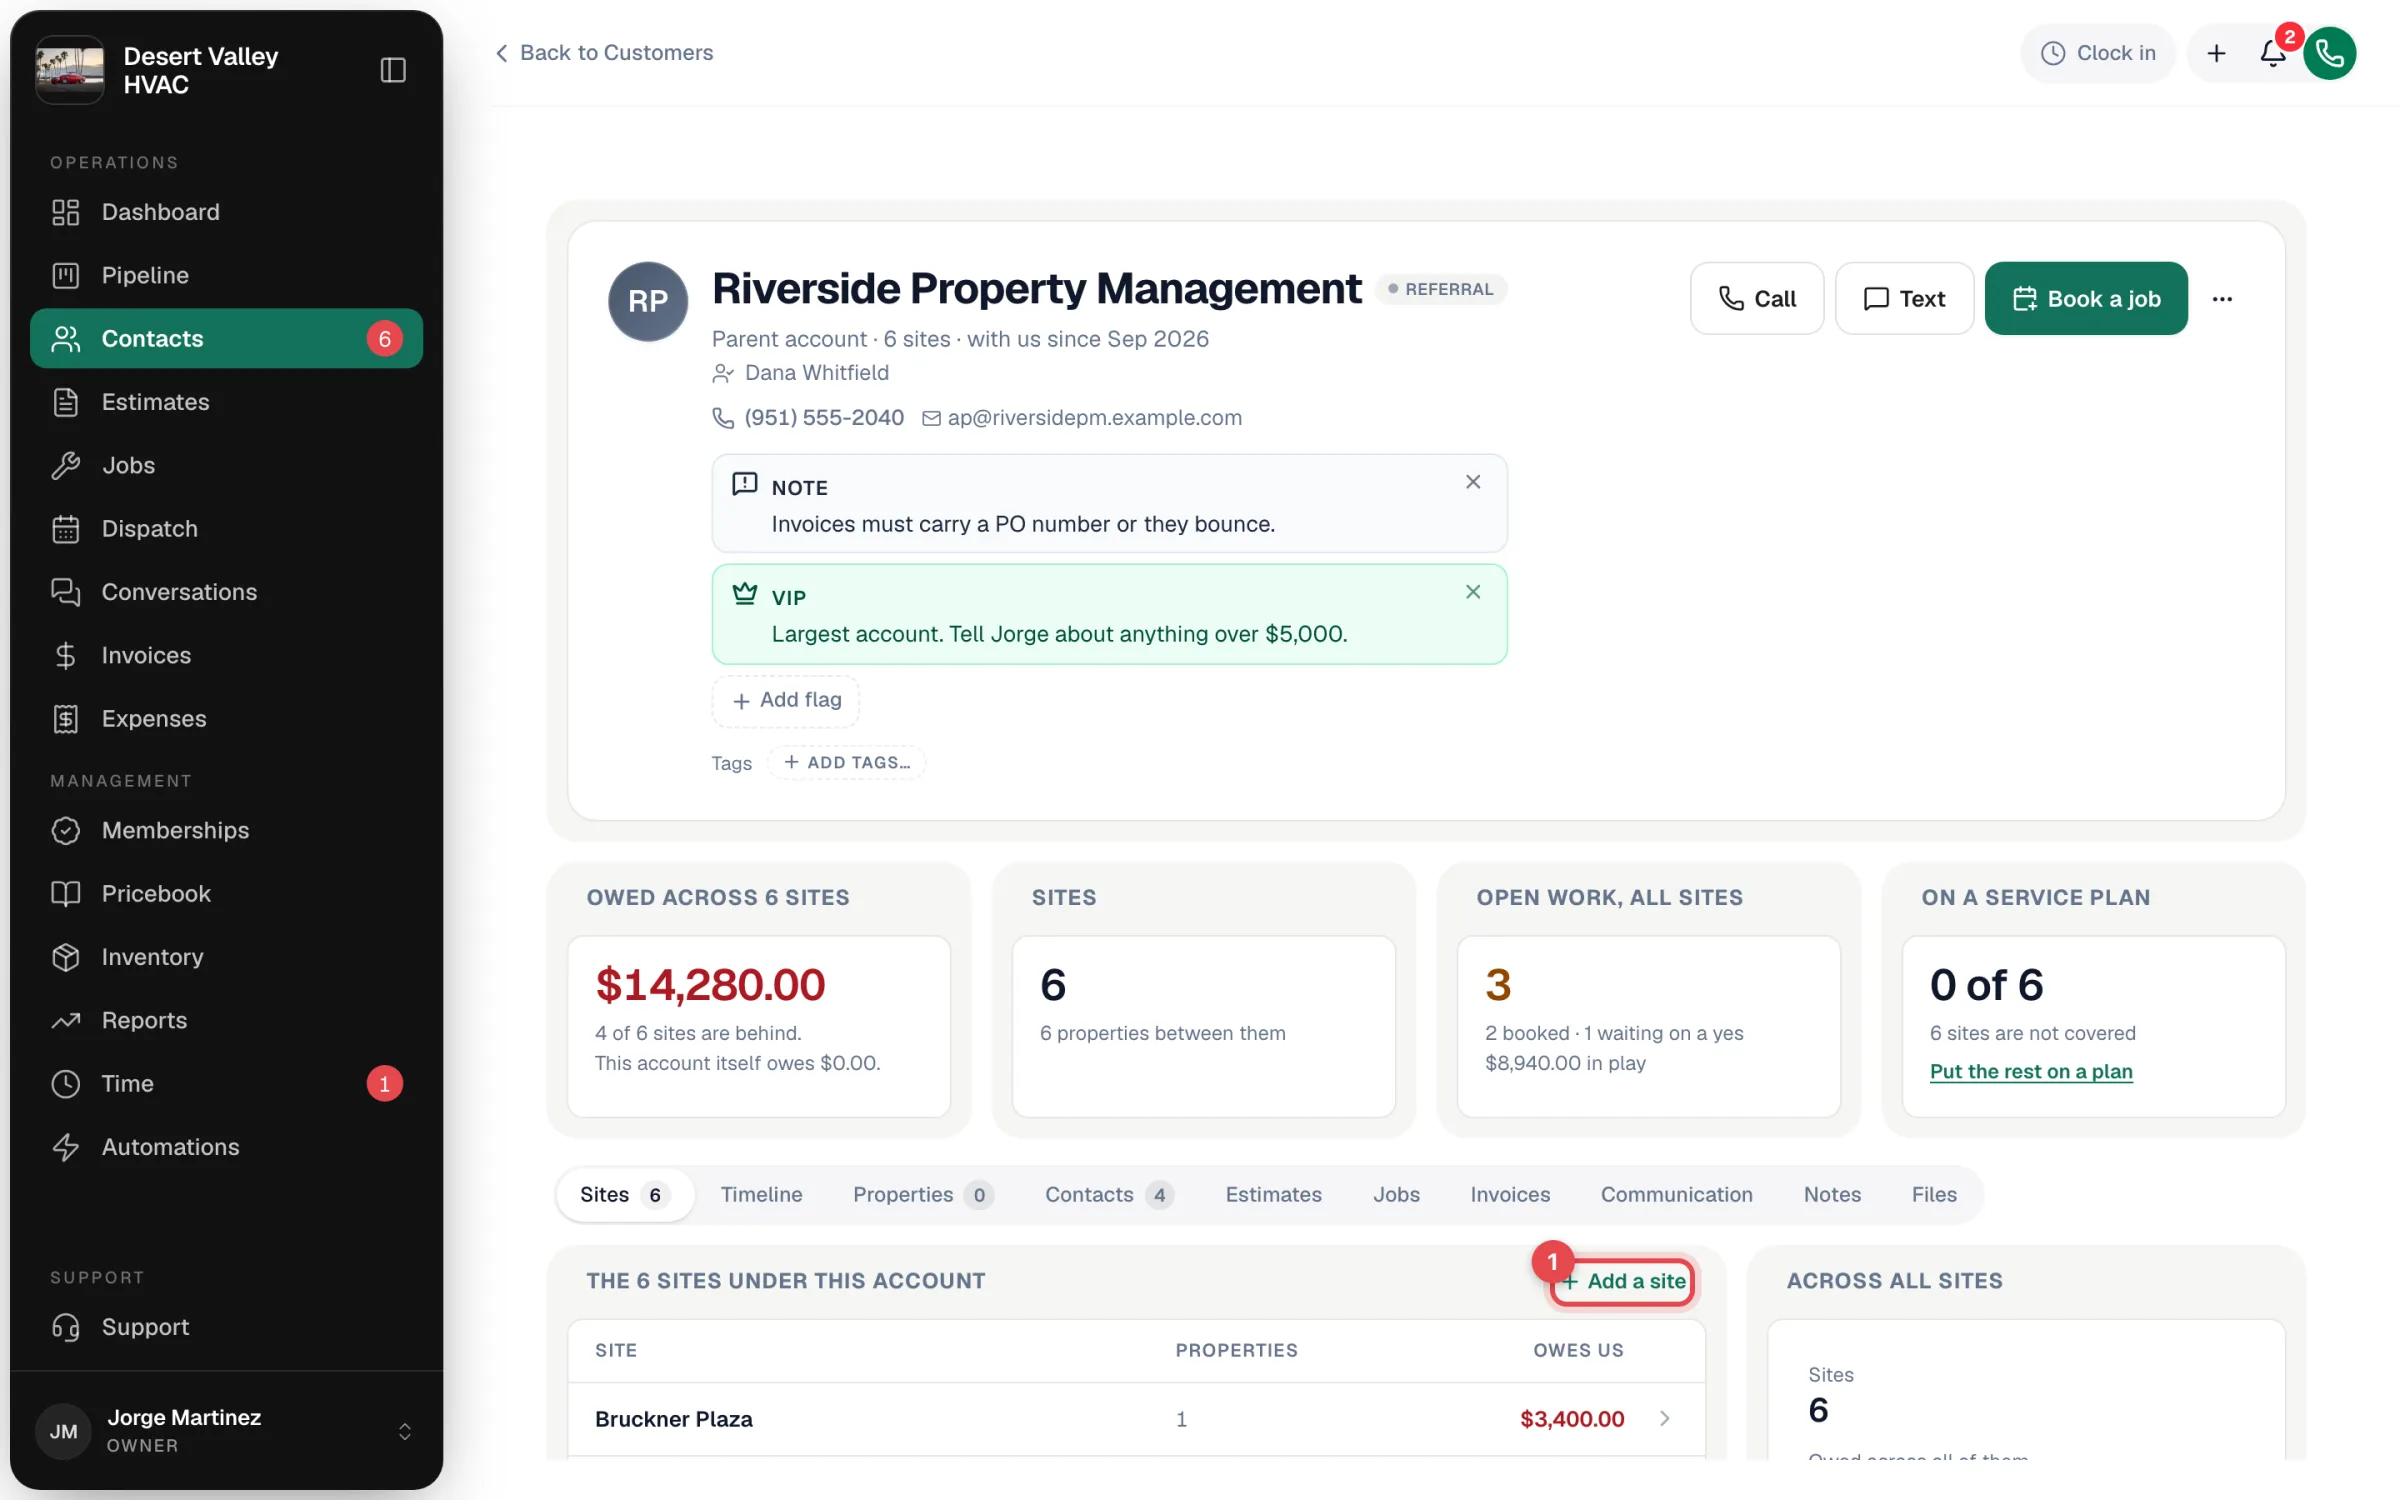
What the parent shows
| Where | What you see |
|---|---|
| Header | Parent account · 6 sites. |
| Tiles | Owed across N sites (and how many are behind), Sites, Open work, all sites, and On a service plan (how many sites are covered). |
| Sites tab | Each site with its number of properties and what it Owes us, plus a total for all sites. Click a site to open it. |
| Across all sites (right column) | Site count, total owed and total properties. |
What a site shows
A site's profile has a banner at the top — A site of [parent] · N sites · $X owed across all of them — that links back to the parent. Everything else works like any other customer.
Linking or unlinking an existing customer
Open the customer, click ⋯ → Edit customer, and set or clear Parent account. This field appears for customers with a company name.
Taking one payment for many invoices
When a property manager sends one check for several buildings, open the parent's Invoices tab and click Record one payment for all. The Record payment window lists the open invoices — the parent's and its sites' — so you can spread the payment across them or use Apply oldest first.
Record one payment for all appears when the account you're on has more than one open invoice of its own. If every open invoice belongs to the sites, record the payment from a site that has several, or on each invoice.
Good to know
- Deleting a parent doesn't delete its sites; they become standalone customers.
- Merging: you can't merge a parent into one of its own sites. If you merge two parents, the sites move to the one you keep.
- Equipment lives at each site's properties, not on the parent.