
A job is one visit (or one project) for a customer at one of their properties. Booking one takes about a minute: pick the customer, describe the problem, and — if you already know — choose when and who.
Who can create jobs
Owners, admins and dispatchers, from the office app. Techs can book jobs for themselves from the mobile app — see Booking a job for yourself from the app.
Where to start
| From | Click |
|---|---|
| Jobs page | New job (top right) |
| Anywhere in the office app | The + button in the top bar, then Job |
| A customer's page | Book a job, or Book here on one of their addresses |
| The dispatch board | Click an empty spot on the Timeline or Calendar, then New job — the date, time (and tech, on a Timeline row) are filled in |
| An estimate | Convert to job — see Creating a job from an estimate |
The steps below use the New job page.
Pick the customer
Under Customer, start typing a name, phone number, email or address in Search by name or phone, then click the customer.
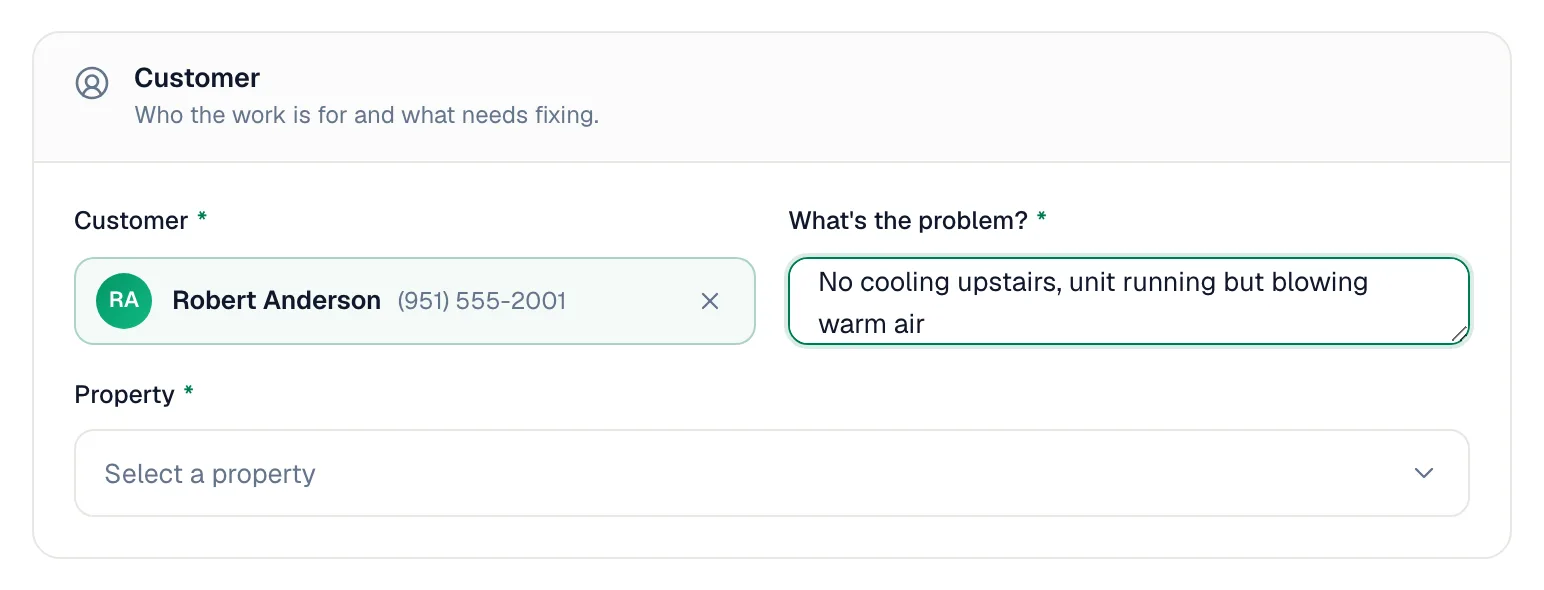
New customer? Type their name and click Add "…" as a new customer. Fill in First name, Last name, and a Phone and Email if you have them, then click Save and continue.
Describe the problem
Type what the customer told you in What's the problem? — for example, No cooling upstairs, started this morning. This becomes the job's title, and your tech reads it before arriving.
Confirm the property
If the customer has one property, it's picked for you. If they have several, choose the right one under Property. If they have none yet, click Add this customer's property and enter the address.
If the customer has saved contacts (a tenant or property manager, for example), you can also choose who the job is for under Assign to.
Choose the type and priority
| Field | What to pick |
|---|---|
| Type | The kind of work — Service, Maintenance, Installation and so on. Your list comes from Settings → Tags & Job Types; click Add new job type… to add one on the spot. Some types add default line items, like a dispatch fee. |
| Priority | Emergency (On site today, ahead of other work), Urgent (Within 24 hours) or Normal (Booked into the normal schedule). Emergency and Urgent jobs send your office team an in-app notification. |
| Reference # | Optional. The customer's own PO, work order or ticket number. |
Schedule it (or leave it for later)
Under Schedule:
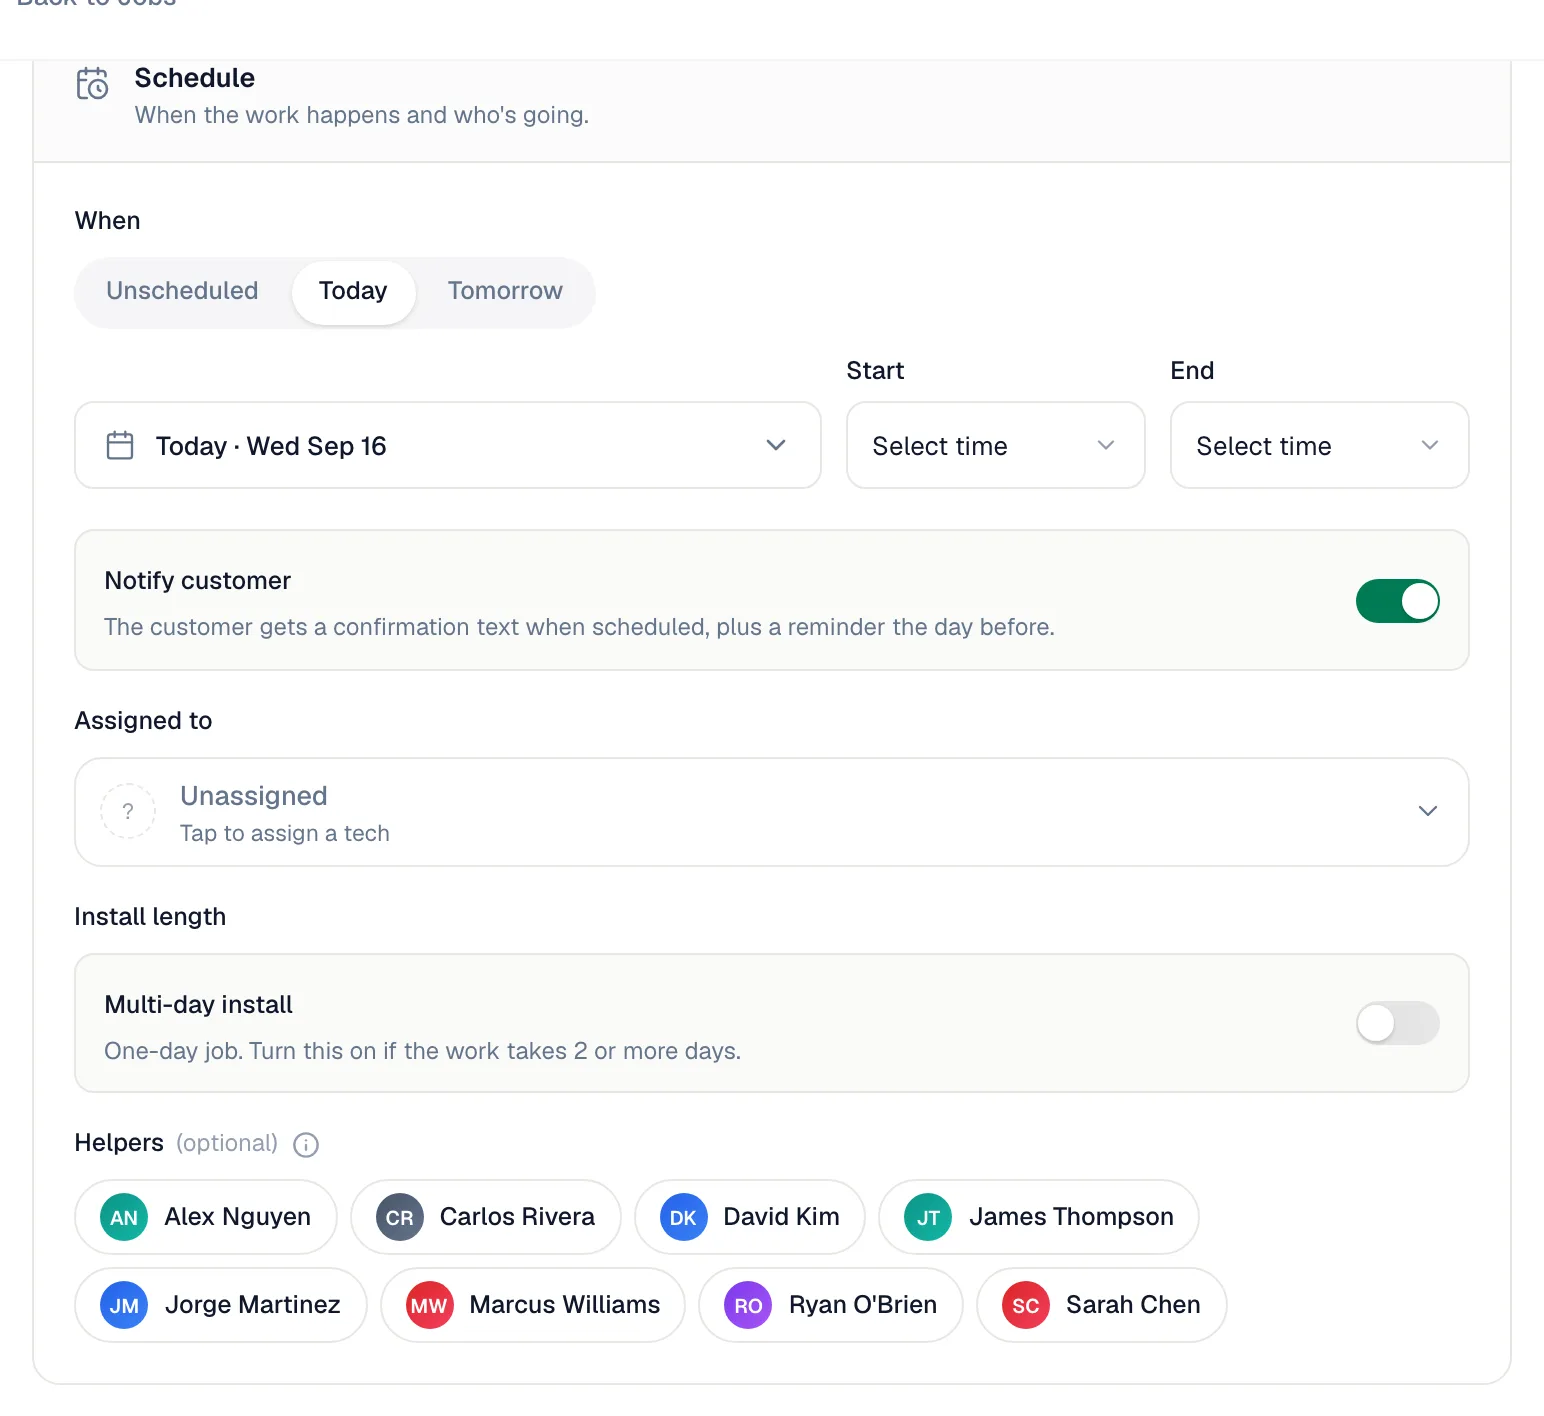
- When — choose Unscheduled, Today or Tomorrow, or Pick a date (optional).
- Start and End — appear once there's a date. After you pick a start time, the Job length buttons (1h to 4h) set the end time for you.
- Assigned to — the lead technician. You need a date first.
- Helpers (optional) — other techs going along.
- Notify customer — on by default. It sends a booking confirmation text once the job is scheduled with a tech, plus a reminder the day before. Turn it off to book quietly.
Not sure when yet? Leave When on Unscheduled. The job waits in the unassigned queue on the dispatch board. See Creating unscheduled jobs.
For work that spans several days, turn on Multi-day install under Install length. See Planning multi-day jobs.
Add equipment or forms (optional)
Under More options, attach the Equipment you're servicing and any Forms (checklists) the tech should fill in. This section only shows when the property has equipment on file or you've built forms.
Click Create job
You land on the new job's page. From there you can add parts and labor, notes, tags and files.
What happens next
- Status — the job is Scheduled if it has a date, or Created if not.
- Default line items for the job type are added automatically. See Starting every job of a type with default line items.
- Booking confirmation — if the job has a date and a technician, Notify customer is on and booking confirmations are turned on in Automations, the customer gets a text about 5 minutes later.
- Day-before reminder — sent the day before the visit if reminders are on.
- The dispatch board shows the job on the tech's row, or in the unassigned queue.
See What customers receive when you schedule a job for every text and email.
Logging a job that already happened
You can pick a past date — the form marks it past date. Save the job, then use Change status → Completed on the job page. Turn Notify customer off first so the customer doesn't get a confirmation for a visit that's already over.
Good to know
- Tags, notes, line items and files are added on the job page after you create the job.
- Where the job number comes from — every job gets the next number automatically, like JOB-0042. See Job numbers and reference numbers.
- Repeat visits — there's no setting that makes a job repeat on its own. Regular maintenance visits come from memberships: due visits show up on the Memberships page, where you schedule them as jobs. See Scheduling membership tune-ups.
- The Create job button stays grey until there's a customer, a property and a problem description (and a date, if you picked a technician).