
A bundle template is a saved package of pricebook items, split into tiers such as Good / Better / Best. Build it once, then drop a whole package onto an estimate, job or invoice instead of adding items one by one. It's the fastest way to present options at the kitchen table or bill a flat-rate repair.
Who can do this: owners, admins and dispatchers.
Start a new template
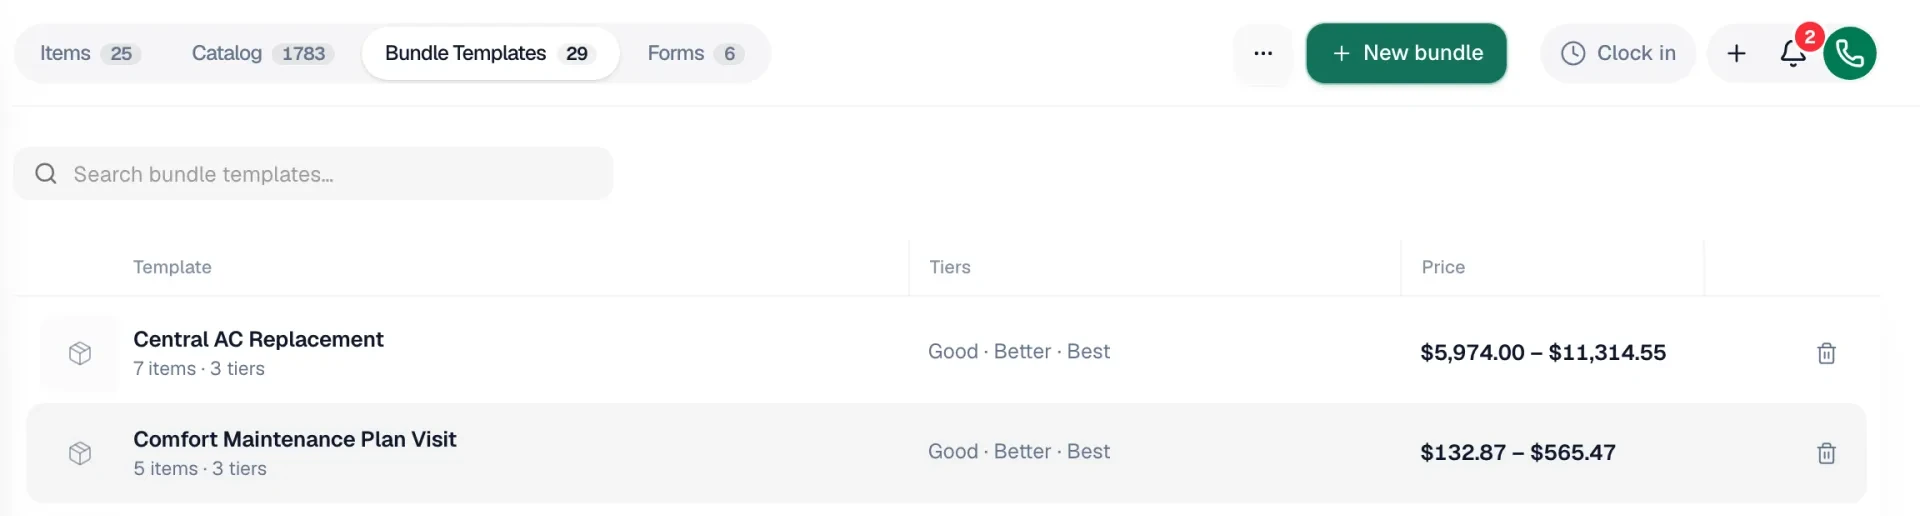
Go to Pricebook, click the Bundle Templates tab, then New bundle. The New bundle template page opens with three tiers ready: Good, Better and Best.
Name it
Enter a Template name, such as 3-Ton AC Change-out. This is the name your team sees when picking a template.
Build each tier
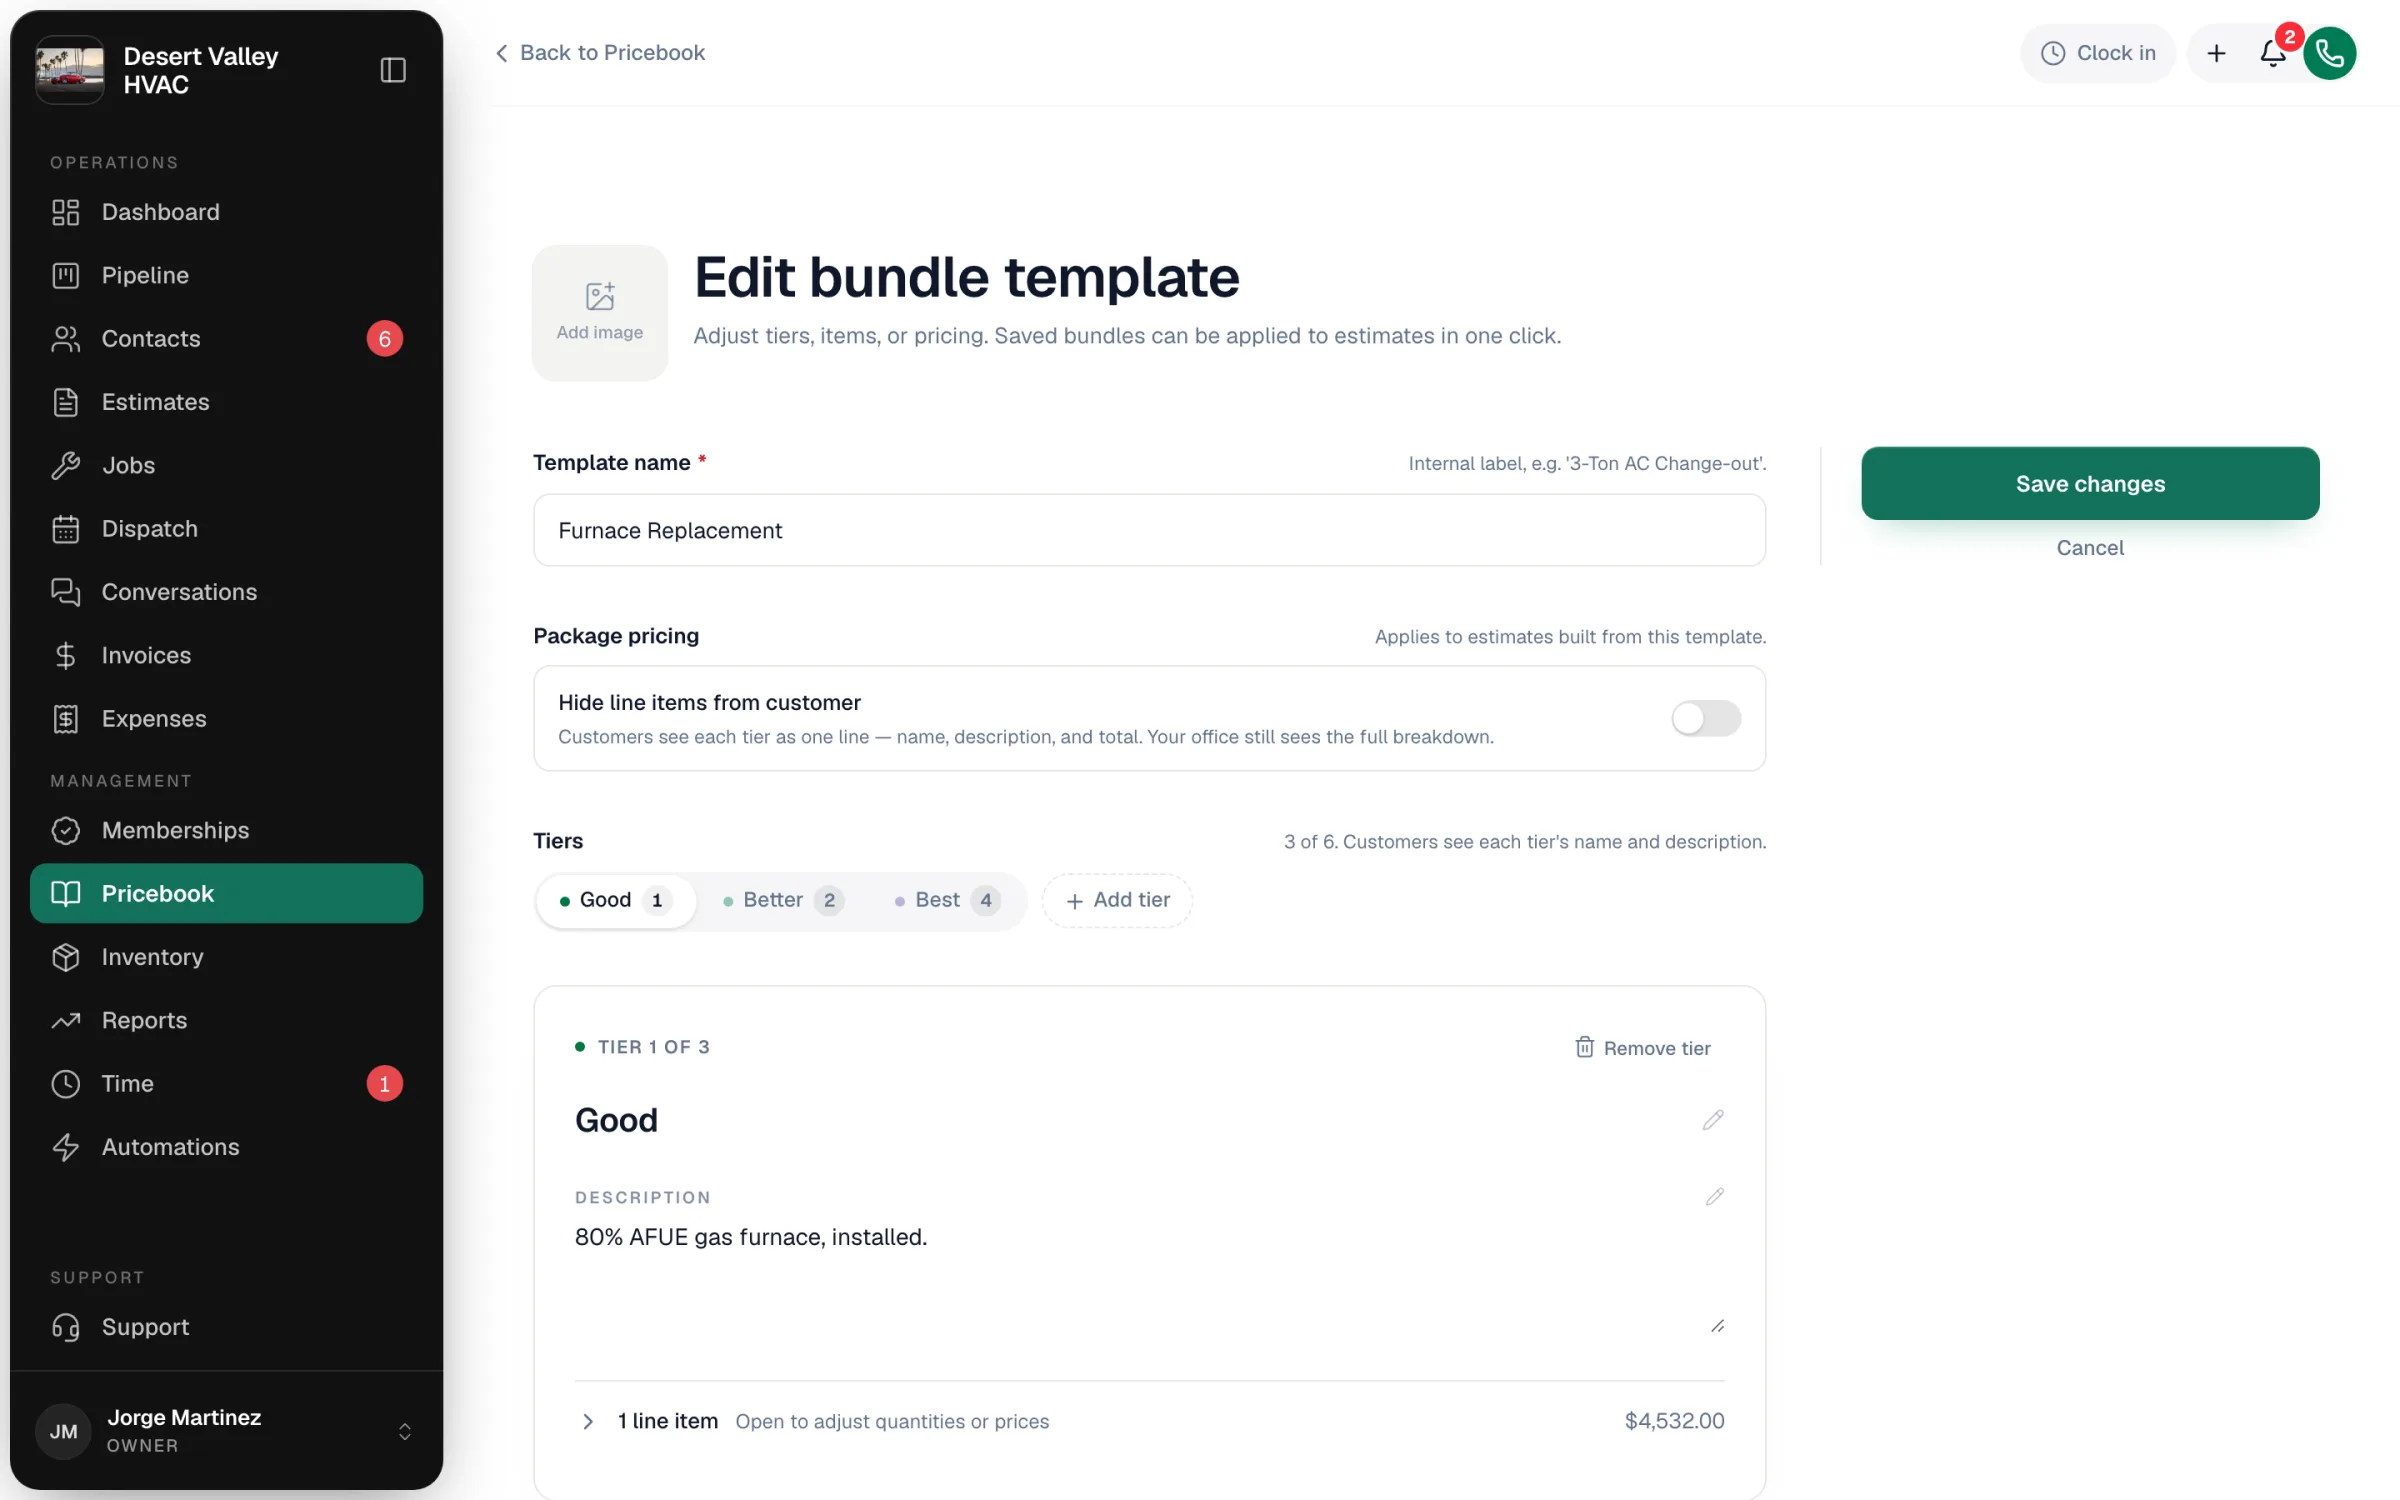
Click a tier pill (Good, Better, Best) to work on it.
For each tier:
- Click the tier name to rename it if you like (for example Bronze, Silver, Gold).
- Write a Description: what's included, warranty length, why a customer would pick it. Customers see each tier's name and description.
- Click Add from pricebook and tap the items this tier includes. To use something that isn't in your pricebook yet, type its name and add it; it's saved to your pricebook (in your first category) so the bundle can use it.
- Open the item list (N line items — Open to adjust quantities or prices) to change quantities, override a price for this template, or remove an item.
Use Add tier for up to 6 tiers, or Remove tier to drop one. Every tier needs at least one item before you can save.
Choose how customers see the price (optional)
Under Package pricing (it applies to estimates built from this template), turn on Hide line items from customer to sell each tier as one line: customers see the tier name, description and a single total, while your office still sees every item.
With it on, each tier gets a Package price. Leave it tracking the sum of the items, or type a fixed price; the items then become the internal breakdown.
Save
Click Save bundle template. You'll see Bundle template saved. When editing an existing template, click Save changes. After the first save you can also add an image with Add image at the top of the page.
Use a template
| Where | How | What happens |
|---|---|---|
| Estimate (all options) | Apply template at the top of the estimate | Each option is filled from the template's tiers, replacing what those options held. You're asked to confirm. |
| Estimate (one option) | Apply bundle inside the option | Adds one tier's items on top of what the option already has. |
| Job | Parts & Labor tab → Apply bundle | Pick the template and tier; each item is added as its own line. |
| Invoice | Apply bundle under the line items | Same as on a job. |
| Mobile app | Job → Parts and labor → Apply a bundle, or Apply template / Apply bundle on an estimate | Same results as in the office. Needs a connection. |
Once applied, the lines are ordinary lines: change quantities, prices or discounts as needed.
Edit or delete a template
- Edit: click the template on the Bundle Templates tab, make changes and click Save changes. Estimates, jobs and invoices that already used it don't change.
- Delete: click the trash icon on its row and confirm. Anything that already used it keeps its lines.
Start with the five to ten jobs you quote most often, such as system change-outs, tune-up packages and common repairs.