
The dispatch map shows your jobs, your techs and your service areas on one full-screen map. Use it to see where the work is, hand a group of nearby jobs to one tech, and keep each tech in their part of town.
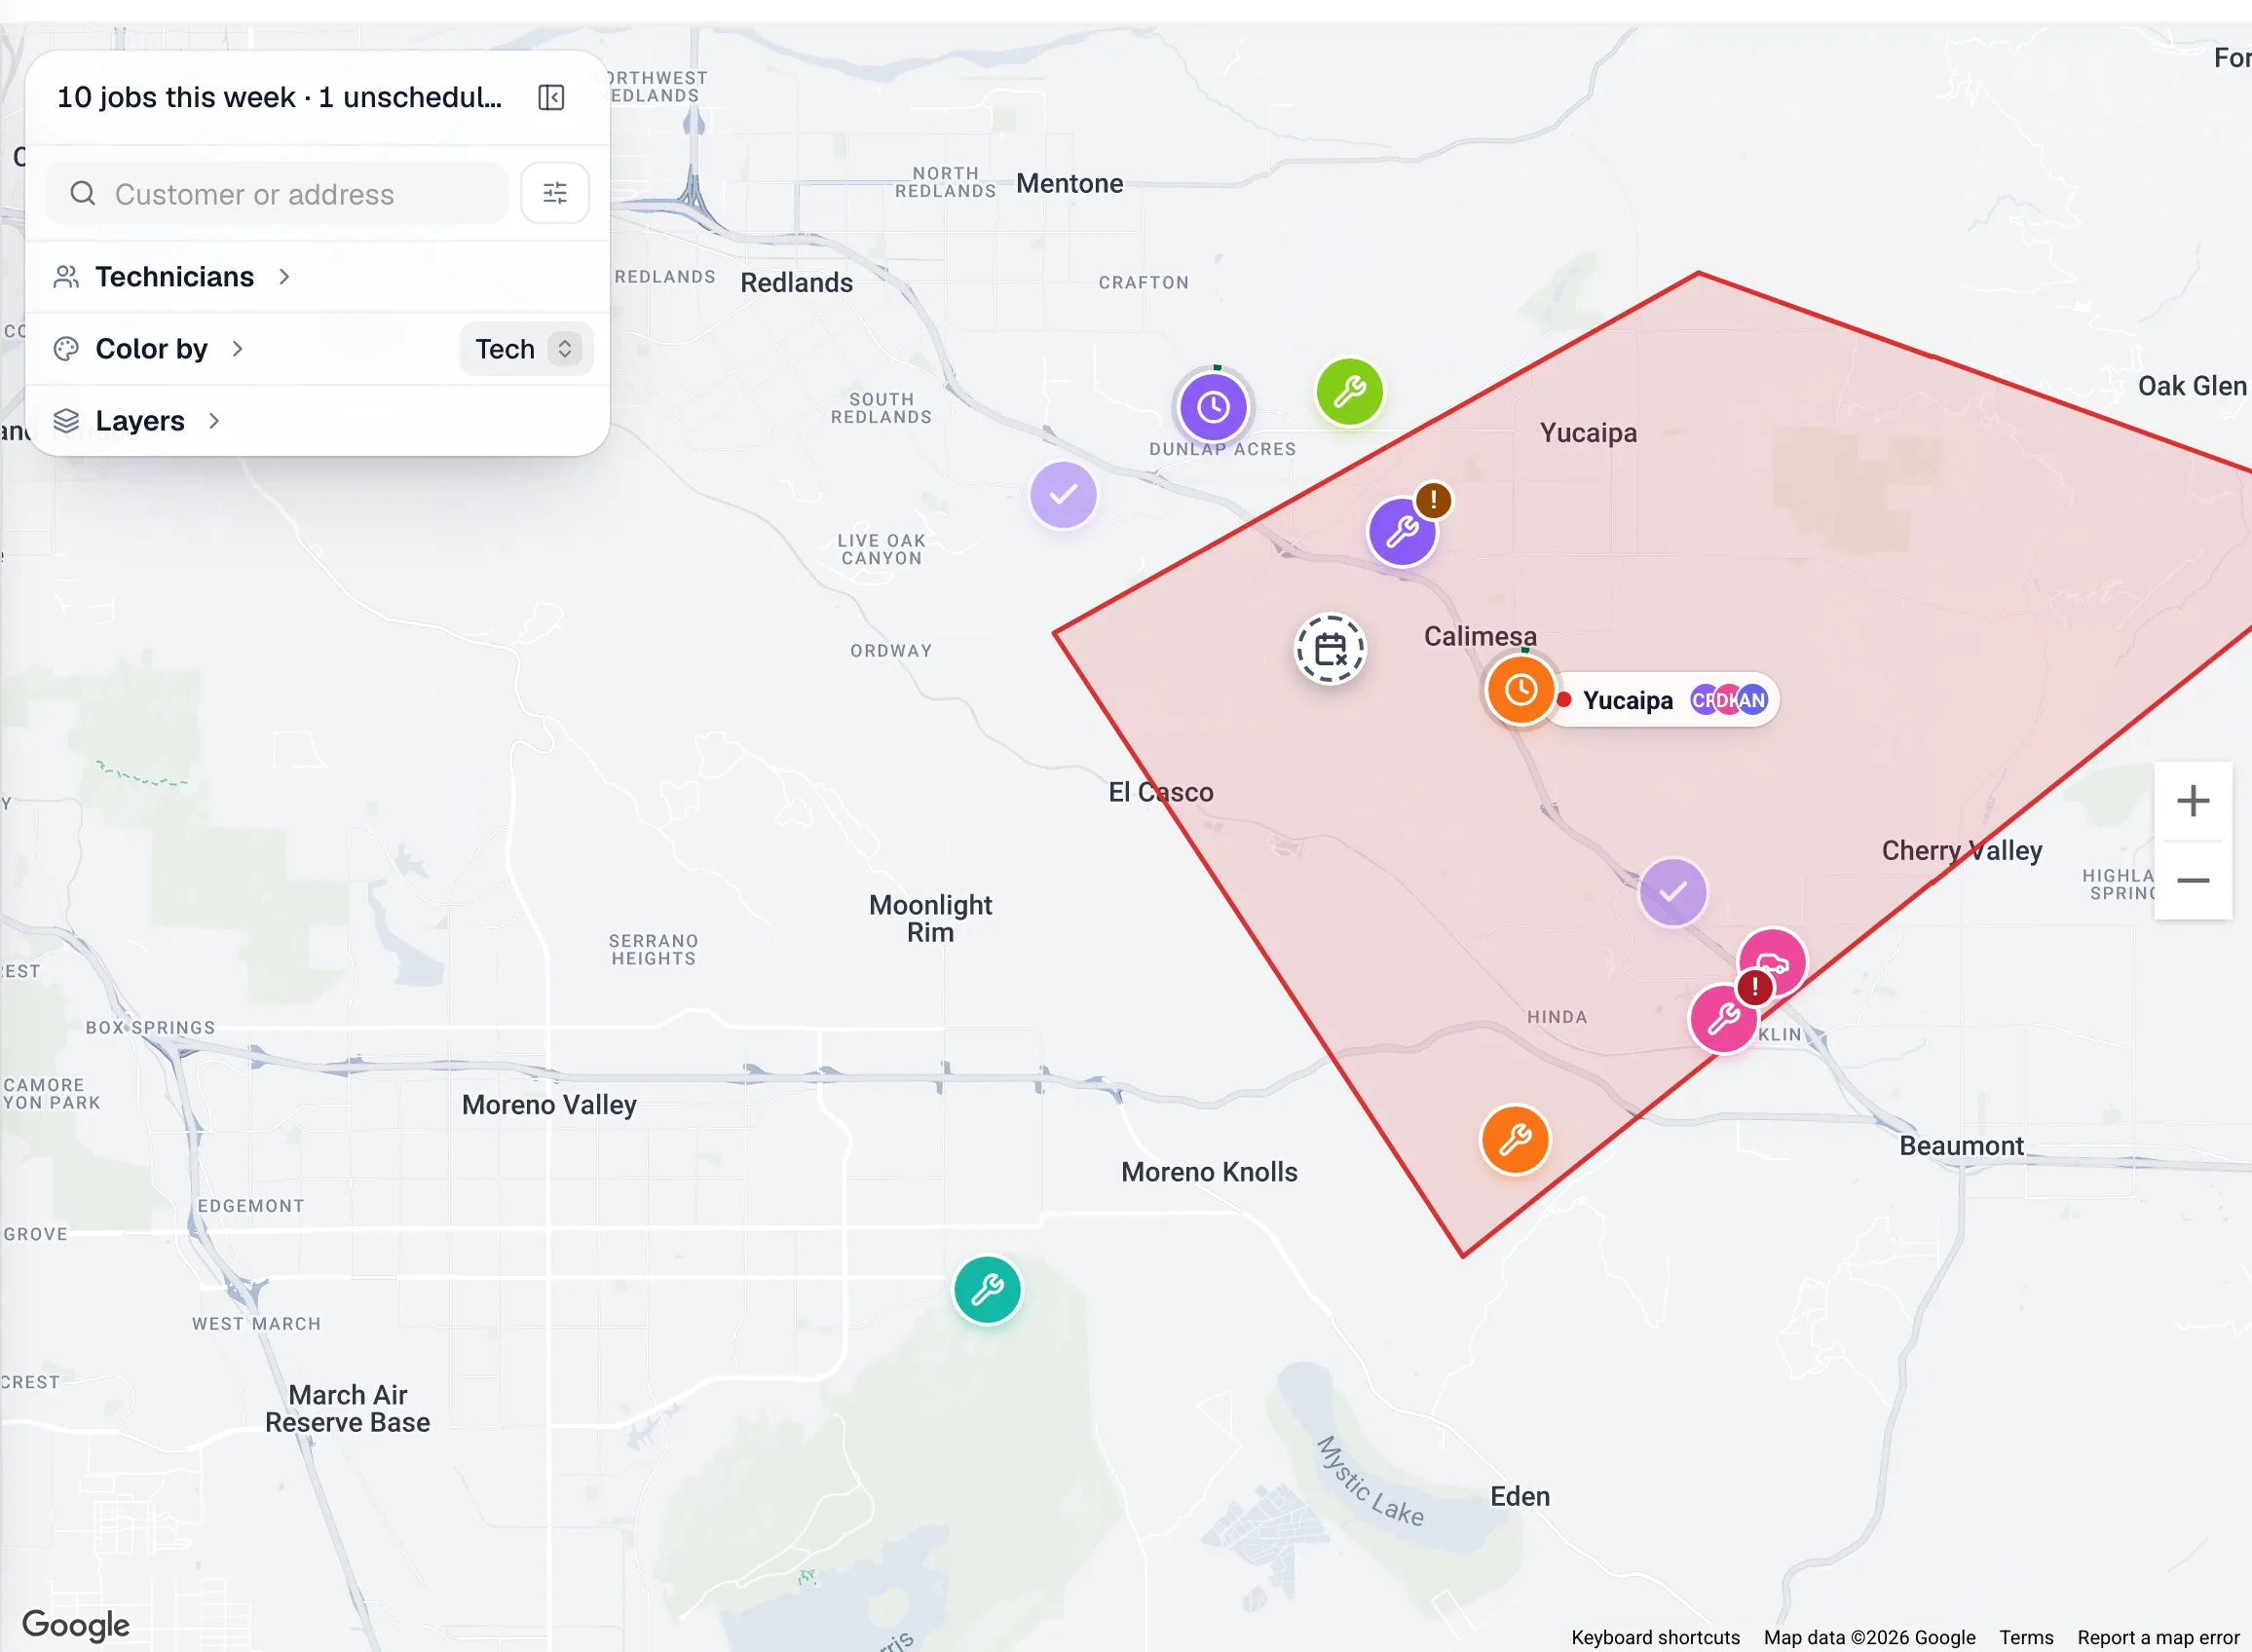
Open the map
- Go to Dispatch and click Map at the top left.
- Use the dropdown next to the gear to pick Day, Week or Month. Week and Month show every job in that range on one map, which is handy for planning. Day shows the day on screen, and on today it also shows where your techs are right now.
- Move between days, weeks or months with the arrows, or click Today.
Click Map again to go back to the Timeline or Calendar view you were on.
The side panel
The panel on the left has everything you need to read the map:
- The top line sums up what you're looking at, for example 10 jobs this week · 1 unscheduled.
- Search finds a customer or an address. The button next to it opens Filters for job type, status, priority, tech, business unit and tags.
- Technicians lists your team. Working, Free and All narrow the list. Click a tech to follow them on the map and see their day.
- Color by colors the pins by Tech, Job type, Status, Revenue or Priority. Open it to see the legend. Click a row in the legend to show only those pins.
- Layers turns parts of the map on and off.
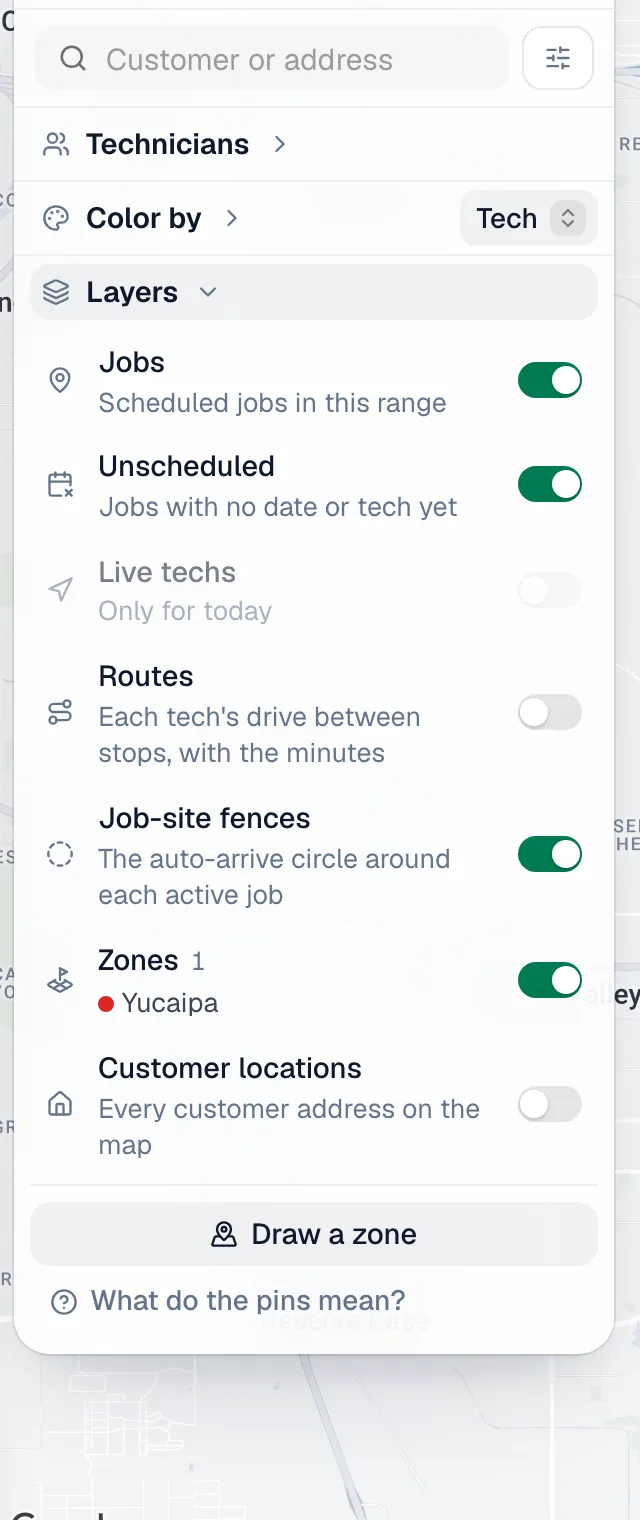
| Layer | What it shows |
|---|---|
| Jobs | Scheduled jobs in the range |
| Unscheduled | Jobs with no date or tech yet |
| Live techs | Where each tech's phone is. Today only |
| Routes | Each tech's drive between stops, with the minutes |
| Job-site fences | The auto-arrive circle around each active job |
| Zones | Your service areas, listed by name |
| Customer locations | A dot for every customer address |
What do the pins mean? at the bottom of the panel explains the pin shapes and badges.
New to the map? Turn on Help tips in Board settings (the gear) under Map. Every control then explains itself when you point at it.
Assign a job from the map
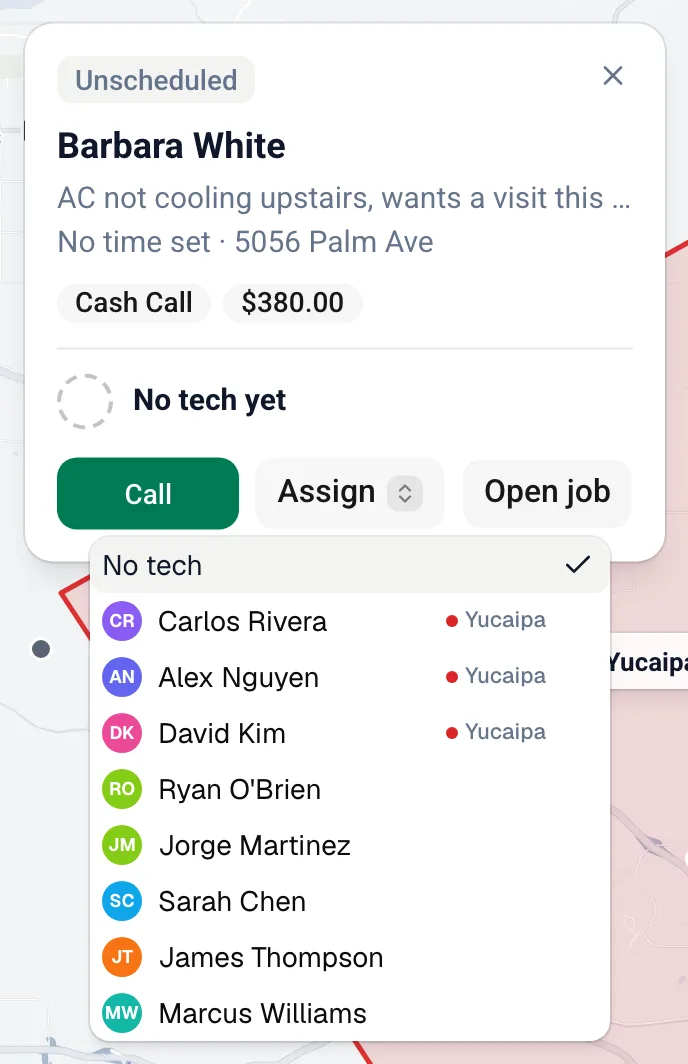
- Click a pin to open the job card.
- Click Assign, or Reassign if it already has a tech.
- Pick the tech. Techs who cover the zone the job sits in are listed first, with the zone's name next to them. You can still pick anyone.
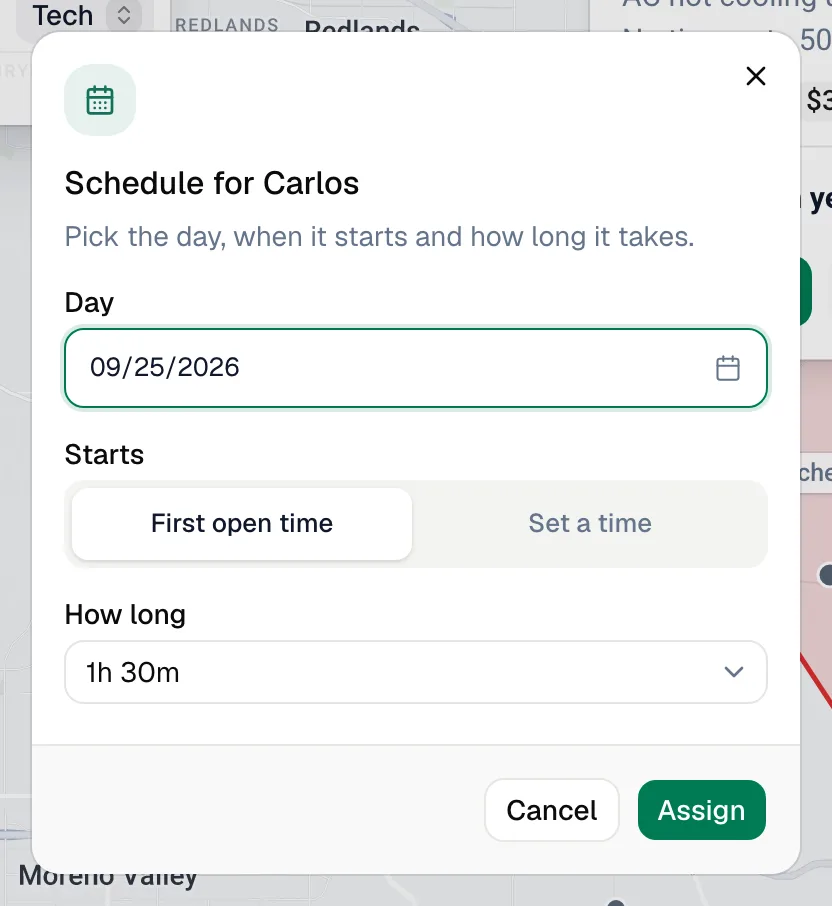
- In Schedule for…, set the Day, when it Starts and How long it takes. First open time puts the job in the tech's first free slot that day. Set a time lets you choose the exact start.
- Click Assign.
A job that's already scheduled opens with its current day, time and length filled in, so reassigning can move it at the same time. Picking No tech unassigns the job straight away.
Assign a group of jobs to one tech
- Hold Shift and drag a box over the jobs you want. Hold Shift and Cmd (or Ctrl) to add to what's already selected, or Option (or Alt) to take jobs out.
- The bar at the bottom shows how many jobs you picked and what they're worth.
- Pick a tech and click Assign.
If some of the jobs have no day yet, Run a Call asks for the day and how long they take. Each one goes in the tech's next open slot that day. Jobs that already have a day keep their day and time.

Customer locations
Turn on Customer locations in Layers to see a dot for every customer address. It's a quick way to spot where your customers cluster.
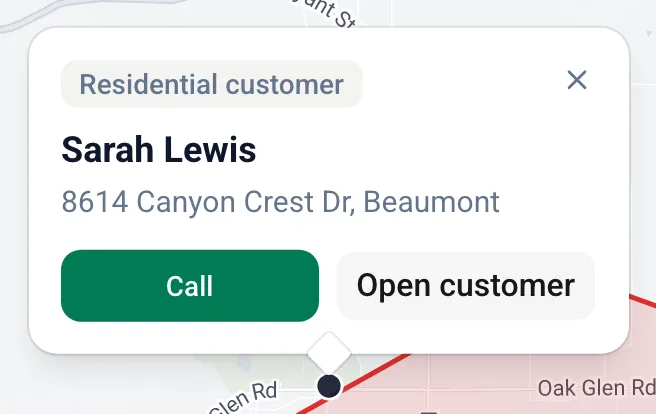
- Point at a dot to see the customer's name.
- Click a dot to open a card with the name, address and property type. Open customer takes you to the customer. Call appears when your company has the phone add-on.
Service zones
Zones are the areas your techs cover, like North side or Downtown. Owners, admins and anyone whose role has full dispatch access can draw and edit them, on a computer.
Draw a zone
- Open Layers and click Draw a zone.
- Click the map at each corner of the area. You need at least three corners. Backspace removes the last corner and Esc cancels.
- Click Finish, or double-click the last corner.
- Name the zone and click Save zone.
Put techs in a zone
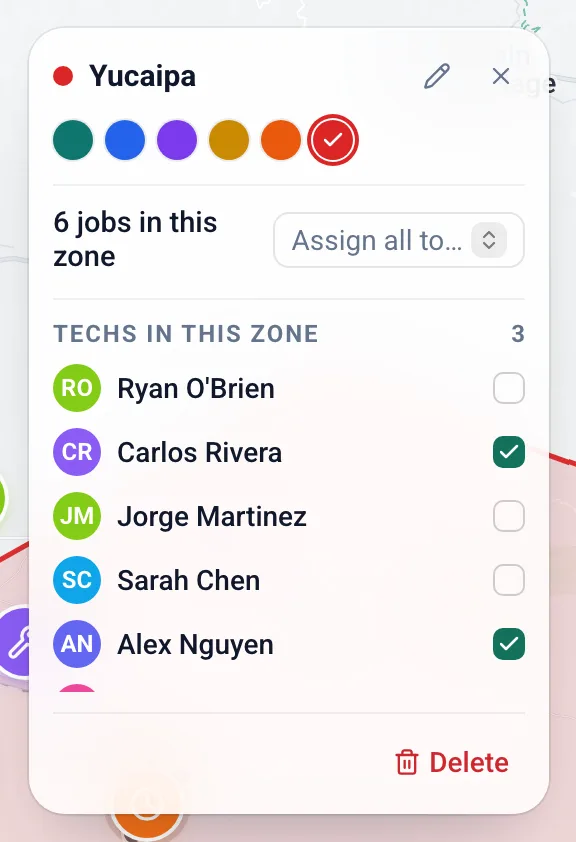
Click the zone's name tag on the map, or its outline, to open the zone card. There you can:
- tick the techs who work that area under Techs in this zone,
- rename it with the pencil or change its color,
- see how many jobs sit inside it and hand them all to one tech with Assign all to…,
- Delete the zone. Jobs and techs aren't affected.
Once a zone has techs, the Assign menu on any job inside it lists those techs first. It's guidance, not a rule: you can always pick someone else. Click a tech in Technicians to see which zones they cover.
On a phone or tablet
On a phone or iPad, Dispatch shows a simpler list with a Map tab that lists the day's addresses, with Go for directions. The full map, box-select and zone drawing need a computer.