
The queue at the bottom of the dispatch board holds every job that doesn't have a technician yet — new calls, jobs from approved estimates, follow-ups and unscheduled installs. Work it from left to right: pick a tab, assign the job, and it moves up onto a tech's row.
What lands in the queue
Any job with no technician that isn't completed, invoiced, closed, cancelled or marked no show. It doesn't matter which day you're looking at — the queue is the same on every date. It shows the 50 most recent jobs; if you have more, narrow it down with a tab.
Jobs are listed emergencies first, then urgent, then normal, oldest first within each. Click a column header to sort differently for now.
The tabs
| Tab | Shows |
|---|---|
| All | Every job in the queue. |
| Booked | Jobs from an approved estimate that already have a date and time, usually a morning or afternoon slot the customer picked. |
| Callback | Jobs from an approved estimate that don't have a date yet, so you call the customer to set one. |
The number on each tab is how many jobs are in it.
Make your own tab
- Click + next to the tabs.
- Give it a Name (for example Emergencies or Installs).
- Under Which jobs show up, pick any mix of Priority, Job type, Booked by (Office; Online booking matches the Booked tab; Callback request matches the Callback tab), Members only and Customer picked a time window. Pick nothing to show every job.
- Click Create tab.
You can have up to five of your own tabs. They're yours only and follow you to any device. To change or remove one, select the tab and click the pencil next to it. Make your changes and click Save, or click Delete this tab.
Choose the columns
Click Columns at the right of the tabs to decide what each row shows. Tick columns on or off, move them up or down under Shown, in order, add extras from More columns, or Reset to default. Each tab remembers its own columns.
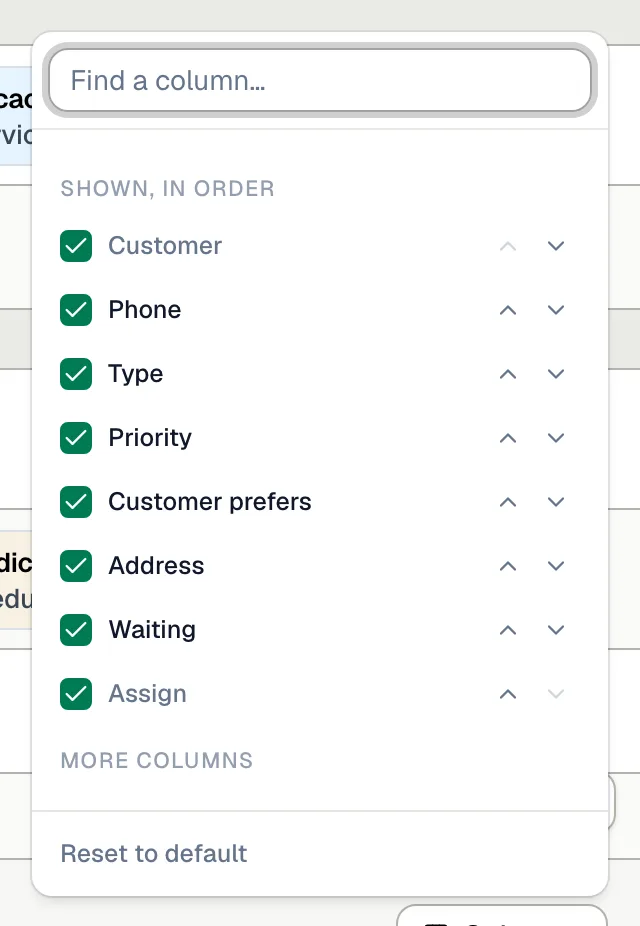
Available columns: Customer, Phone, Type, Priority, Customer prefers, Address, City, Problem, Source, Created, Notified, Waiting and Assign. Customer prefers is the time window the customer asked for; Waiting is how long the job has been in the queue.
Assign a job
Option 1: pick a tech from the row
Open Assign… on the job's row and choose a technician.
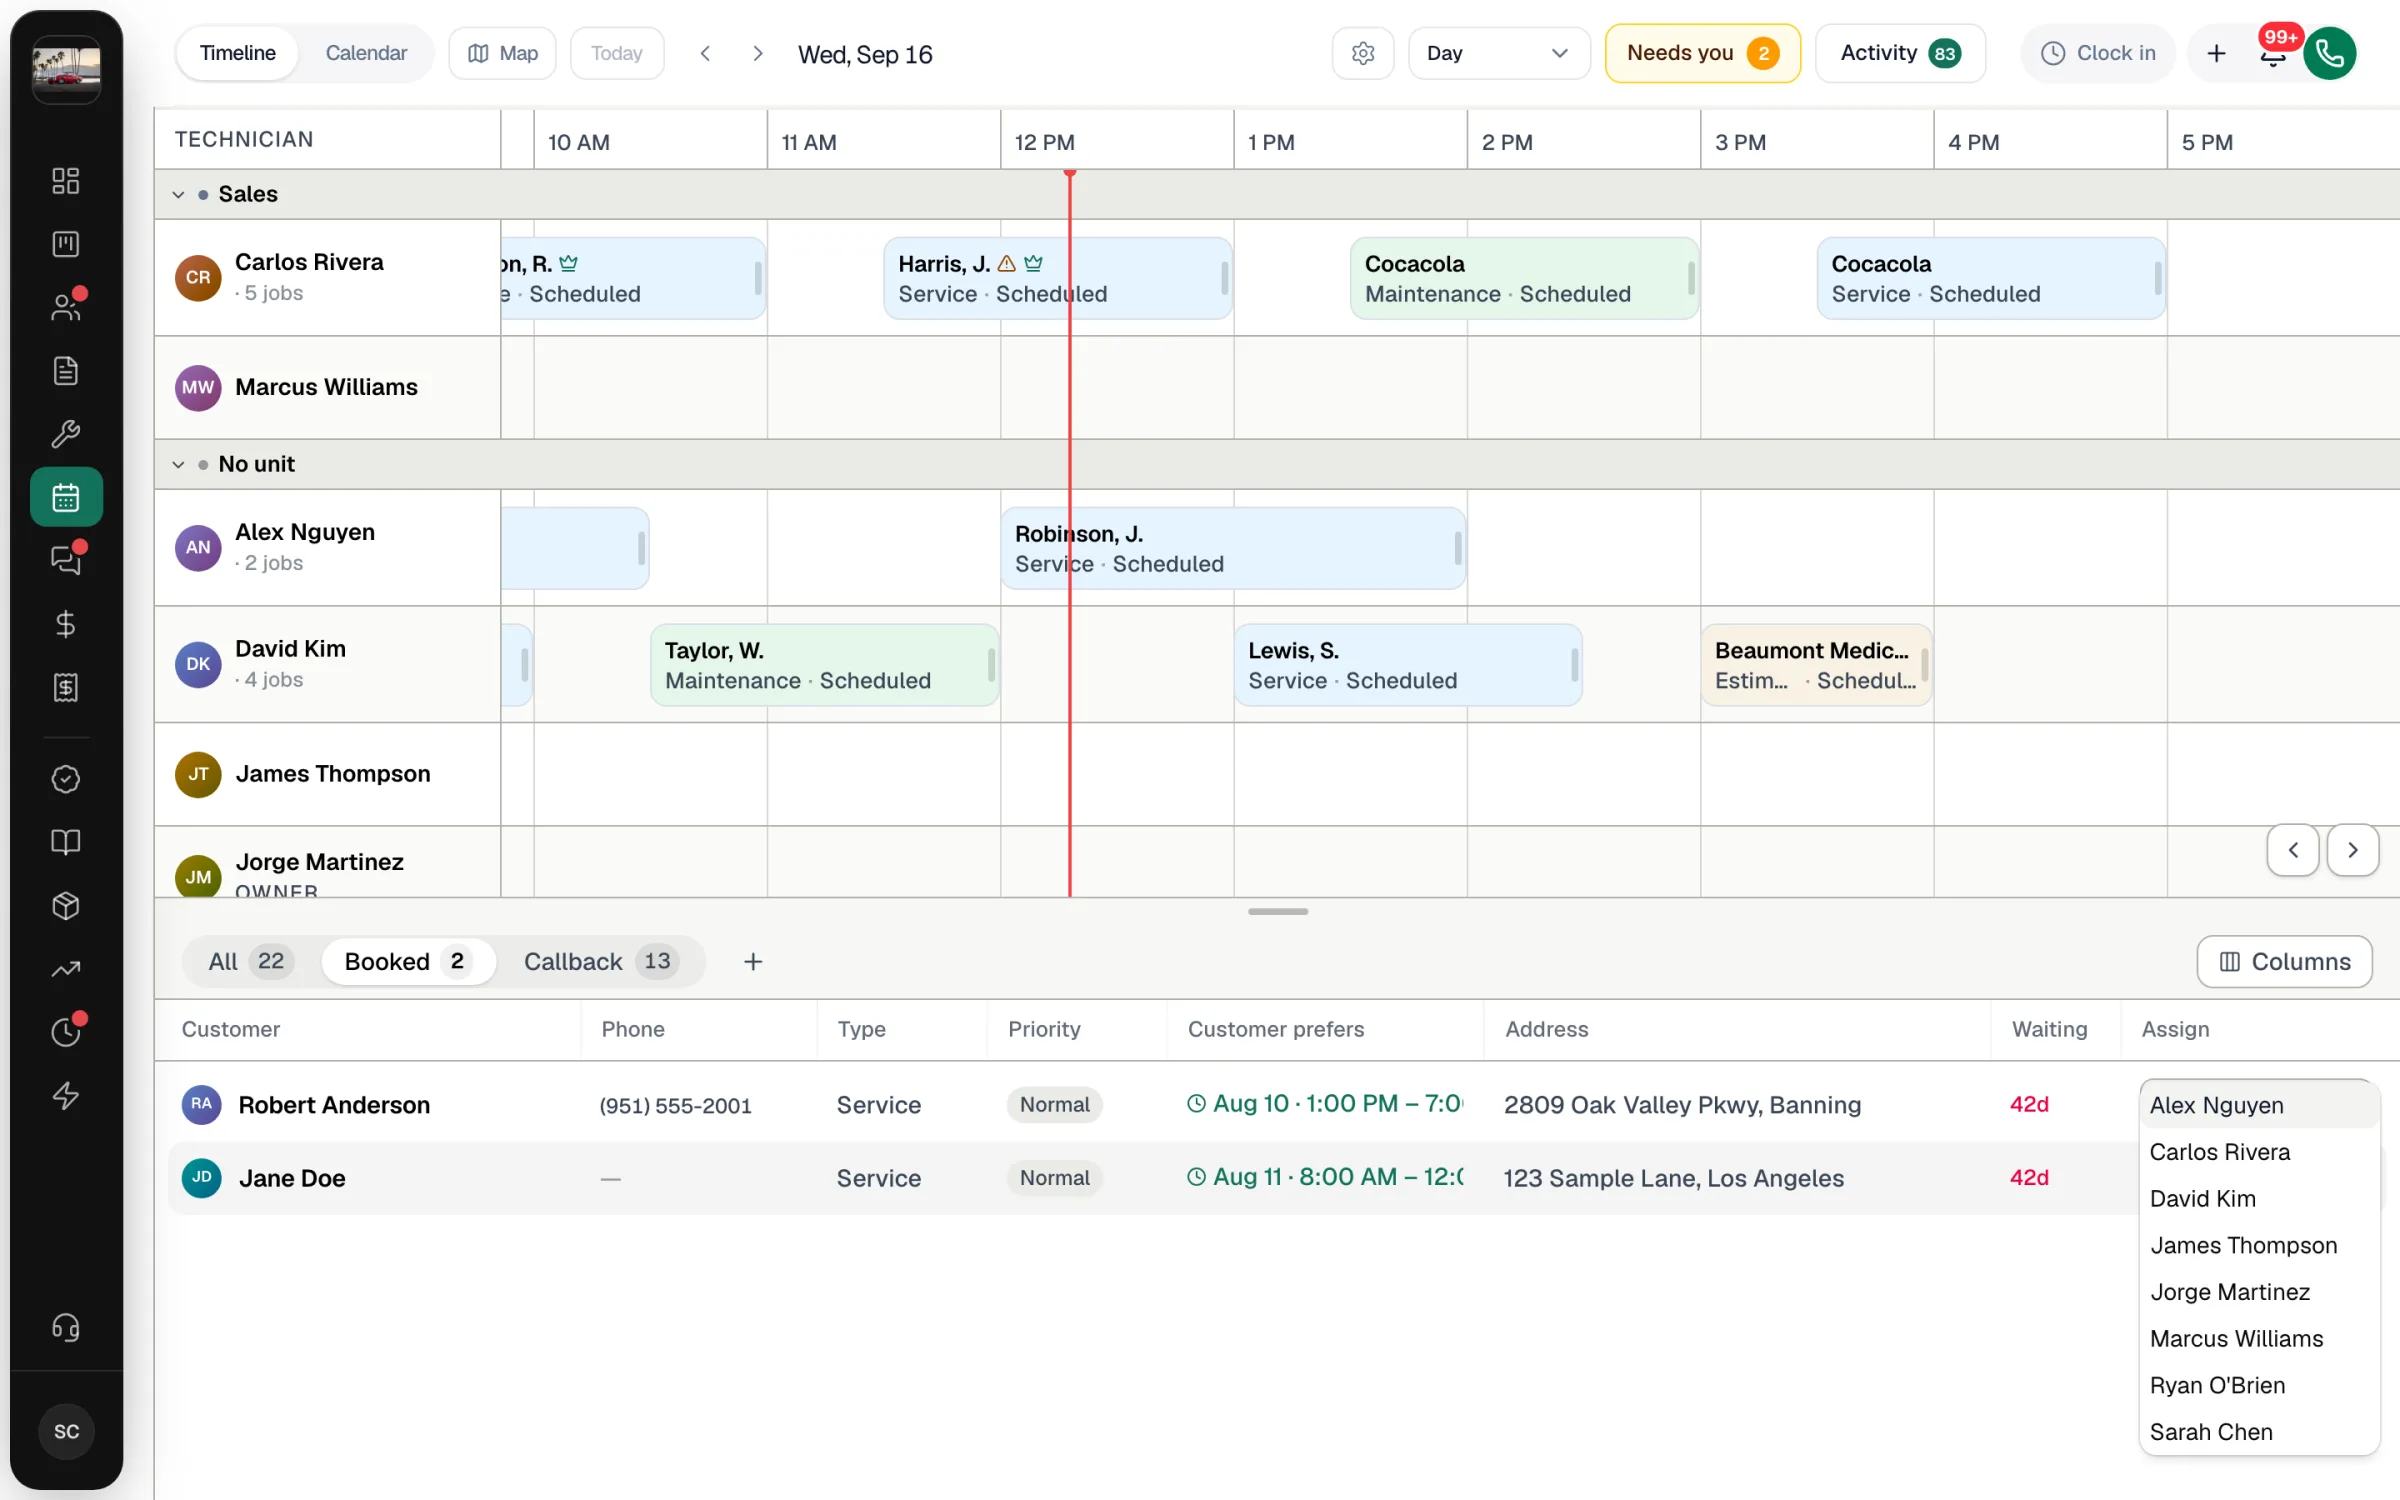
Run a Call schedules it straight away:
- If the job already has a date and time window (for example, one the customer picked when booking online), it keeps that window.
- Otherwise it takes the tech's first open slot on the job's date, or on the day you're viewing. The search starts at the beginning of the board's day (an hour before you open), never in the past, and the job keeps its length (90 minutes if it has none).
- No Heads up check runs on this path, so glance at the tech's row afterwards.
A message confirms Assigned to ….
Option 2: drag it
Drag the row onto a technician's row at the time you want (Timeline · Day), onto a tech's day (Timeline · Week or Month), or onto a day or time on the Calendar views.
On the Calendar views, dropping on a day keeps the tech if they're free that day, otherwise it picks the least-busy tech who is working. If nobody is available you'll see No technicians available on that day. Open the job and assign manually.
Option 3: open the job
Click the row to open the job panel, then use Schedule and Crew to set the time and people.
Multi-day installs waiting for a date
A multi-day install saved without a start date shows a badge like 3-day install · pick date. It can't be dropped on a single day's timeline. Instead:
- click it — the board jumps to Timeline · Week with Crew rows, where you drop it on its start date to open the planner with that date filled in, or
- double-click it to open the planner and pick the start date, lead, helpers and time window in one step.
Take a job back off a tech
Drag the job's card down onto the queue tray. The job goes back to Created and its scheduled time is cleared. If the job has a crew, you're asked whether to remove just that person or Unassign entire job.
On an iPad or phone
The simplified board lists Unassigned jobs at the top. Tap Assign, pick the Date, Start, End and Technician, then tap Assign job.