
Three places on a customer's profile hold what your team should know about them. Use each for a different job:
| Use | For | Who sees it |
|---|---|---|
| Heads-up flag | One line everyone must see before talking to the customer — VIP, Do not service, Lost her husband in June | Your office on the profile, the dispatch board and incoming calls; techs too if you choose |
| Notes | The running record — what was discussed, preferences, history | Your office |
| Files | Documents that belong to the customer — contracts, old invoices, warranty paperwork | Your office |
None of these are ever shown to the customer.
Who can do this
Owners, admins and dispatchers (anyone who can edit customers) can add flags, notes and files.
Heads-up flags
Add a flag
- Open the customer.
- Under their phone and email, click Add a heads-up for whoever calls next (or Add flag if they already have one).
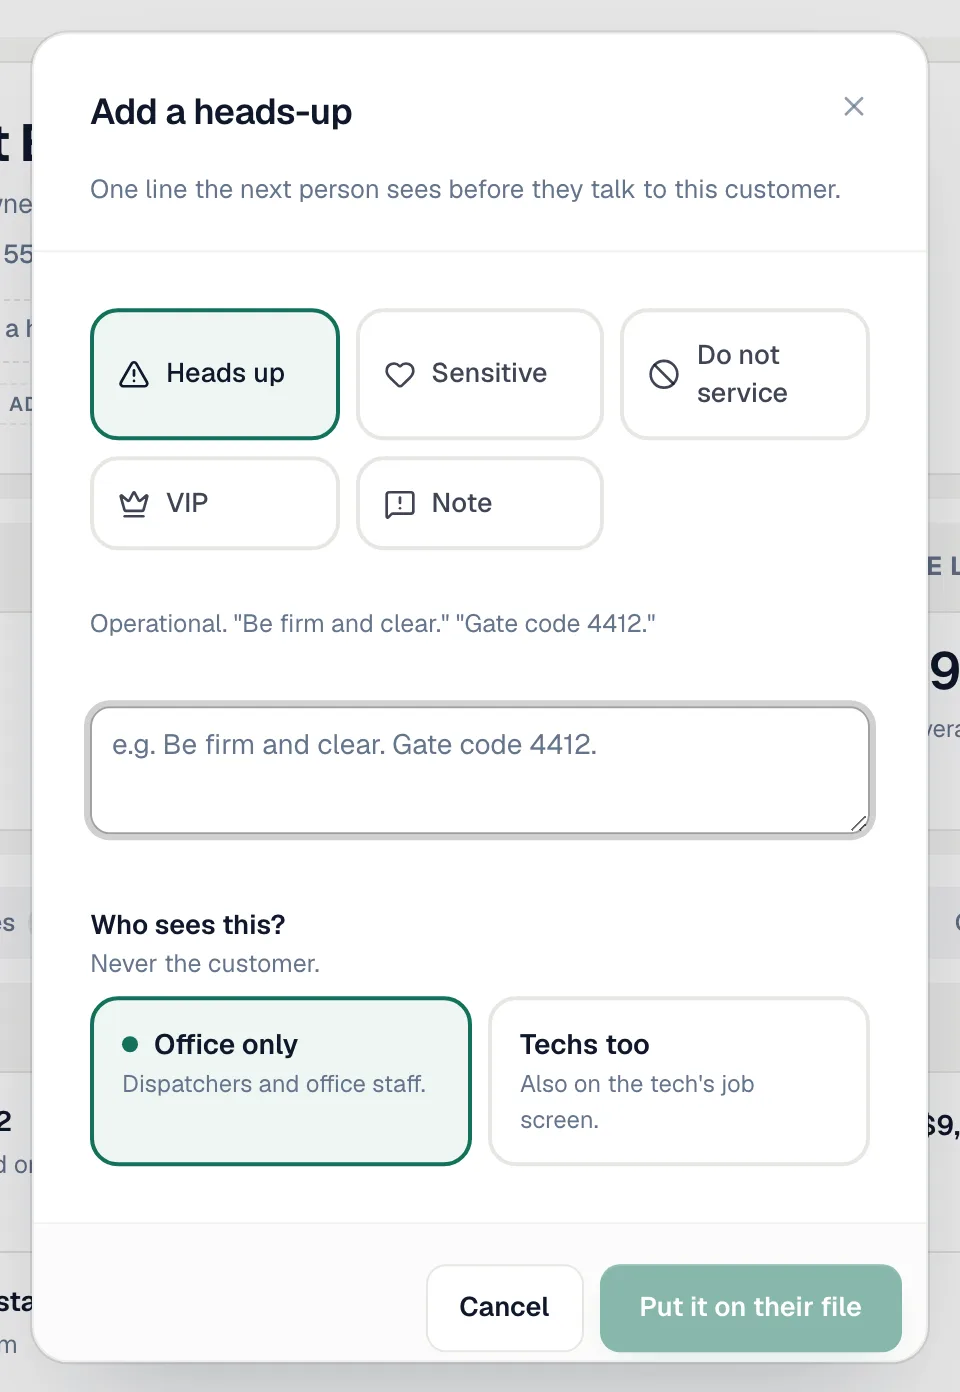
- Pick a kind:
| Kind | Use it for |
|---|---|
| Heads up | Operational — Be firm and clear. Gate code 4412. |
| Sensitive | Compassionate — Lost her husband in June, don't ask about him. Office only by default. |
| Do not service | Stop and check with the office before booking. |
| VIP | Priority handling — best tech, first available slot. |
| Note | Anything else the next person should know before they speak. |
- Type the message (up to 280 characters).
- Under Who sees this?, choose Office only (dispatchers and office staff) or Techs too (also on the tech's job screen).
- Click Put it on their file.
Where flags show up
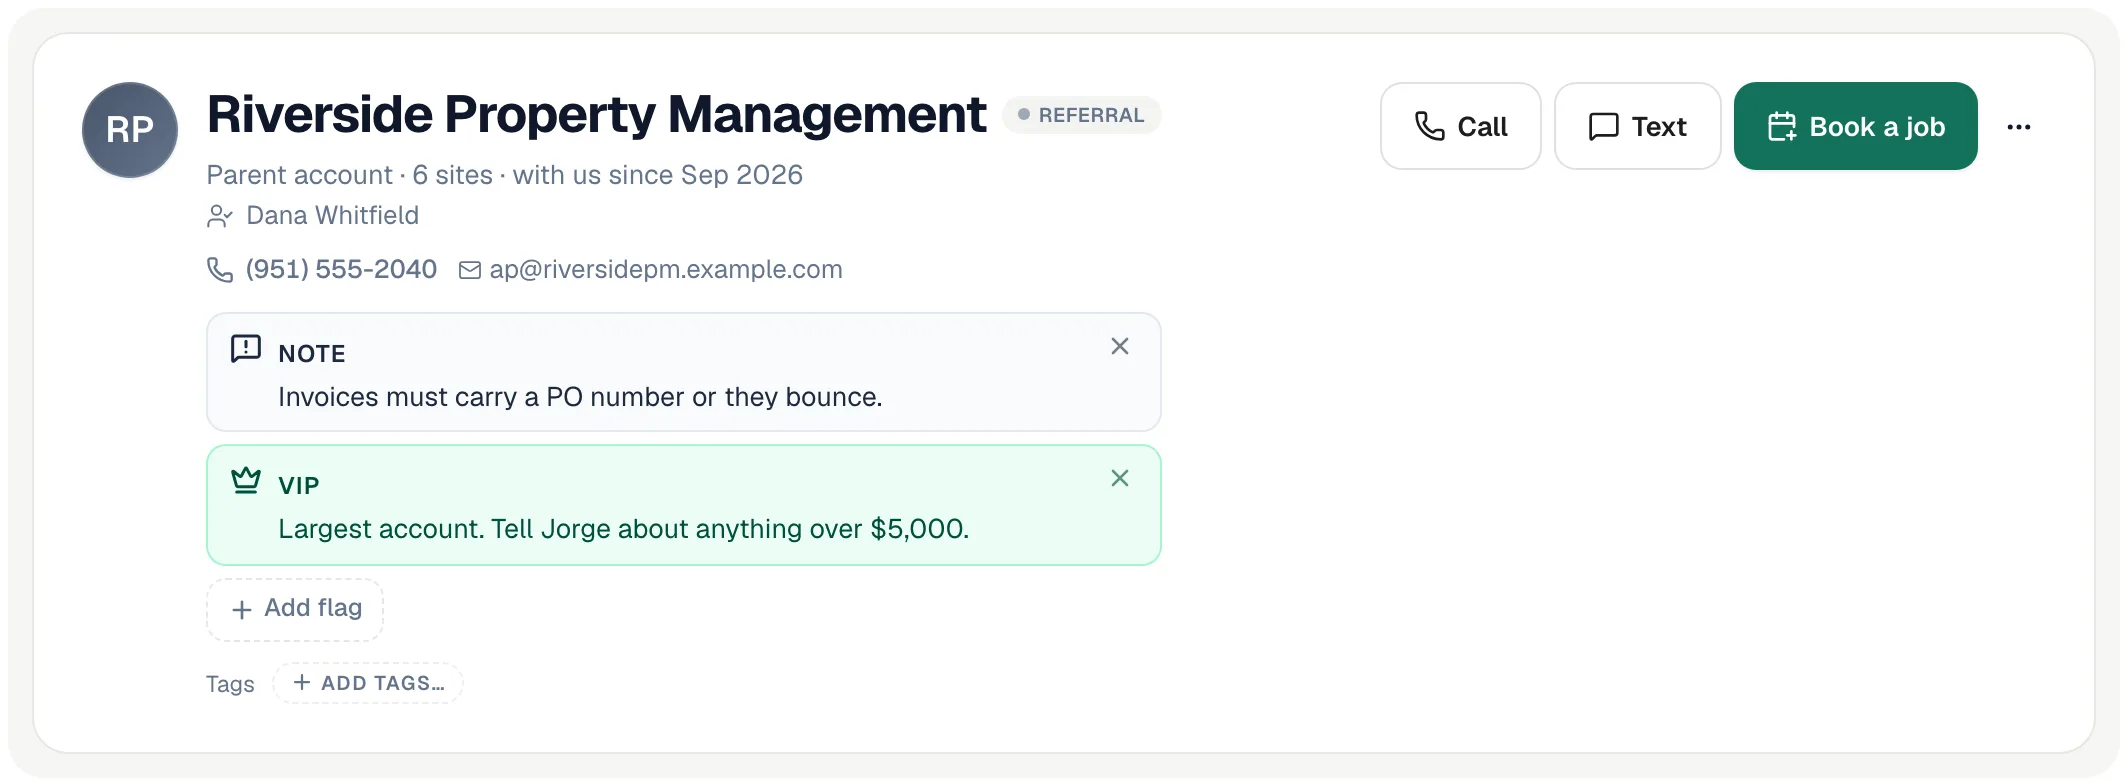
- At the top of the customer's profile, color-coded by kind.
- On the job when you open it from the Dispatch board.
- In the caller panel when that customer calls.
- In the mobile app on the tech's job screen — only flags set to Techs too.
Remove a flag
Click the × on the flag. You can remove flags you added; owners and admins can remove anyone's.
Notes
- Open the customer and click the Notes tab.
- Type in the box (use @ to mention a teammate — they get notified), or click Dictate to speak it.
- Click Add note (or press Cmd/Ctrl + Enter).
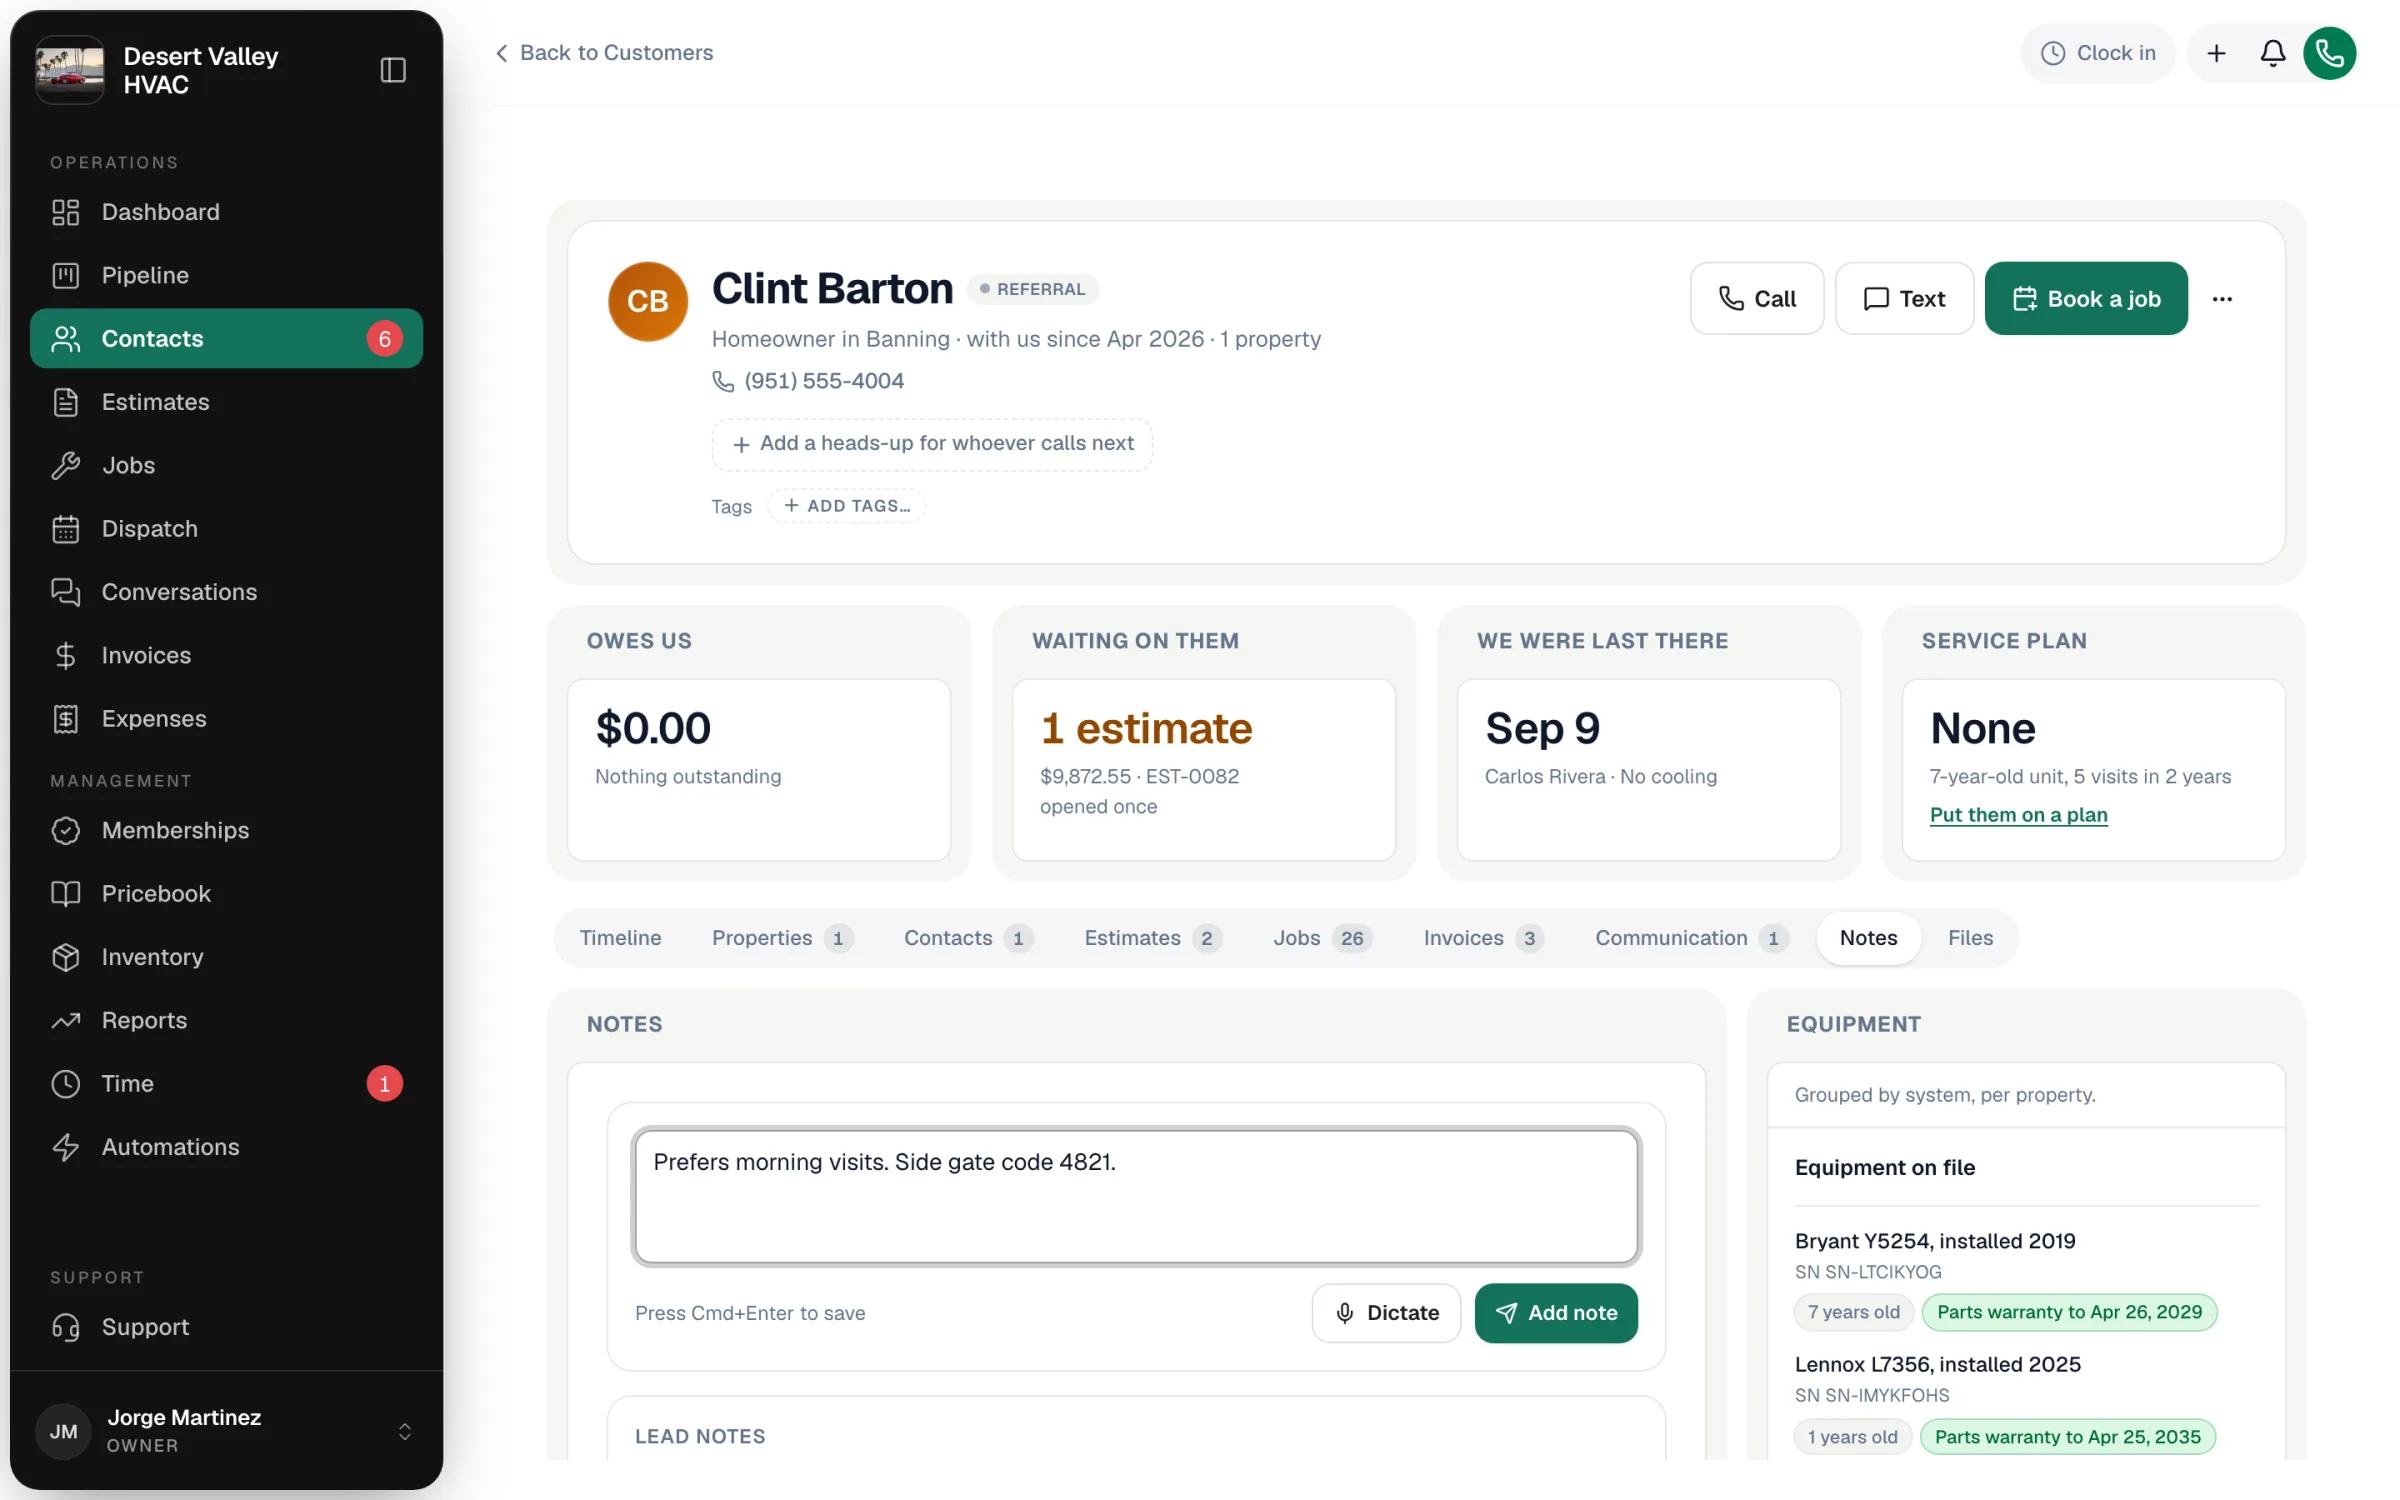
Each note shows who wrote it and when. Use the pin button to keep important notes at the top, and the trash button to delete a note (your own; owners and admins can delete any).
The Notes tab also collects notes that come in automatically:
- AI Receptionist call summaries, with a View call link.
- Web Request notes from your online booking page.
- Call notes your team typed while on a call or in the call wrap-up, with a View call link.
- Lead Notes — automatic entries such as Auto-converted: job created.
Customer notes are different from job notes. A job note can be shared with the customer on their project page; customer notes never are.
Files
- Open the customer and click the Files tab.
- Click Add, or drag files onto the tab.
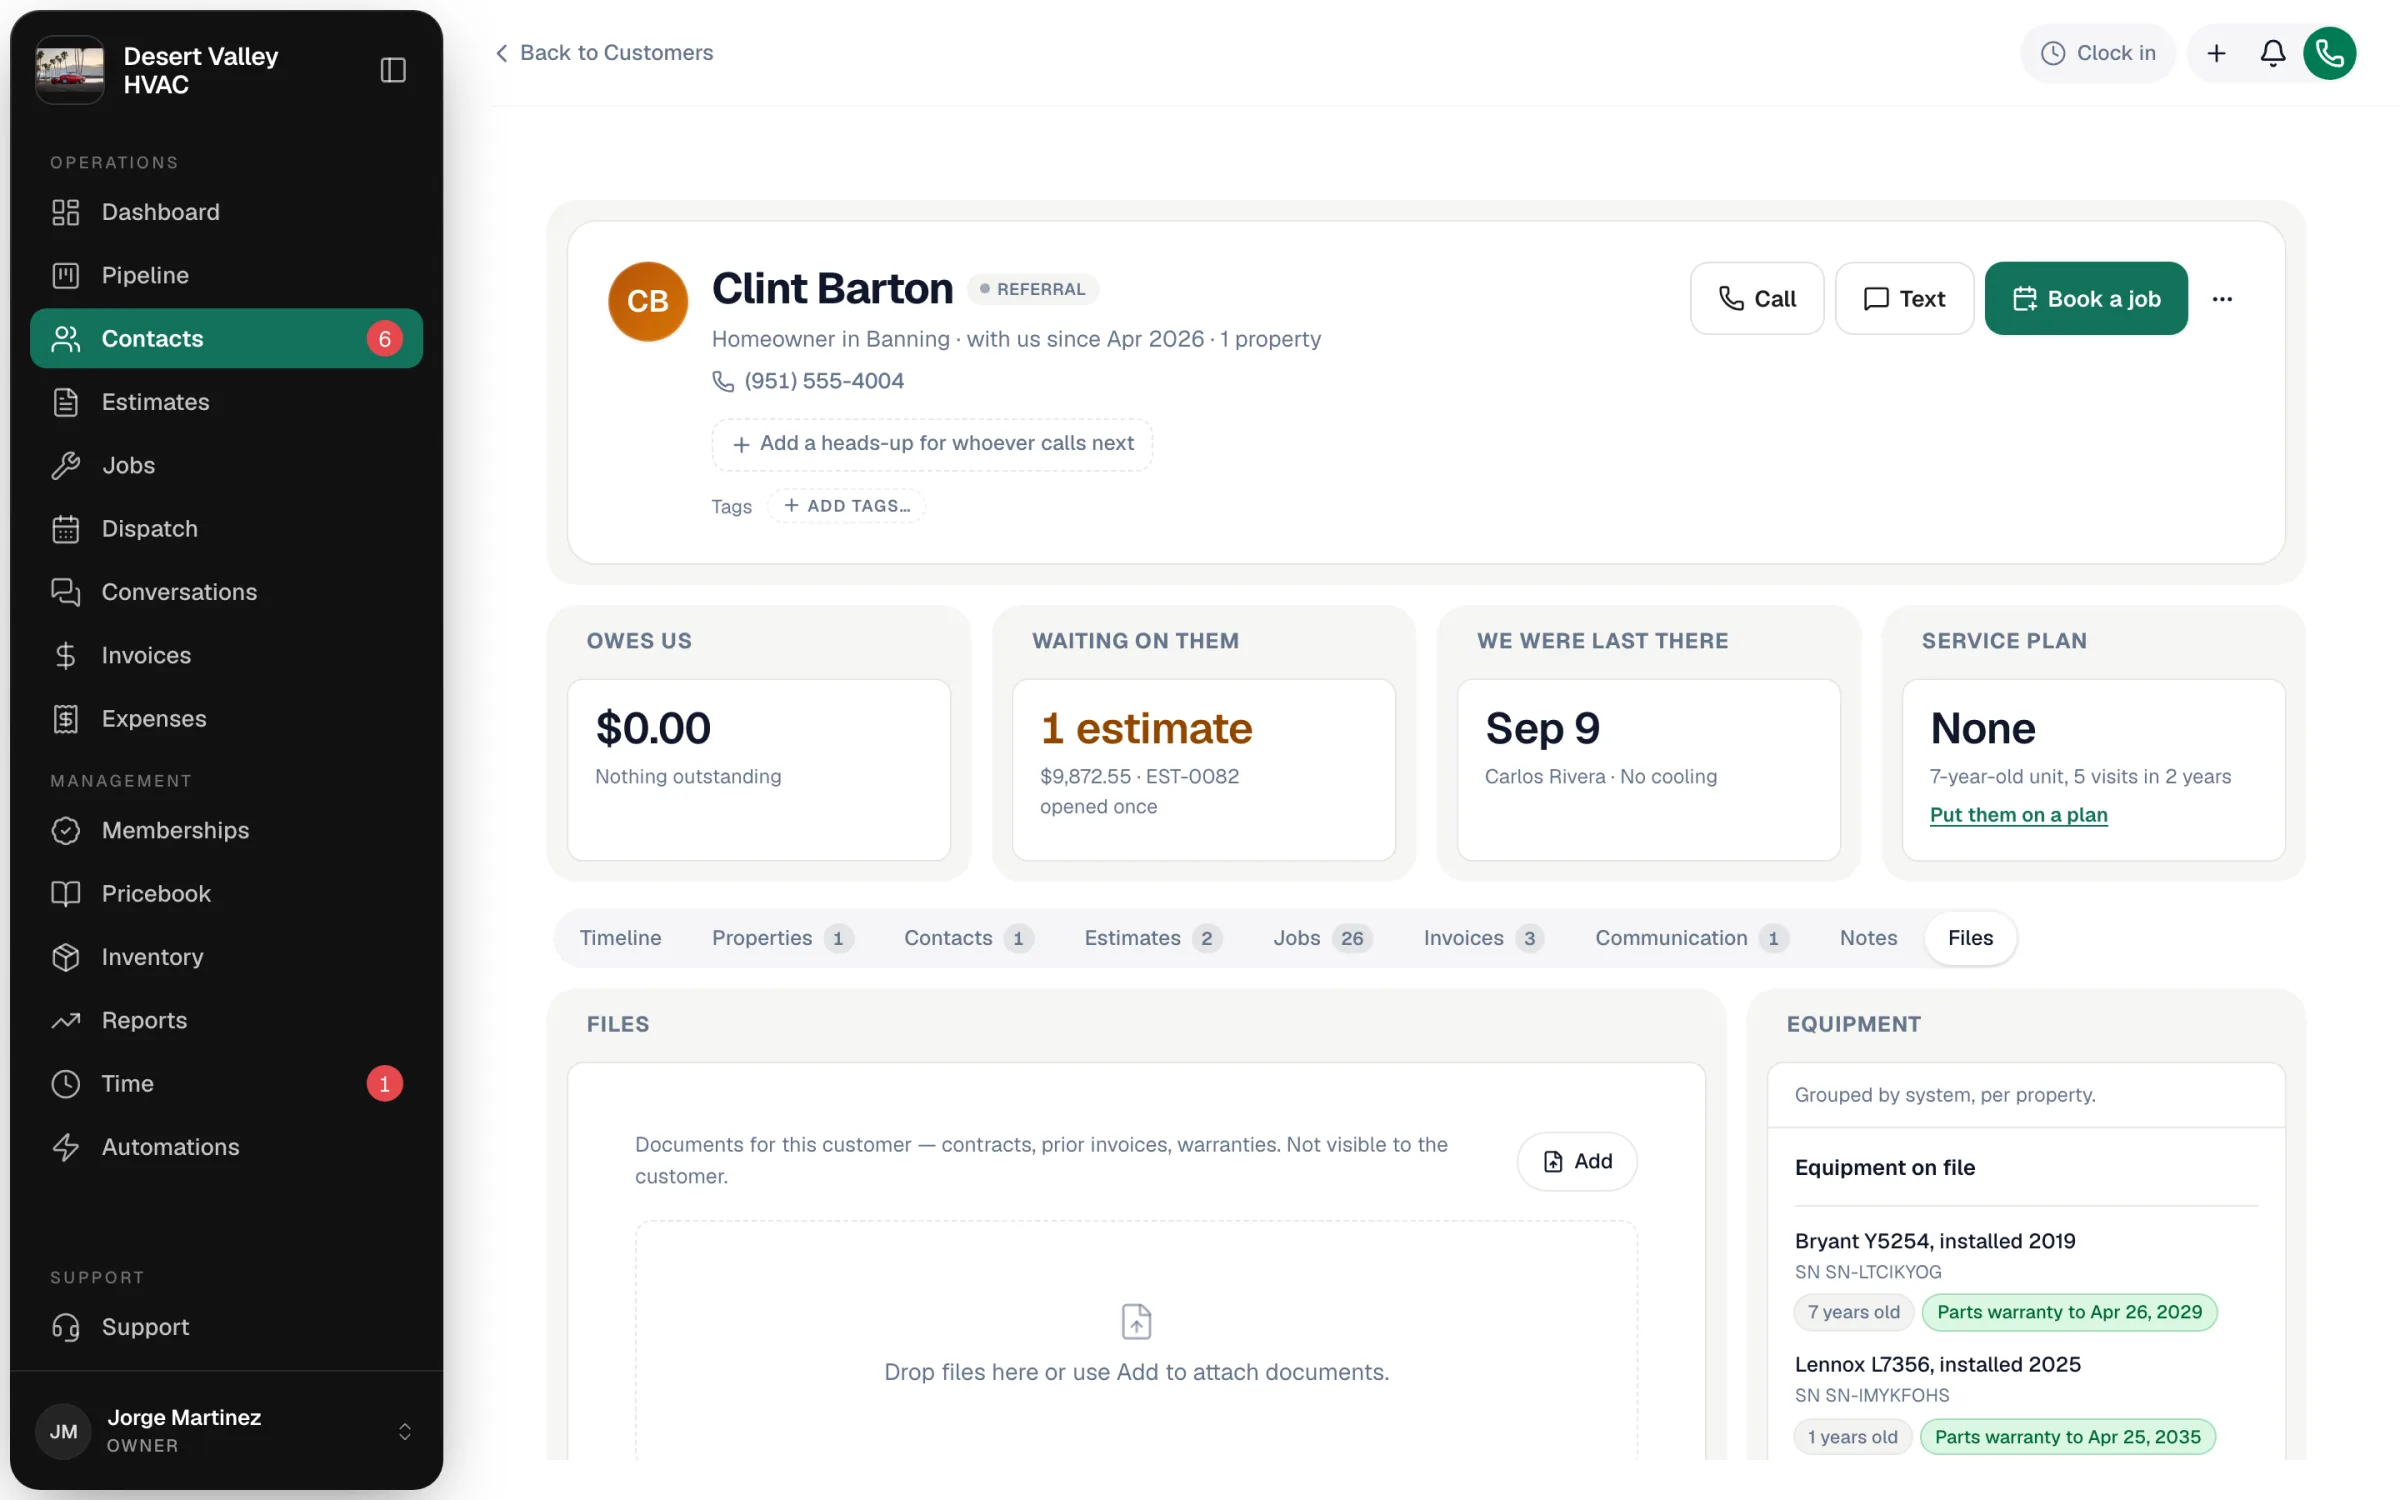
Files can be up to 100 MB each. Click a file to open or download it; delete it from its row. For photos and documents from one visit, attach them to the job instead.