
Installs and bigger projects often take more than a day. In Run a Call they stay one job — one customer, one set of line items, one invoice — with a separate scheduled day for each day of work. Each day can have its own crew and hours, and the dispatch board shows every day on the right tech's row.
Create a multi-day install
Start a new job
Click New job on the Jobs page (or + → Job) and fill in the customer, the problem and the job type as usual.
Turn on Multi-day install
In the Schedule section, under Install length, turn on Multi-day install.
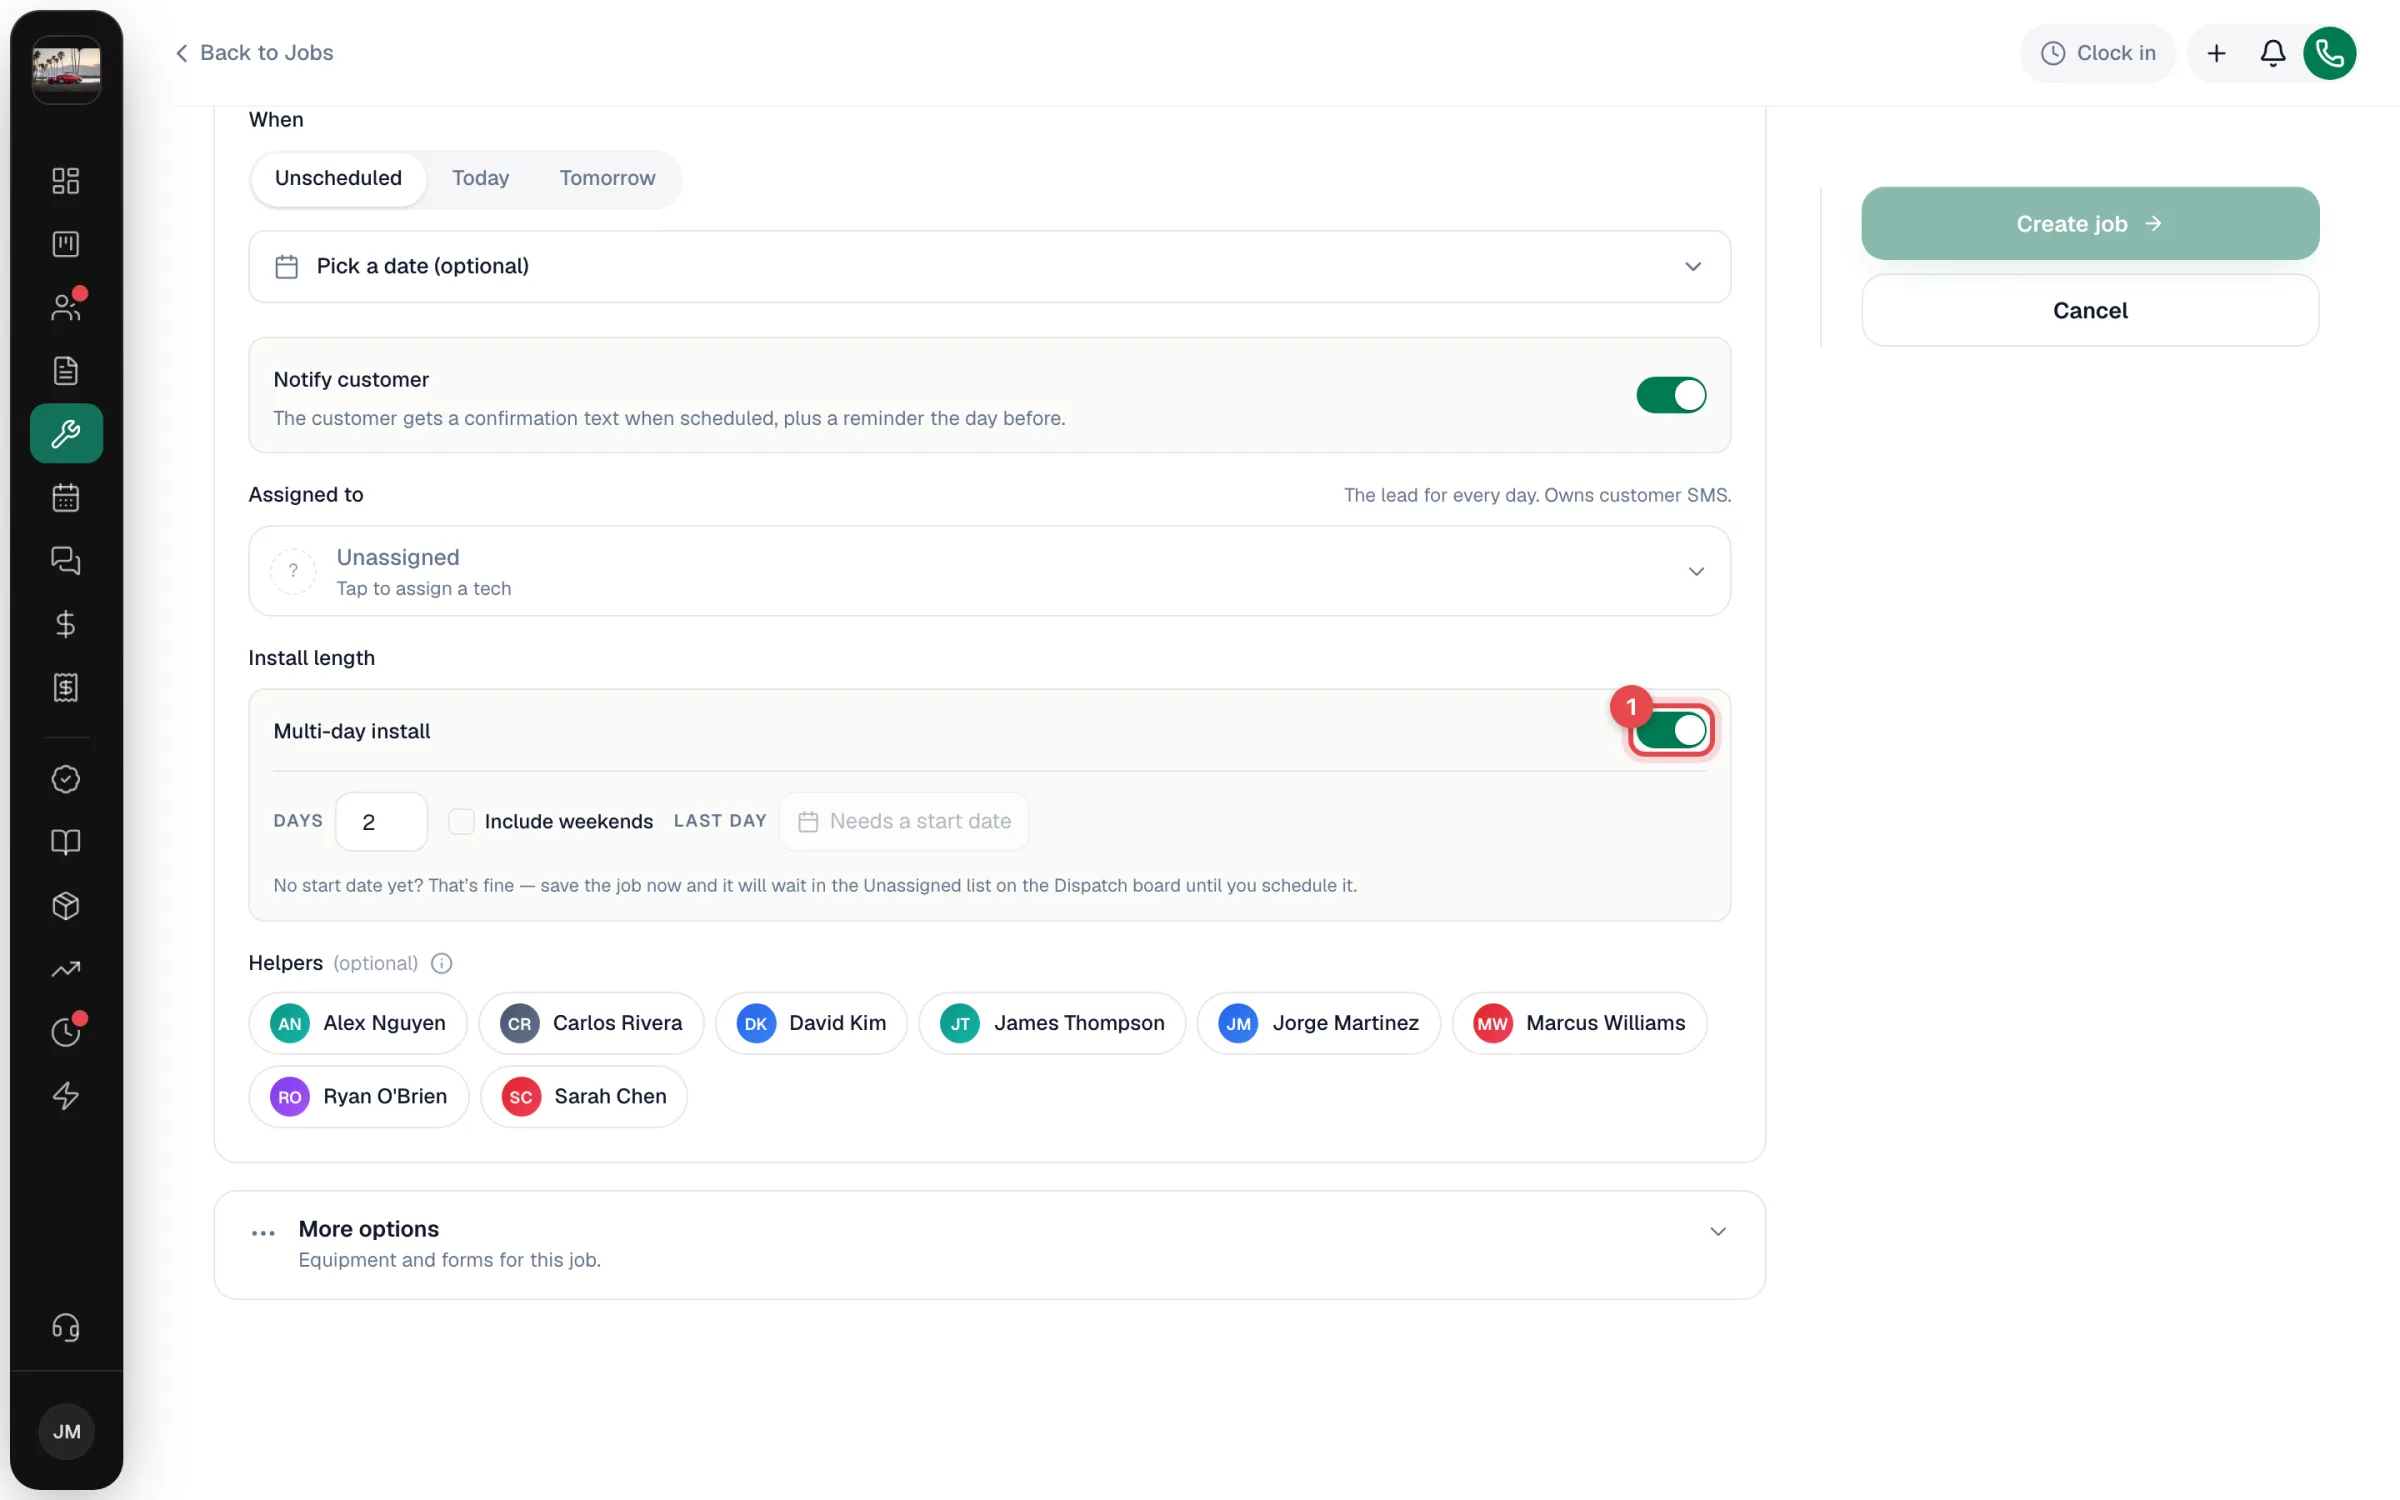
Set the length
| Field | What it does |
|---|---|
| Days | How many work days, from 2 to 30. |
| Include weekends | Off by default, so the days skip Saturday and Sunday. Turn it on to run days back to back through the weekend. |
| Last day | Shows the finish date once you pick a start date. Pick a different last day to change the number of days. |
Choose when and who (or leave it for later)
- Know the dates? Pick the start date under When, the times, the Assigned to tech — who is the lead for every day and receives the customer texts — and any Helpers. Every day gets the same crew and time window.
- Not sure yet? Leave the date empty. The install is saved and waits in the queue at the bottom of the dispatch board until you schedule it.
Click Create job
You'll see Multi-day install scheduled — 4 days · 2 on crew, or, without a date, a note that the install is waiting in the Unassigned list.
Schedule an install that's waiting for dates
A multi-day install without dates shows in the dispatch queue with a badge like 4-day install · pick date.
- Double-click the queue card, or open the job and click Plan install dates. Pick the Start date, Weekends, Lead, Helpers and Time window, then click Schedule 4 days.
- Or click the queue card: the board switches to Timeline · Week with Crew rows. Drag the install onto its start date in the strip at the top.
Manage the days
Open the job. In the Schedule & technician card, click Manage days (on a one-day job this reads Add another day).
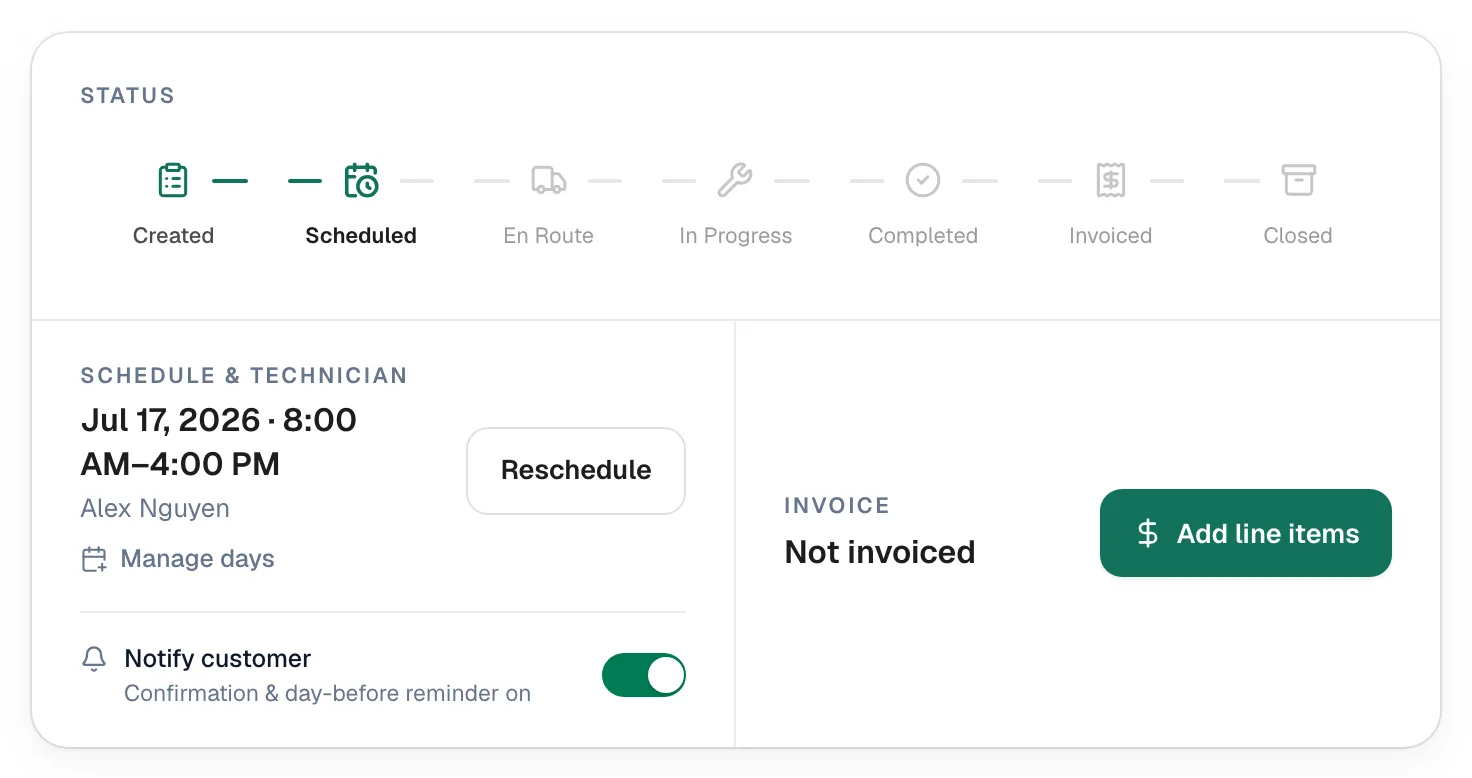
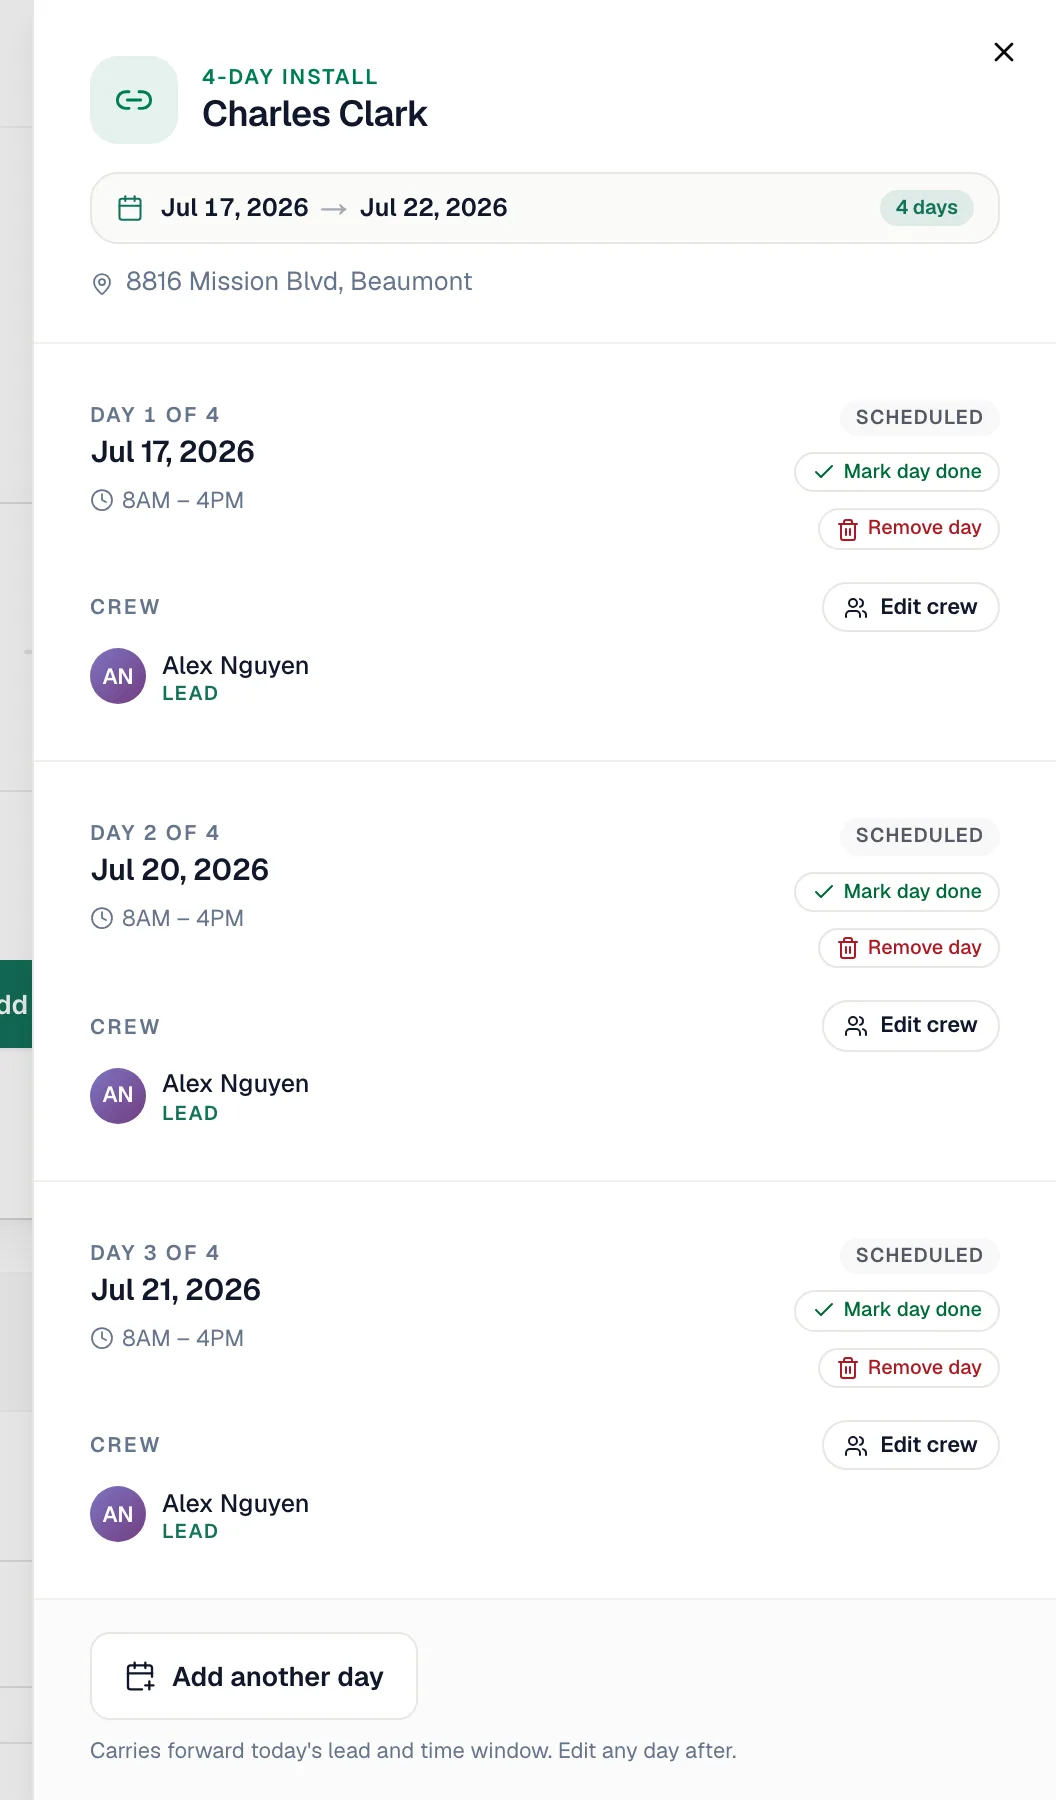
The panel lists every day of the install:
| On a day | What it does |
|---|---|
| Click the time | Change that day's start and end time. |
| Edit crew | Change who works that day — see below. |
| Mark day done | Closes just that day. On the last day, the whole job is marked completed. The customer isn't texted. |
| Remove day | Takes that day off the install. The other days stay scheduled, and the customer isn't notified. |
| Add another day (at the bottom) | Adds a day after the current ones, carrying forward the lead and time window. |
You can also right-click the job on the Timeline to open the same panel.
Change the crew
Edit crew opens the crew picker:
- Tap a tech to add or remove them. Tap the star to make someone the Lead — one lead per day.
- Apply to all days controls the scope: on means Same crew across the install; off changes only that date.
- With Apply to all days off, a helper can have their own hours for the day (Set hours) — for example a helper who only joins from 12 to 4.
- Each tech shows whether they're available: Off this day, Free 8:00–17:00 or No schedule configured.
On the dispatch board
- Timeline · Day: each day is a card on the crew's rows, marked Day 2 of 4.
- Timeline · Week → Crew rows: each install is one block (for example Day 1–4). Drag it to another date to move the whole install; use Manage days on the block, or Add on a day to add crew to just that day.
- Calendar views: each day shows as its own block, labelled with the day number.
Runny doesn't place multi-day installs — schedule them yourself.
Cancel or finish the install
- Cancel the whole install: on the job, Change status → Cancelled. See How to cancel a job.
- Drop one day: use Remove day in the install panel.
- Finish: mark each day done as the crew wraps up (the last one completes the job), or complete the job from Change status. Then invoice the job once — see Creating estimates and invoices from jobs.