
Welcome to Run a Call. This guide takes you through your first hour: setting up your company, finding your way around, inviting your team, and booking and billing your first job.
Tell us about your company
When you start your trial, the first screen is Tell us about your company: your company name, what you do, your address, contact details, and your logo. This information appears on your invoices, estimates, and customer messages. You can change any of it later in Settings → Business.
Your free trial starts right away. You won't be charged unless you add a card and your trial ends — see Updating the card on file for your subscription.
Find your way around
After setup you land on the Dashboard. The left sidebar is your home base:
| Sidebar item | What it's for |
|---|---|
| Dashboard | Money, today's work, and sales at a glance |
| Pipeline | Boards for jobs, contacts, and estimates, column by column |
| Contacts | Every customer and lead |
| Estimates | Quotes you send customers |
| Jobs | Every job, past and upcoming |
| Dispatch | The schedule board: who's going where, and when |
| Conversations | Calls and texts with customers (with the phone add-ons) |
| Invoices | Bills you send and payments you collect |
| Expenses | Receipts and purchase orders |
| Memberships | Maintenance plans your customers subscribe to |
| Pricebook | Your services and parts, with prices |
| Reports | How the business is doing |
| Time | Timesheets and time off |
| Automations | Texts and emails that go out on their own |
Your own settings, company settings, and billing are under your name at the bottom of the sidebar. The + button at the top of every page creates a customer, estimate, job, or invoice from anywhere.
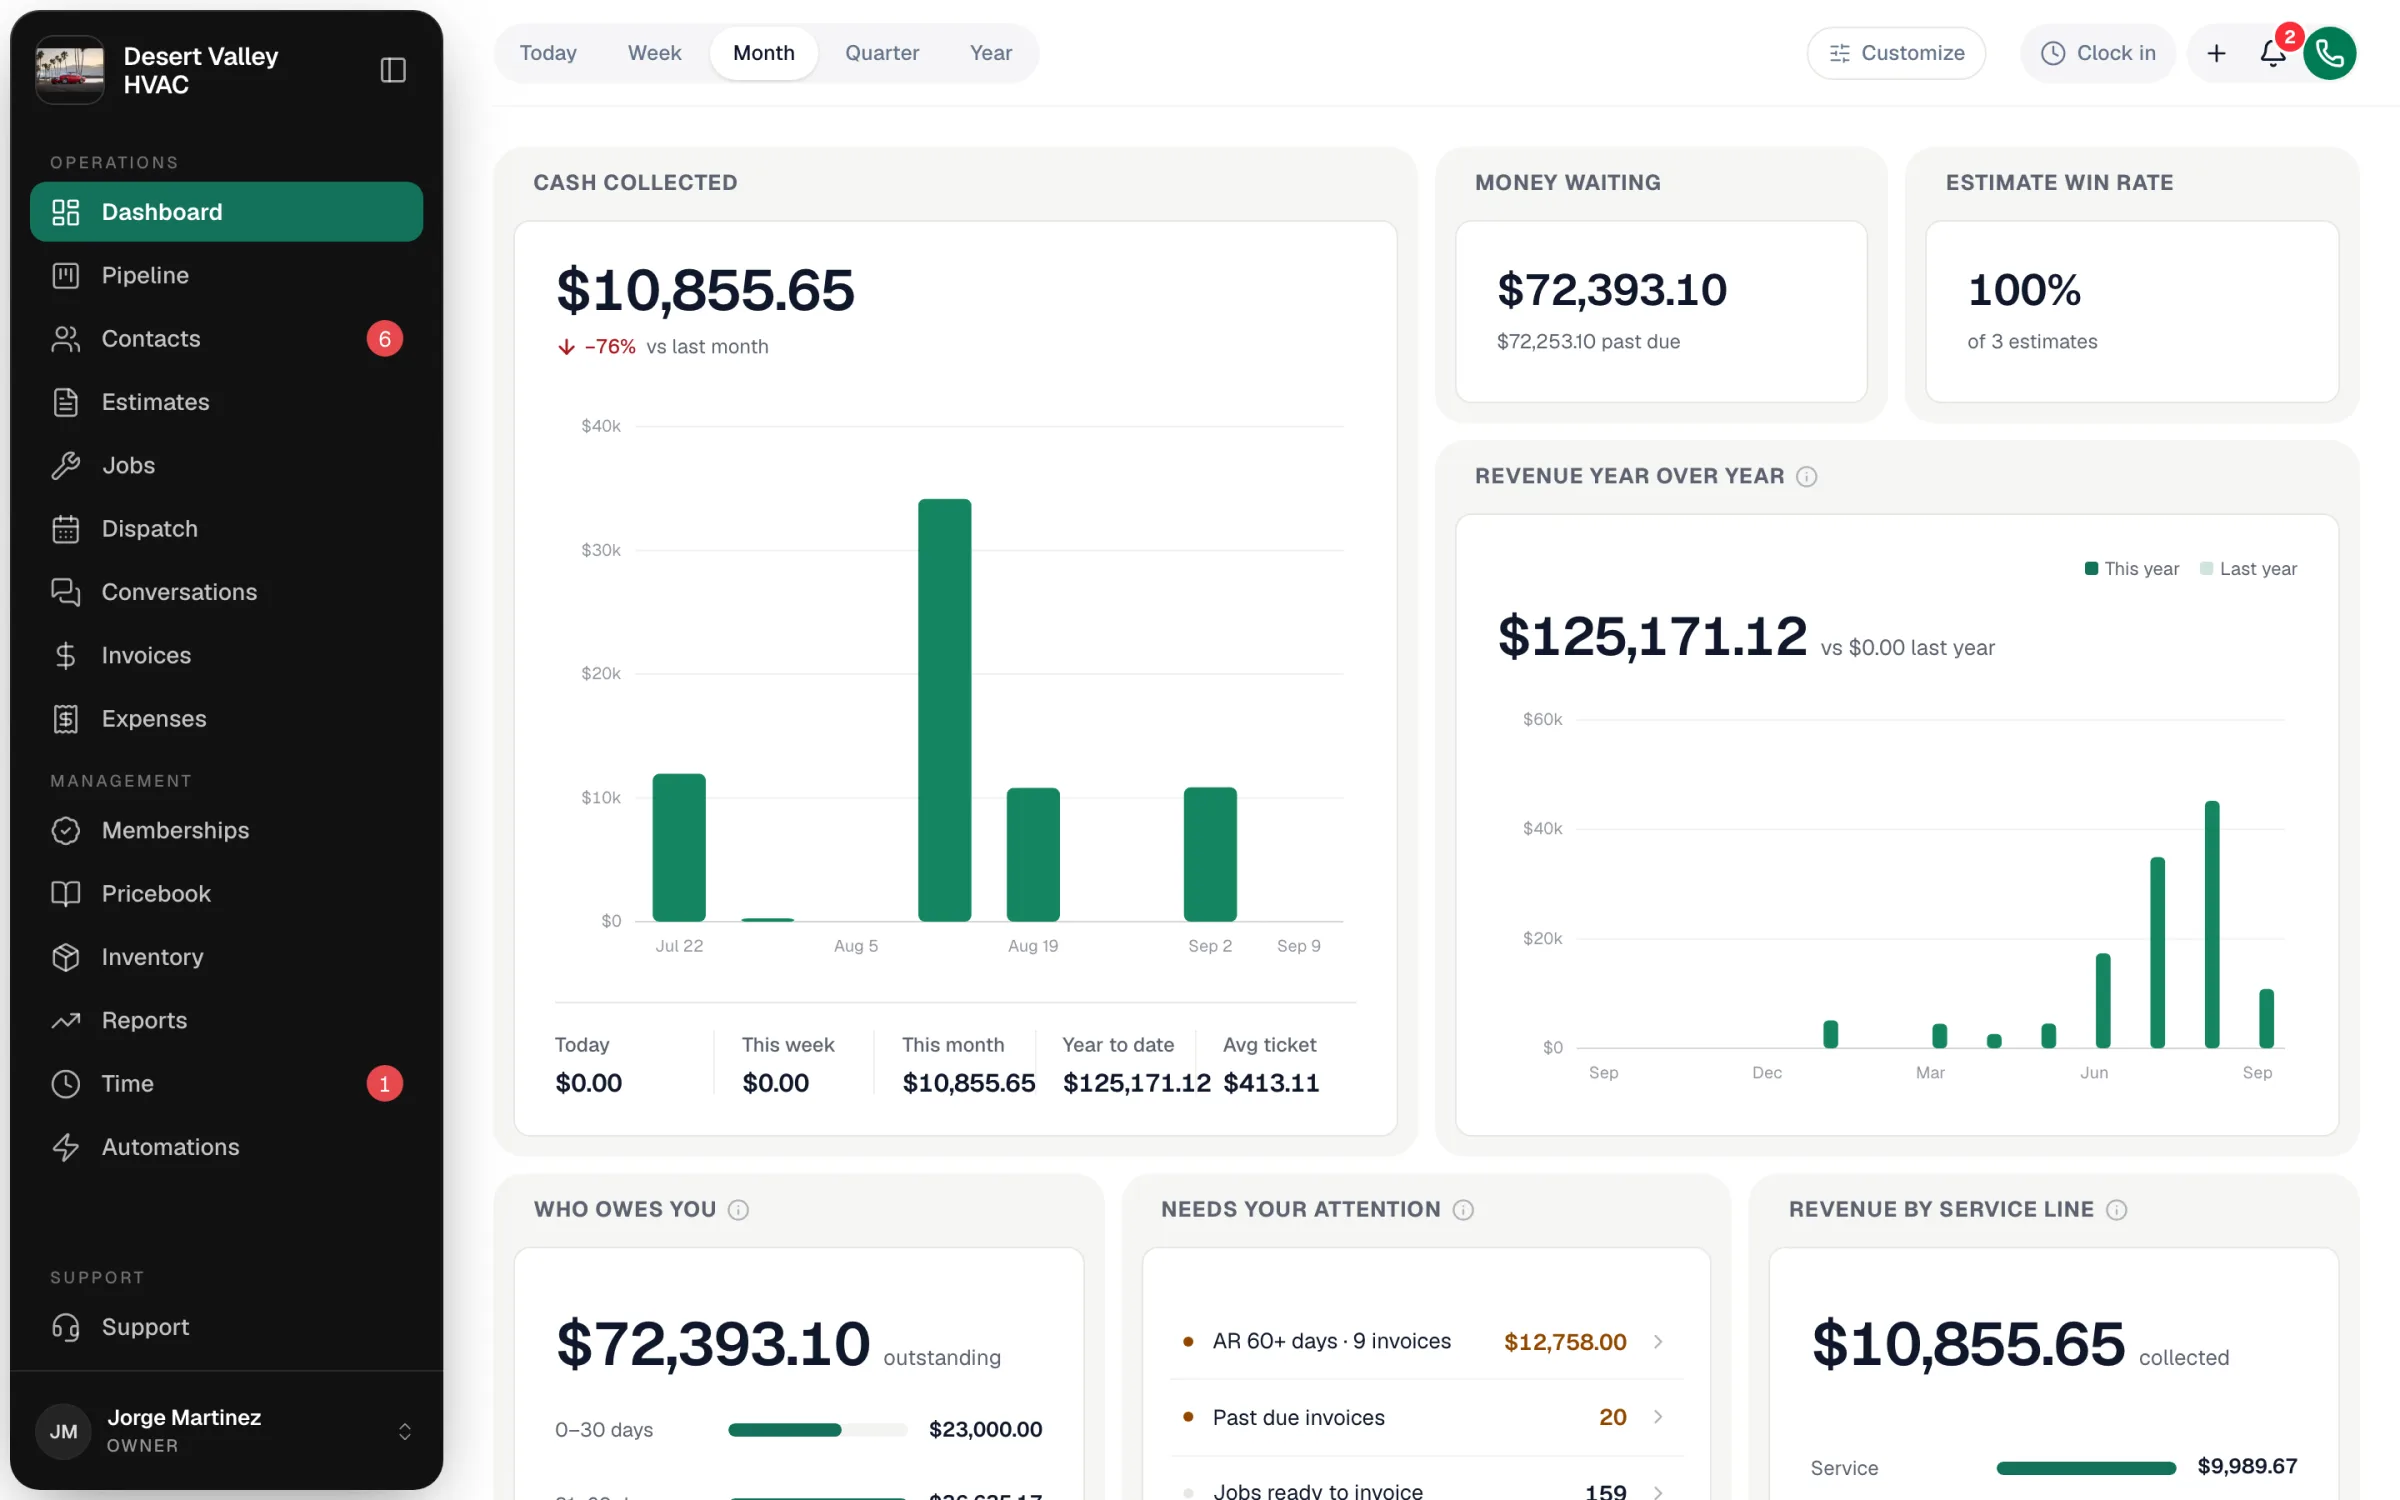
While you're on your trial, the dashboard may show a setup checklist — Add a customer, Create an estimate, Schedule a job, Invite your team, and Connect payments or accounting. It's a good order to work in.
Set your hours and timezone
- Settings → Business — check your Timezone. Every appointment time uses it.
- Settings → Hours & Licenses — set your Business hours (shown on the dispatch board), your license numbers, and your sales tax rate.
See Updating your business info.
Bring in your customers and prices
If you're coming from another system or a spreadsheet, go to Settings → Import & export and import your customers and pricebook from CSV files. See Importing customers from a spreadsheet and Importing the pricebook.
Invite your team
Go to Settings → Team and click Invite member. Pick a role for each person — Admin, Dispatcher, Field Tech, or Comfort Advisor. Technicians then install the mobile app and sign in with the same email and password. See How to add new team members.
Book your first job
Click + at the top of the page and choose Job (or open Jobs and create one). Pick the Customer (or add a new one), describe What's the problem?, choose the Property, then set the Type and When, and assign a tech. Click Create job. The job appears on the dispatch board and in the tech's mobile app.
See How to create your first job.
Send your first invoice
When the work is done, go to Invoices and click Generate invoice to bill the job. Review the line items and send it. Your customer gets a link where they can view and pay it. See How to create and send an invoice.
To take card payments online, connect Stripe first: see Enabling online payments with Stripe. You can always record cash and checks without it.
Need a hand?
Click Support at the bottom of the sidebar to send the Run a Call team a question — we reply by email, usually the same day. See Getting help from Run a Call support.